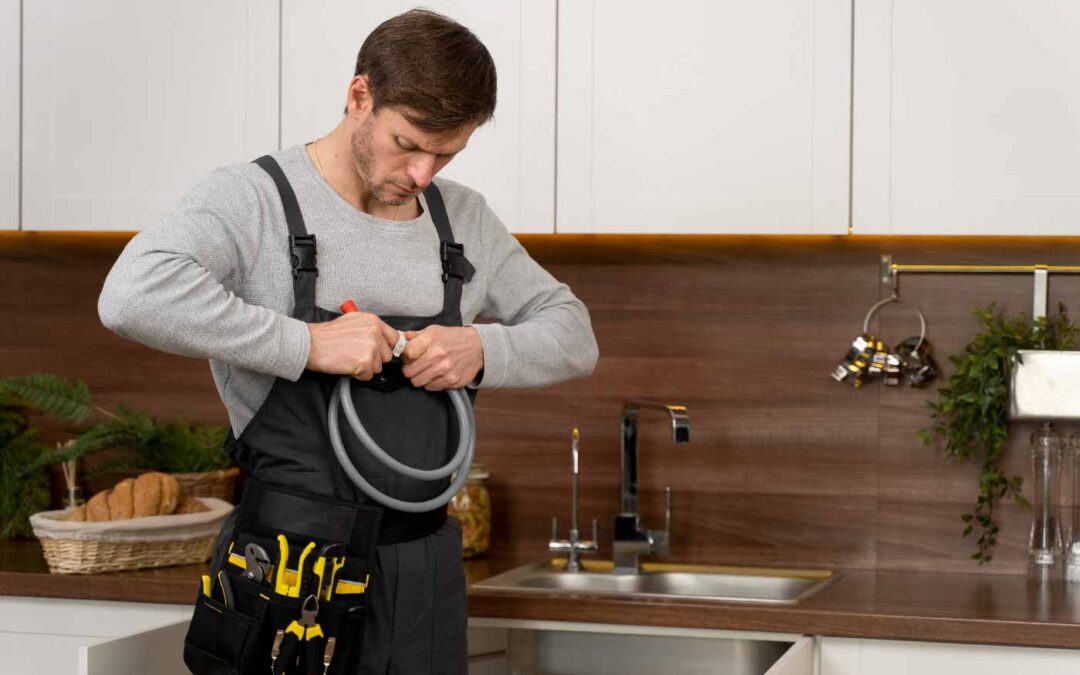
by avi | Apr 21, 2024 | plumbing Services
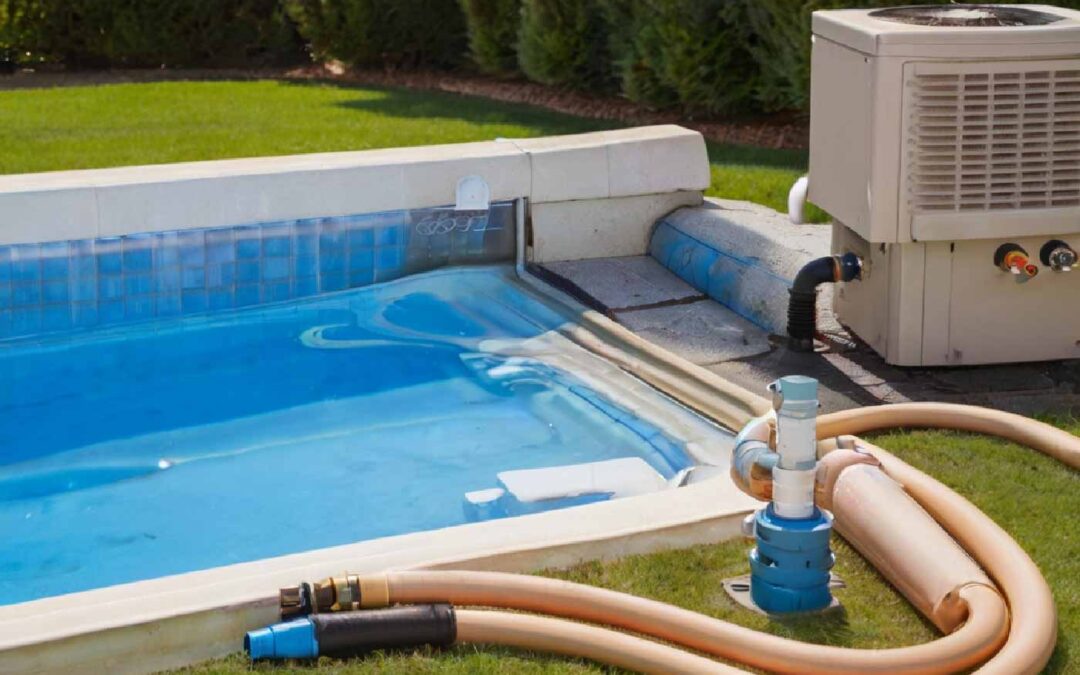
Identifying “Who Can Run a Gas Line for a Pool Heater” is crucial for any pool owner aiming to install a heating system. This task demands specific expertise and certification due to the technical and safety challenges involved. It’s essential to choose a professional with the right qualifications to ensure a safe and efficient setup. This brief overview highlights the importance of selecting a professional for the installation. Focusing on safety, efficiency, and compliance with local regulations.
What is a Gas Pool Heater
A gas pool heater works by using natural gas or propane. Is popular for heating swimming pool water. These heaters are famous for their rapid heating capabilities. Allowing for quick temperature adjustments regardless of outdoor conditions.
What are the benefits of Gas Pool Heaters
Extended Swimming Season
One of the primary benefits of gas pool heaters is their ability to extend the swimming season. By efficiently maintaining optimal water temperatures, these heaters enable pool use well into cooler months. This extension not only maximizes the value of your pool investment. Also increases the opportunities for exercise, relaxation, and entertainment.
Speed
When it comes to heating pool water, gas heaters offer excellent efficiency. This rapid heating capability is especially beneficial for a quick warm pool or swimming for minutes. Unlike solar or electric heat pumps. As they take hours to significantly change water temperatures. Because gas heaters can achieve the necessary warmth in a much shorter timeframe. Making pool sessions enjoyable without the lengthy wait.
Cost-Efficiency for Short-term Use
Gas pool heaters are particularly cost-efficient for pools that have rare uses. Since these heaters can quickly heat the pool water on demand, they don’t need long-term operation. This on-demand operation leads to significant energy savings. Because You won’t be wasting money heating the pool when it’s not in use. Thereby reducing overall operational costs.
Flexibility
The operation of gas pool heaters is impressively flexible. As they don’t rely on external factors like sunlight or ambient air temperature. This means you can heat your pool to a comfortable swimming temperature regardless of the weather conditions. Making sure a consistently warm and inviting pool whenever you wish to use it.
Eco-Friendly Options
Given the growing concern for environmental sustainability. The latest gas pool designs offer energy efficiency and emissions reduction. These advancements allow you to enjoy the benefits of a warmer pool while living a green lifestyle. Choosing an eco-friendly gas heater can help minimize your carbon footprint and keep you environmentally conscious.
Durability
Durability is another significant advantage of gas pool heaters. With proper care and maintenance, these heaters can reliably serve your pool heating needs for up to 10 years. This longevity ensures that your investment in a gas pool heater continues to pay off. Not just for one season only instead over many seasons. Providing both warmth and value long-term.
Step-by-Step Installation of a Gas Pool Heater
The installation involves several key steps. Things like choosing a suitable location, ensuring proper ventilation, and connecting to the gas supply, As well as adhering to safety standards. Given the complexity, professional installation is advisable for safer and better functionality.
Who Can Run a Gas Line for a Pool Heater
Professional plumbers or HVAC technicians with certifications in gas fitting and experience in pool heater installations are professional to install a gas line for a pool heater. It’s crucial to hire someone with the expertise and credentials to ensure safety and compliance with local regulations.
What is the Total Cost of Adding a Gas Line Heater to the Pool
The cost varies on the distance of the gas line, the type of heater, and local labor rates. On average, homeowners might expect to spend between $1,500 and $4,500 for a comprehensive installation.
Different Ways to Heat Pool Water
- Solar Heaters ($2,000-$4,000): Utilize renewable energy, best for sunny areas, with lower operating costs.
- Electric Heat Pumps ($2,500-$5,000): Efficient in warm climates, they work well when the air temperature is above 50°F.
- Gas Heaters ($1,500-$6,000): Offer the fastest heating capability; ideal for any climate, especially effective for large pools or quick heating needs.
Natural Ways to Heat Water for Pool
- Solar Blankets: Minimize heat loss and use solar energy to warm the water.
- Landscaping: Planting trees and shrubs can reduce wind and naturally warm your pool area.
- Using a Windbreak: Structures or natural barriers that reduce wind speed over the pool surface, decreasing cooling effects.
Selecting the Best Gas Line Pool Heater
Choosing the right gas pool heater is crucial for extending your swimming season and ensuring efficient, cost-effective operation.
Here’s a streamlined guide to selecting the ideal heater for your needs:
Pool Size and Volume
The size and volume of your pool directly influence the necessary heater capacity. For a quick note this measures in British Thermal Units (BTU). Larger pools need heaters with higher BTU ratings to efficiently warm the water. A general estimate is 50,000 to 100,000 BTUs for every 10,000 gallons of water, which can again vary on pool characteristics.
Climate
Your local climate significantly impacts your heater selection. Cooler climates demand more powerful heaters to maintain comfortable water temperatures. Choosing a heater with a higher BTU rating is advisable if you live in a cooler region to ensure consistent warmth.
Usage Pattern
How often and in what manner you use your pool affects the type of heater you should choose. For infrequent or sporadic use, a gas heater’s rapid heating capability makes it a cost-effective choice, allowing for quick temperature adjustments.
Energy Efficiency
Energy efficiency is crucial for minimizing operational costs and environmental impact. Seeking models with high-efficiency ratings (80% to 95%) can save on gas consumption. Though efficient models may have higher initial costs, the long-term savings can be substantial.
Additional Considerations
Durability and Maintenance
Opt for models known for their durability and ease of maintenance. Heaters constructed with corrosion-resistant materials will last longer, especially in harsh weather conditions or if the pool uses saltwater chlorination.
Installation and Operating Costs
Consider the initial installation costs, including any necessary modifications to your existing gas line or pool setup. Also, factor in the ongoing operating costs, which can vary based on the heater’s efficiency and your local gas prices.
Environmental Impact
For those concerning individuals with environmental sustainability, consider models that produce lower emissions. Advances in technology have led to the development of gas pool heaters that are not only efficient but also environmentally friendly.
Maintenance and Care
To ensure the longevity and efficiency of your gas pool heater, a comprehensive approach to maintenance and care is paramount. Here is a vast discussion on the key aspects of maintaining your pool heater. Things such as annual inspections, regular cleaning, and the crucial process of winterization.
Annual inspections
Maintaining a gas pool heater involves crucial steps to ensure its longevity and efficient performance. Annual inspections by expert technicians are key to identifying any potential issues early. Things like checking gas connections, ensuring proper ventilation, and examining the heat exchanger for signs of wear. These inspections help maintain the heater’s safety and operational efficiency.
Regular cleaning
Regular cleaning of both the exterior and interior components of the heater is essential. Because it helps to prevent blockages and maintain optimal airflow. As it is vital for the combustion process. Keeping the venting system clear of obstructions also ensures efficient exhaust.
Winterization
Winterization is particularly important in colder climates to protect the heater from freezing temperatures. This process includes shutting off the gas supply. Draining all water from the heater to prevent freezing damage, and covering the heater for protection. Insulating pipes can further safeguard the heater during the off-season. Ensuring that it remains in good condition for when warmer temperatures return.
By adhering to these maintenance practices. Pool owners can enjoy efficient heating and extend the lifespan of their gas pool heater. Ensuring a warm and welcoming pool experience throughout the year.
Conclusion,
In conclusion, ensuring the safe and efficient installation of a gas line for a pool heater requires the expertise of qualified professionals. Homeowners should prioritize hiring licensed and experienced contractors or plumbers who are knowledgeable about local building codes and safety regulations. By entrusting this task to trained professionals, individuals can minimize the risk of accidents, ensure compliance with legal requirements, and enjoy the benefits of a properly functioning pool heater system. When it comes to “Who Can Run a Gas Line for a Pool Heater,” the answer is clear: qualified professionals with the necessary skills and expertise.
FAQ
- Can I run a gas line for my pool heater myself?
- It is highly recommended to hire a licensed and qualified professional for running a gas line, as working with gas lines involves potential safety hazards. DIY installation may not comply with local codes and regulations, posing risks to both property and occupants.
- What type of professional can run a gas line for a pool heater?
- A licensed and experienced plumber or a qualified HVAC (heating, ventilation, and air conditioning) contractor is typically authorized to run gas lines. Make sure the professional has knowledge of local building codes and gas line installation regulations.
- Do I need a permit to run a gas line for a pool heater?
- In many jurisdictions, a permit is required for installing or modifying gas lines. A licensed professional will usually handle obtaining the necessary permits and ensure that the installation complies with local regulations
- How much does it cost to hire a professional to run a gas line for a pool heater?
- Costs can vary based on factors such as location, complexity of the installation, and the distance from the existing gas source. It’s advisable to obtain quotes from multiple professionals and discuss the specific requirements of your pool heater installation.
- What safety considerations should I keep in mind when running a gas line for a pool heater?
- Safety is paramount when dealing with gas lines. Ensure that the professional performing the installation is licensed, follows safety protocols, and conducts a thorough inspection. Additionally, make sure there are proper gas shutoff valves and that all connections are secure and leak-free.
by avi | Apr 14, 2024 | plumbing Services
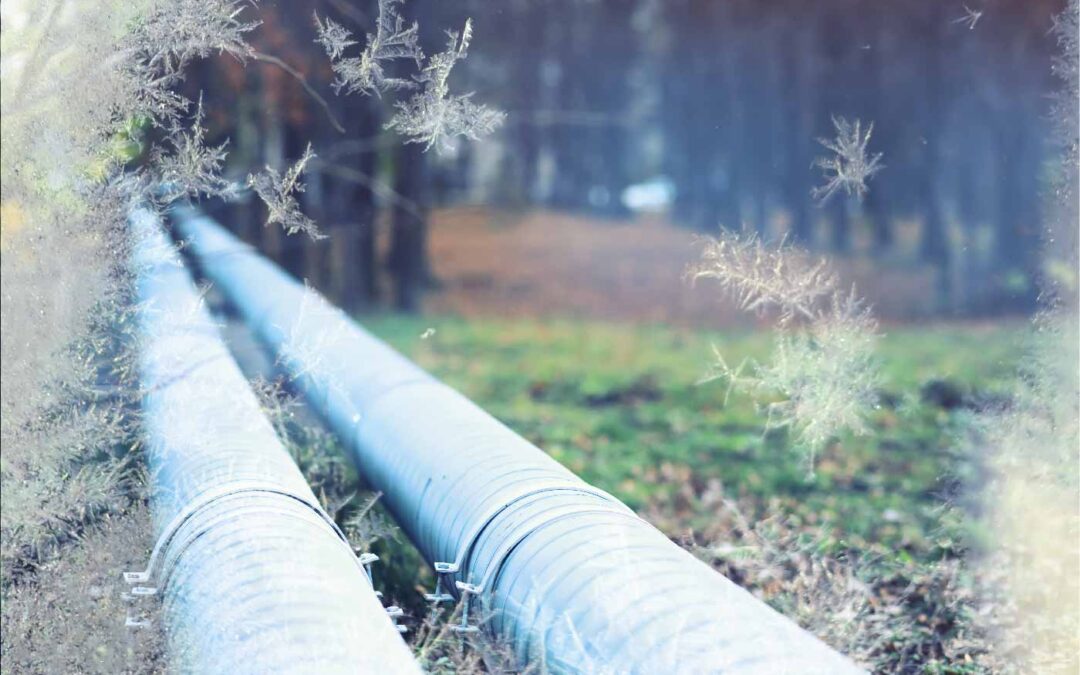
Pipes can freeze at 28 degrees within around 5 hours. Freezing time can vary based on various factors. When temperatures drop to 28 degrees, the risk of pipes freezing becomes a concern for homeowners. Frozen pipes can lead to costly damage and inconvenience. Making it crucial to know how long it takes for pipes to freeze at this temperature.
Different factors can all impact when pipes might freeze. Now we will explore in detail how long does it take pipes to freeze at 28 degrees. The signs of frozen pipes, and essential tips to prevent freezing. Learning about these factors can help homeowners protect their plumbing systems during cold weather.
What Is A Freezing Process
Pipes are at risk of freezing when the temperature drops to 32 degrees Fahrenheit (0 degrees Celsius) or lower. However, the actual freezing point for pipes, particularly those at risk, is often around 28 degrees Fahrenheit (-2 degrees Celsius). At this temperature, unprotected pipes exposed to the cold can start to freeze within 6 to 8 hours of exposure.
Factors Affecting Freezing Time
Knowing about these factors influencing freezing time is crucial. When it comes to protecting your pipes from potential damage. Factors such as insulation and exposure to cold play a significant role. It determines how long does It take pipes to freeze at 28 degrees. Let’s take a closer look at each of these factors:
Insulation
The level of insulation surrounding your pipes can significantly impact freezing time. Insulation acts as a protective layer, preventing the transfer of cold air to the pipes. Proper insulation effectively slows down the cooling process and can extend the time it takes for the pipes to freeze.
Insulating pipes can be done using various methods and materials:
- Apply foam insulation: Foam insulation sleeves can be easily wrapped around exposed pipes, providing an effective barrier against the cold.
- Add Pipe Insulation Tape: This tape can be wrapped around the pipes to provide a layer of insulation.
By properly insulating your pipes, you can reduce the risk of freezing and protect your plumbing system.
Exposure To Cold
Exposure of the pipe to cold temperatures is another critical factor in determining freezing time. Pipes in unheated rooms or exposed to drafts are more prone to freezing. Compared to isolated regions.
If you have pipes in unheated spaces such as attics, crawl spaces or garages, consider the following steps to reduce the risk of freezing:
- Install heating cables: Heating cables provide a constant source of heat to the pipes and prevent them from freezing.
- Seal Air Leaks: Seal any cracks, crevices or openings where pipes come into contact with cold air. This helps minimize the risk of frostbite.
Reducing the exposure of pipes to cold air. You can significantly delay the freezing process and protect the pipeline from possible damage.
Type Of Pipe
The type of pipe you have in your home plays a crucial role. It helps to determine how long does It Take Pipes to Freeze at 28 Degrees. Each pipe has different properties that affect its freezing time.
Metal Vs. Plastic
Metal pipes, such as copper or galvanized steel, conduct heat more efficiently than plastic pipes. This means that they can transfer heat from the water flowing inside them to the surrounding cold air more quickly. As a result, metal pipes tend to freeze faster than plastic pipes when exposed to temperatures as low as 28 degrees.
Plastic pipes, on the other hand, have a lower thermal conductivity, meaning they are less effective at transferring heat. This makes plastic pipes more resistant to freezing compared to metal pipes. However, it’s important to note that plastic pipes can still freeze if the temperature drops significantly and they are exposed to prolonged cold conditions.
Thickness
Protecting your pipes from freezing is crucial, especially in areas with harsh winter conditions. The thickness of pipe walls plays a significant role in their ability to resist freezing. With thicker walls providing better insulation and heat retention. To further prevent freezing, ensure your home is well-insulated and consider the water flow rate through your pipes. Higher rates can reduce freezing risks by generating heat.
If you find your pipes frozen, act quickly and safely to thaw them using methods like a hairdryer or warm towels. Also, avoid open flames or excessive heat. For complex situations, consulting a professional plumber is advisable.
You can also use online tools to calculate your pipes’ volume and estimate freezing times, considering factors like length, diameter, and material. Preventative measures, such as insulating exposed pipes and allowing a slow drip of hot water from faucets during extreme cold, can effectively reduce the risk of freezing.
Signs of a Frozen Pipe
Identifying a frozen pipe early can prevent it from bursting. Here are the signs to watch for: Reduced or No Water Flow: A clear sign of a frozen pipe is a significant decrease in water flow or no flow when you turn on the faucet.
Frost on Pipes: Visible frost on the exterior of pipes is an indication that the water inside may be frozen.
Strange Noises: Clanking, banging, or whistling sounds, when you use the tap, could indicate ice is obstructing water flow.
Unpleasant Odors: If a pipe is blocked by ice, you might notice odd smells coming from your faucets or drains.
Temperature Considerations
Temperature considerations play a crucial role in figuring out how long it takes pipes to freeze at 28 degrees. By analyzing external temperature and water flow, you can better prepare and protect your plumbing system from potential freezing.
External Temperature
External temperatures below 32°F increase the risk of pipes freezing. At 28 degrees, the likelihood of pipes freezing becomes more imminent. The impact of external temperatures is crucial in preventing any potential damage to your plumbing infrastructure.
Water Flow
Water flow inside the pipes also affects how long does it take pipes to freeze at 28 degrees. Continuous water movement helps prevent freezing, while stagnant water increases the risk. Therefore, ensuring a steady flow of water during colder temperatures can mitigate the possibility of hot water pipes frozen.
Warning Signs
When the temperature drops to 28 degrees, it’s crucial to be aware of warning signs that could indicate your pipes are at risk of freezing. Knowing these signs can help you take proactive measures to prevent the costly and inconvenient issue of frozen pipes.
Reduced Water Flow
If you notice reduced water flow from your faucets, it could be a sign that your pipes are starting to freeze. How long does it take pipes to freeze at 28 degrees? Well, reduced water flow could mean that ice is beginning to form within the pipes, causing a restriction in the water flow. This is a clear indication that immediate action is required to prevent further freezing and potential pipe damage.
Unusual Noises
Unusual noises such as banging, cracking, or gurgling coming from your plumbing system could be a warning sign of pipes freezing. These noises may occur as ice starts to form inside the pipes, causing stress and pressure on the surrounding materials. It’s essential to act promptly if you hear these unusual sounds to prevent potential pipe bursts and subsequent water damage.
Understanding these warning signs is a crucial step in safeguarding your plumbing system during freezing temperatures. By taking swift action, you can prevent the inconvenience and expense of dealing with frozen or burst pipes.
Preventive Measures
When the temperature falls to a bone-chilling 28 degrees, the risk of pipes freezing becomes a serious concern for homeowners. Frozen pipes can lead to costly repairs and water damage. Taking preventive measures is the key to avoiding this plumbing nightmare. Here are some effective ways to protect your pipes:
Insulate Pipes: Applying foam insulation sleeves to pipes, especially those exposed to cold air, can significantly reduce the risk of freezing.
Seal Leaks: Check for and seal any leaks or drafts around your home where cold air might reach pipes.
Keep a Drip Flowing: Allowing a trickle of water to flow through faucets can prevent freezing by ensuring continuous movement within the pipes.
Maintain Consistent Indoor Temperature: Keep your home’s thermostat set to a consistent temperature day and night to prevent interior pipes from freezing.
Open Cabinet Doors: During extreme cold, open cabinet doors to allow warm air to circulate plumbing under sinks and appliances.
Heat Tape: For highly vulnerable pipes, electric heat tape can provide direct warmth to prevent freezing.
Shut Off and Drain: For properties that will be unoccupied during cold periods, shutting off the water supply and draining the system can eliminate the risk of freezing.
Thermostatic Controlled Heating
Controlling the temperature inside your home is another effective preventive measure against frozen pipes. By maintaining a consistent and adequate level of heat, you can keep your pipes protected during the chilly winter months. Here’s what you can do:
- Ensure your thermostat is set to a minimum temperature of 55 degrees Fahrenheit or higher, even when you’re away from home.
- If you have rooms that are rarely used, keep the doors open to allow warm air circulation.
- In extremely cold climates, consider using portable space heaters to provide additional warmth to vulnerable areas.
- Keep in mind, that maintaining a warm and even temperature throughout your home is essential for preventing pipes from freezing.
By taking these preventive measures, you can avoid the inconvenience and potential damage caused by frozen pipes at 28 degrees. Remember, prevention is always better than cure when it comes to protecting your plumbing system during the winter months. Stay prepared and take action to keep your pipes safe and your water flowing.
Do Frozen Pipes Burst?
Yes, pipes can burst when the water inside them freezes. The expansion of water as it turns into ice can increase pressure inside the pipe. This pressure can cause the pipe to crack or burst, leading to significant water damage once the ice melts.
What to Do If Your Pipe is Frozen
Discovering a frozen pipe in your home can be a stressful experience, but taking prompt and careful action can mitigate potential damage. Here’s a step-by-step guide on what to do if you find yourself dealing with a frozen pipe:
Identify the Frozen Pipe
Look for visible signs of freezing, such as frost on the pipe or a noticeable lack of water when you turn on a faucet. Pipes most likely to freeze are those which has exposure to severe cold. Also, areas like basements, crawl spaces, attics, garages, or kitchen cabinets are likely to have much effect.
Open the Faucet
Before you begin thawing the pipe, open the faucet that the pipe feeds water into. This will allow water to flow through the pipe and relieve any built-up pressure caused by freezing.
Apply Heat to the Frozen Section
Use a hair dryer, heat lamp, electric heating pad, or towels soaked in hot water. This helps to apply heat to the section of the pipe that is frozen. Start from the faucet end and work your way towards the coldest section.
Important: Never use open flame devices, such as a blowtorch, kerosene or propane heater, or charcoal stove, to thaw a pipe. These can cause fire hazards or pipe damage.
Check All Other Faucets in Your Home
While you’re dealing with one frozen pipe, others may also be frozen. Check all faucets to determine if there is another area that needs attention.
Apply Additional Insulation
Once the pipe has thawed, consider adding insulation to prevent future freezing. Foam rubber or fiberglass insulation sleeves can provide necessary protection against cold temperatures.
Keep the Heat On
If you expect cold weather to continue, keep a consistent heat source in areas prone to freezing to prevent the issue from recurring. Keeping cabinet doors open to allow warm air to circulate pipes under sinks can also help.
By acting swiftly and cautiously, you can address frozen pipes effectively and reduce the risk of damage to your home. Always prioritize safety and do not hesitate to seek professional assistance when needed.
Conclusion
Frozen pipes are a common yet preventable problem during cold weather. The conditions that lead to pipes freezing help you know how long does It take pipes to freeze at 28 degrees. So, by recognizing the early signs, and taking preventative measures. Homeowners can significantly reduce the risk. Should you encounter a frozen pipe, prompt and proper action can prevent it from bursting and causing extensive damage. Always consider consulting with a professional plumber if you’re unsure. So call a professional and ask how to handle a situation or if it escalates beyond your control.
FAQ
Q: How long does it take for pipes to freeze at 28 degrees?
A: The time it takes for pipes to freeze at 28 degrees depends on factors like insulation, wind exposure, and water flow. Generally, it may take a few hours in such conditions. Adequate insulation and preventative measures are crucial to avoid freezing.
Q: Can pipes freeze overnight at 28 degrees?
A: Yes, pipes can freeze overnight at 28 degrees, especially if there are vulnerable areas with insufficient insulation. Taking precautions like insulating pipes and allowing a slight water trickle during extremely cold nights can help prevent freezing.
Q: What types of pipes are most susceptible to freezing at 28 degrees?
A: Vulnerable pipes include those in unheated areas, exterior walls, or attics. Pipes made of materials with poor insulating properties are also more prone to freezing. Regularly inspect and insulate these susceptible areas to minimize the risk.
Q: Can a running faucet prevent pipes from freezing at 28 degrees?
A: Allowing a small, steady stream of water through faucets can help prevent freezing by keeping water moving. However, it’s not a foolproof solution. Proper insulation and other preventative measures are essential for comprehensive protection.
Q: What should I do if I suspect my pipes are frozen at 28 degrees?
A: If you suspect frozen pipes, turn off the water supply and open faucets to relieve pressure. Apply gentle heat with tools like a hairdryer or towels soaked in warm water. Contact a professional plumber if needed. Prompt action is crucial to minimize potential damage.
by avi | Mar 27, 2024 | plumbing Services
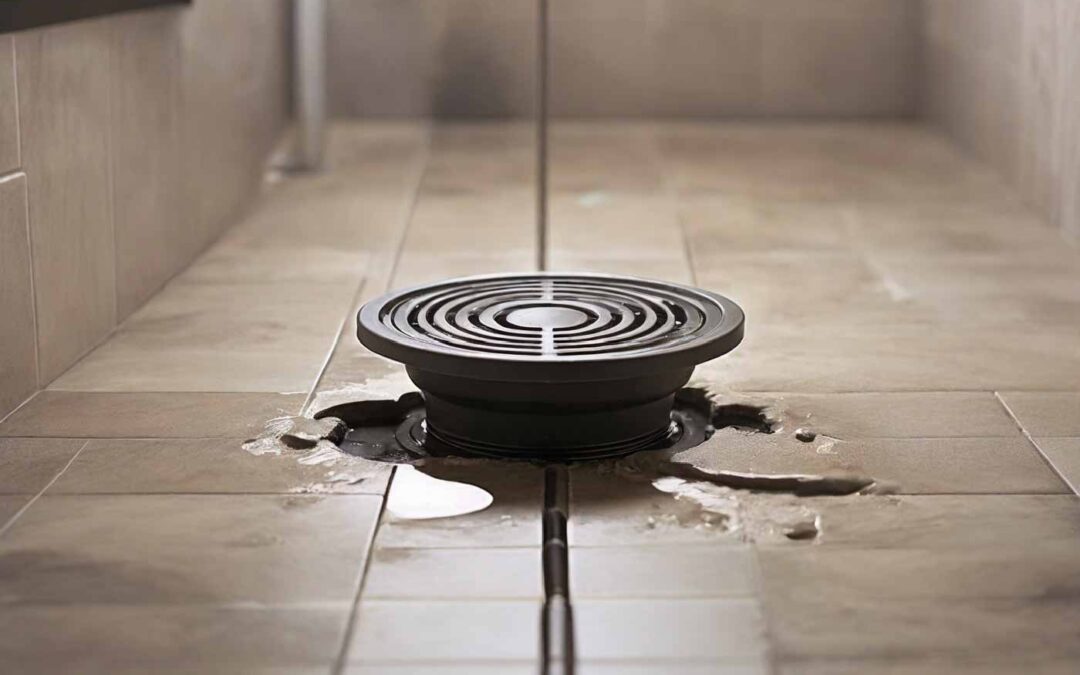
When renovating a bathroom or building a new shower. Installing a shower drain for tile is a crucial step in ensuring a functional and water-tight shower space. The proper installation of a shower drain for tile involves several key steps. Things like preparing the subfloor, connecting the drain to the waste pipe, and creating a mortar bed for the tile. So, How To Install Shower Drain For Tile for better functionality and compatibility?
To install a shower drain for tile, first, ensure the subfloor is clean and dry. Then attach the drain to the waste pipe. Now, finally, create a mortar bed for the tile. This essential process creates a solid footing for the shower floor and allows for proper drainage.
This comprehensive guide provides a clear understanding of each step. Additionally, we’ll cover essential maintenance and cleaning practices to uphold the installation’s integrity over time.
Choosing The Right Shower Drain
When it comes to installing a shower drain for tile. Choosing the right drain is crucial for a successful and long-lasting installation. The shower drain not only ensures proper drainage but also serves as a decorative element in your bathroom. In this section, we will discuss the considerations for tile installation and the different types of shower drains available.
Considerations For Tile Installation
Before selecting a shower drain, it’s essential to consider a few factors which relate to tile installation. These considerations will help you choose a shower drain that is compatible with your tile. Ensures a seamless and aesthetically pleasing finish and compatibility.
Drain Height
The shower drain should be positioned precisely to allow the tiles to be installed flush against it. This ensures a smooth transition from the tiles to the drain, preventing any water seepage.
Tile Size
Different types of shower drains accommodate various tile sizes. It is crucial to choose a drain that can accommodate your specific tile size. Without any compromisation to its functionality or appearance.
Tile Material
The type of tile you choose will affect the compatibility of the shower drain. For example, a linear drain is suitable for large format tiles or mosaic tiles, while a traditional round drain may be more appropriate for smaller tiles.
Installation Method
Depending on the type of shower drain you choose, the installation method may vary. It’s essential to understand how the drain installation will go on. To ensure a smooth and trouble-free installation.
Types Of Shower Drains
There are several types of shower drains available in the market, each with its unique features and benefits. Here are some popular types of shower drains you can consider for your tile installation:
| Compression Shower Drain |
A compression shower drain offers easy installation with its compression washers and nuts. This type of drain is suitable for both tile and shower bases. |
| Adjustable Shower Drain |
An adjustable shower drain allows you to customize the drain height to ensure a flush installation with your tiles. |
| Linear Shower Drain |
A linear shower drain provides a sleek and modern look to your shower floor. It is designed to accommodate larger tiles and creates a seamless transition from the shower area to the drain. |
When installing a shower drain for tile, it is crucial to choose the right drain that considers the specific requirements. By understanding the considerations and exploring the different types of shower drains available, you can select the perfect drain for your bathroom that combines functionality and aesthetics.
How To Install Shower Drain For Tile
Installing a shower drain for tile is a crucial step in creating a fully functional and aesthetically pleasing shower. Proper installation will ensure that water drains are efficient. Preventing any potential water damage to the surrounding tile and structure. In this guide, we will walk you through the essential steps of how to install shower drain for tile.
Gathering Necessary Tools And Materials
Before you begin installing the shower drain for tile, it’s important to gather all the necessary tools and materials. This will help streamline the installation process and ensure that you have everything you need at hand. Below is a list of tools and materials necessary for the installation:
- Tape Measure
- Marker or pencil
- Adjustable wrench
- Hacksaw or PVC cutter
- Screwdriver
- Bucket or container for debris
- Shower drain kit
- Plumber’s putty or silicone sealant
- Protective gloves
- Safety glasses
Measuring And Marking The Drain Location
Measuring and marking the drain location is a critical step in the installation process. Here’s a step-by-step guide on how to measure and mark the drain location for tile installation:
Locate the center point: Use a tape measure to locate the center point where the drain will be installed. Mark this point using a marker or pencil.
Measure the drain size: Use the measurements you will get with the shower drain kit. And use it to determine the size of the opening specific to the drain.
Mark the drain outline: Using the center point as a reference, mark the outline of the drain on the shower floor. Use the measurements you already have in the previous step.
Double-check the measurements: Ensure that the marked outline aligns accurately with the drain size specified in the kit.
Installing The Shower Drain
When it comes to tiling a shower, proper installation of the shower drain is essential to ensure a watertight seal and prevent leaks. Below, we’ll discuss the step-by-step process of how to install shower drain for tile, ensuring a successful and professional-looking tiling job.
Attaching The Drain Base To The Subfloor
Step 1: Start by placing the drain base in the center of the shower floor, ensuring that it aligns with the slope you’ve created for water drainage.
Step 2: Secure the drain base to the subfloor by using the appropriate screws or bolts, making sure it sits flush with the floor surface.
Connecting The Drain Pipe
Step 1: Cut the PVC drain pipe to the required length, ensuring it extends from the drain base to the existing plumbing.
Step 2: Connect the drain pipe to the base using PVC primer and cement, creating a secure and watertight seal.
Setting The Tile Around The Drain
To install the shower drain for tile, it’s important to carefully set the tile around the drain. This ensures a secure and visually appealing installation, with the drain flush with the tile surface. By following the proper steps, you can achieve a professional-looking result.
Once you have successfully applied the waterproofing membrane, it’s time to move on to the next step: setting the tile around the drain. This ensures a seamless and secure transition. between the drain and the rest of the shower floor. By following these steps, you can achieve a professional-looking finish.
Applying Waterproofing Membrane
Before laying the tiles, it is crucial to apply a waterproofing membrane around the drain area. This membrane acts as a barrier, preventing any water from seeping through the grout lines and damaging the underlying structure. To do this:
- Clean the drain area thoroughly, removing any dirt or debris.
- Select a suitable waterproofing membrane that is designed for use in wet areas.
- Follow the manufacturer’s instructions to apply the membrane evenly around the drain, ensuring complete coverage.
- Allow the membrane to dry according to the recommended drying time before proceeding with the tile installation.
Laying And Grouting The Tiles
Once the waterproofing membrane has dried, it’s time to lay and grout the tiles around the drain. Follow these steps to achieve a seamless finish:
- Start by applying tile adhesive to the area around the drain. Use a trowel to create ridges for better adhesion.
- Place the tiles carefully onto the adhesive, aligning them evenly and leaving space for grout lines.
- Continue laying the tiles, working your way outwards from the drain until you have covered the entire shower floor.
- After the adhesive has dried, mix the grout according to the manufacturer’s instructions.
- Apply the grout evenly between the tiles, making sure to fill in all the gaps.
- Use a grout float to smooth the surface and remove any excess grout.
- Allow the grout to dry for the recommended time before cleaning the tiles with a damp sponge.
By following these guidelines, you can install the shower drain for tile with ease. Remember to take your time and double-check your work for a professional and long-lasting finish. With the right materials and techniques, you’ll have a beautifully tiled shower floor that not only looks great but also functions effectively in keeping water where it should be.
Finishing Touches And Testing
After the successful how to install shower drain for tile. It’s time to add the finishing touches and test its proper functioning. This step is crucial to ensure that your shower drain is working effectively and will prevent any future issues. In this section, we will cover how to install the drain grate and how to test the drain for proper functioning.
Installing The Drain Grate
The drain grate is an essential component of the shower drain as it prevents debris from clogging the drain pipe. Follow these simple steps to install the drain grate:
- Carefully remove the protective cover from the drain pipe.
- Place the drain grate over the opening, ensuring it fits securely.
- Press down firmly on the drain grate to create a tight seal.
- Check for any gaps or misalignment and make adjustments if necessary.
It is important to choose a drain grate that complements your shower design. But make sure it is made of high-quality materials for long-lasting performance. Now that the drain grate is ready, it’s time to test the drain for proper functioning.
Testing The Drain For Proper Functioning
To ensure that your shower drain is working as it should, follow these steps to test its proper functioning:
- Turn on the water in your shower and let it run for a few minutes.
- Observe the drain to check if the water is flowing freely.
- Ensure that there is no water pooling or slow draining.
- If you notice any issues, such as water backing up or slow draining. It may be necessary to recheck the installation or seek professional assistance.
So, now you will finally be able to finish and ensure the overall steps on How To Install Shower Drain For Tile. You will be able to make sure that your shower drain for tile is functioning effectively. Testing the drain is crucial to avoid any future water damage or clogging issues. Take the necessary time to perform these finishing touches and testing. As they will let you enjoy a hassle-free and functional shower drain.
Frequently Asked Questions
Q: Should Shower Drain Be Flush With Tile?
A: Yes, the shower drain should be level with the tile to allow for seamless tile installation.
Q: How Do You Install A Shower Drain?
To install a shower drain, first, position the drain base, ensuring it’s centered and level. Then, connect the drain pipe and secure it with clamps. Finally, pour a mortar mix around the edges to create a slope and set the shower pan liner before tiling.
Q: Can I install a shower drain for tile without professional help?
A: Yes, installing a shower drain for tile can be a DIY project. Follow the manufacturer’s instructions carefully, use the right tools, and ensure proper measurements. Basic plumbing skills are helpful, but many homeowners successfully complete this task on their own.
Q: What type of shower drain is best for a tiled shower floor?
A: For a tiled shower floor, a square or round linear drain is often recommended. These drains provide efficient water drainage, are aesthetically pleasing, and can be seamlessly integrated into the tile layout. Consider the design and functionality when choosing the drain type.
Q: Do I need special tools for installing a shower drain in a tile floor?
A: Yes, you may need specific tools such as a tile saw, hole saw, and a wrench for tightening drain connections. Having the right tools ensures a precise installation, preventing damage to the tiles and ensuring a secure fit for the drain.
Q: How do I ensure a waterproof seal around the shower drain and tile?
A: Achieving a waterproof seal is crucial. Use a high-quality waterproof membrane or shower pan liner beneath the tile. Properly apply waterproofing material around the drain flange and edges. This safeguards against water infiltration and protects the subfloor from potential damage.
Q: Can I install a linear drain in an existing tiled shower without major renovations?
A: Retrofitting a linear drain into an existing tiled shower is possible with careful planning. It may involve some tile removal, but innovative retrofit drains are available that simplify the process. Consult with a professional or follow detailed guides to ensure a successful retrofit installation.
Conclusion
Installing a shower drain for tile is a crucial step in ensuring a waterproof and functional shower. By following the proper techniques and using the right materials, you can create a seamless and visually appealing finish. Remember to measure carefully, use a high-quality drain, and secure it properly to the subfloor.
Don’t forget to consult professional advice if needed. With these guidelines in mind, you are ready to tackle your shower drain installation project like a pro. Happy DIYing!
by avi | Mar 21, 2024 | plumbing Services
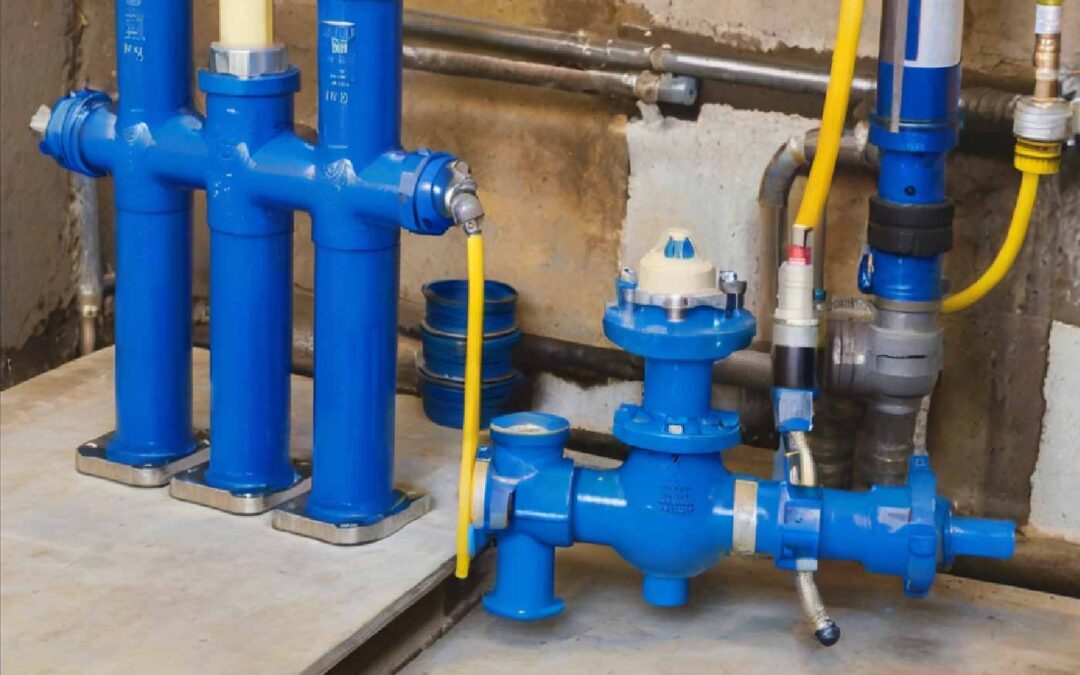
Are you considering a hydrostatic plumbing test but unsure about how much does a hydrostatic plumbing test cost? Well, Hydrostatic plumbing tests are essential to ensure the integrity of your plumbing system. This test involves pressurizing the pipes to locate leaks or weak points that make potential problems in the future.
A hydrostatic plumbing test typically costs between $300 to $500. This cost usually includes the testing equipment and the labor involved.
The cost of the test varies on different factors. Things like the size of the property and the complexity of the plumbing system. It’s essential to consult a professional plumber to get an accurate estimate for the test.
Inadequate testing can lead to significant damage and expensive repairs. Investing in a quality hydrostatic test can provide peace of mind. Learning your plumbing system is in good shape.
What Is A Hydrostatic Test
A hydrostatic test is a plumbing procedure to check for leaks or weaknesses in pipes. The cost of a hydrostatic plumbing test can vary depending on factors. With prices ranging from $200 to $800 on average.
A hydrostatic test is a common plumbing procedure. Experts perform to check the pressure and integrity of a plumbing system. It involves filling the system with water and pressuring it to a specific level. This ensures integrity and makes sure no leaks or weaknesses in the pipes.
How Does It Work?
During a hydrostatic test, a professional plumber will close off all the outlets and drain valves. After that, they connect a test pump. The test pump then fills the system with water, exerting pressure on the pipes and fittings.
The plumber carefully monitors the pressure to make sure it reaches a specific limit. Eventually following local plumbing codes and standards. This pressure is typically under notice for a certain duration to ensure the system remains stable.
If there are any leaks or weaknesses in the plumbing system, they will become evident during the hydrostatic test. The plumber will inspect the system for any signs of water loss or pressure drops. Because a simple problem can indicate potential issues.
If they detect any problems, they hastily ensure which is profitable. Also, they ensure areas that require attention and perform the necessary repairs or replacements. Once the plumbing system passes the hydrostatic test. You can consider it safe and reliable for regular use.
Hydrostatic testing is not only essential for new construction projects. But also useful for older systems and after major plumbing repairs or alterations. It helps ensure the longevity and effectiveness of the plumbing system by detecting any hidden leaks or weaknesses.
So, if you’re wondering how much does a hydrostatic plumbing test cost, it’s important to know that the price can vary. Factors such as the size of the plumbing system, the complexity of the test, and the location of the property can influence the cost. Typically, a hydrostatic test can cost anywhere between $150 to $500.
Factors Affecting Cost
When conducting a hydrostatic plumbing test, several factors can affect the overall cost. To help you figure out the potential expenses with this type of testing our guideline can help. So, here are some key factors:
Type Of Property
The type of property you own plays a significant role in determining the cost of a hydrostatic plumbing test. Different properties have various plumbing systems. As well the complexity of these systems can impact the testing process. For instance, residential homes typically have simpler plumbing systems in comparison to commercial buildings or industrial facilities.
For residential owners, the cost of a hydrostatic plumbing test may be on the lower end of the spectrum. On the other hand, commercial buildings and large-scale properties might require more extensive testing, leading to higher costs. It is essential to consider the size and complexity of your property when estimating the expenses.
Extent Of Testing Needed
The extent of testing needed is another crucial factor that affects the cost of a hydrostatic plumbing test. Depending on the specific requirements of your property, the testing may involve different areas and components of the plumbing system.
In a typical hydrostatic plumbing test, professionals check for leaks, cracks, and weaknesses in pipes, valves, and fixtures. The more comprehensive the testing, the more time and effort it will require. Which, in turn, can increase the overall cost of the test.
In addition to the standard testing procedures, certain properties may require professional testing for specific areas. Such as underground pipelines or complex network systems. These additional tests can further enhance the accuracy and reliability of the results but may also contribute to higher costs.
To get an accurate estimate for your hydrostatic plumbing test, it is best to consult with a professional plumbing service. They can assess your specific needs and provide you with a detailed cost breakdown for custom property.
However, the cost of a hydrostatic plumbing test may vary depending on these factors. Investing in this testing process can bring significant benefits. Early detection of plumbing issues through hydrostatic testing can help prevent extensive damage. Ensure the safety of your property, and potentially save you from expensive repairs down the line.
How Much Does A Hydrostatic Plumbing Test Cost
If you are wondering how much does a hydrostatic plumbing test cost. It’s important to know that the cost can vary depending on several factors. Such as the size of the property, the complexity of the plumbing system, and the location. Hydrostatic testing is a method to check for leaks or weaknesses in plumbing systems by pressurizing them with water. This process is common during the construction, renovation, or inspection of plumbing systems.
Residential Testing
Regarding hydrostatic testing for residential properties, the cost can range from $300 to $600 on average. However, this cost can have a differentiation for the size of the property, the number of plumbing fixtures, and the accessibility of the plumbing system. Additionally, the location and the expertise of the technicians conducting the test can also impact the overall cost.
Commercial Testing
For commercial testing, the cost of a hydrostatic plumbing test is typically higher than for residential properties. Being larger and more complex plumbing systems this is the main reason. The cost for commercial hydrostatic testing can range from $800 to $1500 or more. Depending on the scale of the property and the intricacy of its plumbing network. Larger buildings or facilities with extensive plumbing infrastructure may require more time and resources. To conduct a thorough hydrostatic test, leading to more costs.
Cost Components
A hydrostatic plumbing test cost considers several cost components including labor, materials, and equipment rental. The average cost typically ranges from $300 to $1,000. Depending on the size of the plumbing system and the complexity of the test.
Factors such as location and service provider can also affect the overall cost.
Cost Component
When considering a hydrostatic plumbing test, it’s important to learn about the right cost involvement. The overall cost is a mix of labor costs and material costs. Learning about these components will give you a clearer picture of what to expect during a hydrostatic plumbing test.
Labor Costs
The labor costs for a hydrostatic plumbing test usually depend on the complexity of the system and the location of the inspection. On average, plumbers charge a standard hourly rate ranging between $50 to $150. However, for specialized hydrostatic tests, the rates can be higher due to the specific skills and equipment necessary.
Material Costs
Material costs for a hydrostatic plumbing test typically include the cost of special equipment and testing materials. Such as pressure gauges, test pumps, and necessary sealing materials. These costs can vary depending on the size and complexity of the plumbing system. Overall, the total cost of a hydrostatic plumbing test arises from a combination of labor and material expenses.
Remember, these costs can vary based on individual circumstances. It’s always best to consult with a professional plumber to get an accurate estimate for your specific situation.
Cost-saving Tips
Looking to save costs on a hydrostatic plumbing test? Hydrostatic plumbing tests can range in cost depending on various factors. Things like property, location, and complexity of the plumbing system. To save money, consider getting multiple quotes from different plumbing companies. Schedule the test during off-peak seasons, and ensure proper maintenance of your plumbing system.
When it comes to determining the cost of a hydrostatic plumbing test, it’s essential to consider some cost-saving tips that can help you save money while ensuring the safety of your plumbing system. Here are a few tips to keep in mind:
Regular Maintenance
Maintaining your plumbing system regularly is one of the most effective ways to save money on hydrostatic testing. By keeping your pipes properly functional, you can minimize the risk of leaks and other issues. Regular maintenance can include simple tasks. Checking for any visible leaks, ensuring proper insulation of pipes, and monitoring water pressure will help prevent problem.
Comparison Of Service Providers
Comparing different service providers can help you find the best deal for your hydrostatic testing needs. It is important to request quotes from multiple providers and carefully evaluate their offerings. Consider factors such as the reputation of the service provider. The expertise of their team, and any additional services they may provide. However, it’s essential to remember that the cheapest option may not always provide the quality you need. So be sure to strike the right balance between cost and reliability.
Contractor License And Insurance
When selecting a service provider for your hydrostatic plumbing test, ensure that the contractor is a professional. A professional will have the necessary expertise to perform the test accurately. Reducing the risk of errors that may lead to costly repairs in the future. Additionally, choosing an expert contractor provides you with protection from damages that may occur during the testing process.
Bundle Services
If you require other plumbing services along with the hydrostatic test, consider bundling them together to save costs. Many service providers offer discounts when you combine multiple services. For example, you might need a drain cleaning or pipe inspection along with the hydrostatic test. By bundling these services, you can not only save money but also ensure comprehensive maintenance and evaluation.
Importance Of Testing
When it comes to the plumbing system in your home or business. It’s vital to ensure that it operates smoothly and efficiently at all times. One way to achieve this is by conducting regular hydrostatic testing. This process involves pressurizing your plumbing pipes to determine if there are any leaks or weaknesses. As they can cause costly damage or compromise the safety of your property. But why is it so important to perform hydrostatic testing? Let’s explore two key reasons: Safety and Compliance, and Leak Prevention.
Safety And Compliance
When considering the importance of hydrostatic testing, safety should always be a top priority. A hydrostatic test is designed to identify any potential issues before they become serious hazards. Whether you’re a homeowner or a business owner, ensuring that your plumbing system is safe is essential. By conducting a hydrostatic test, you can identify and address any weak points in your pipes, preventing the risk of catastrophic accidents. You will gain protection from Burst pipes or water damage.
Leak Prevention
Another crucial aspect of hydrostatic testing is leak prevention. Even a small leak can escalate into a major problem if you leave it as it is. By subjecting your plumbing system to a hydrostatic test, you can identify and locate leaks. As they normally go unnoticed until significant damage occurs. This proactive approach empowers you to take the necessary steps to repair or replace preventing leaks and water damage. Not only does this save you from the headache of dealing with costly repairs or replacements. But it also minimizes the disruption to your daily life or business operations.
The Necessity Of A Hydrostatic Testing?
Hydrostatic testing is essential for plumbing systems to ensure safety and integrity. The cost of a hydrostatic plumbing test varies depending on factors such as the size of the system and location. Contact a professional plumber for an accurate estimate.
What Is The Necessity Of A Hydrostatic Testing?
A hydrostatic test, also known as a hydro test, is a critical process in plumbing that ensures the integrity and safety of your pipes. It involves filling the pipes with water or another liquid to assess their strength and leak resistance.
Hydrostatic testing is essential for several reasons:
- It helps identify any weak points or leaks in the plumbing system.
- It ensures compliance with building codes and regulations.
- It provides peace of mind, knowing that your plumbing has proficient testing.
- It prevents potential water damage and costly repairs for leaks or clogs.
- Hydrostatic testing is often necessary before connecting new plumbing installations to the main water supply.
What Are The Consequences If My Hydrostatic Testing Fails?
If a hydrostatic test reveals failures in your plumbing system, it can have significant consequences:
- Leaks can lead to water damage, mold growth, and structural issues in your property.
- Loss of water pressure and inefficient water flow can disrupt daily activities.
- Increases in utility bills due to water wastage from leaks.
- Potential health hazards from contamination seeping into the pipes.
It is crucial to address any failures immediately to prevent further damage and ensure the safety of your plumbing system.
Conclusion
It is essential to consider the cost of a hydrostatic plumbing test before initiating any plumbing project. Although prices vary depending on various factors. Such as the size of the system and the location. Still, it is advisable to consult with professional plumbers to get accurate estimates.
Remember that investing in a hydrostatic plumbing test can save you from potential future damages. Ensuring the longevity and efficiency of your plumbing system. So, make a wise decision and prioritize the safety and functionality of your water supply.
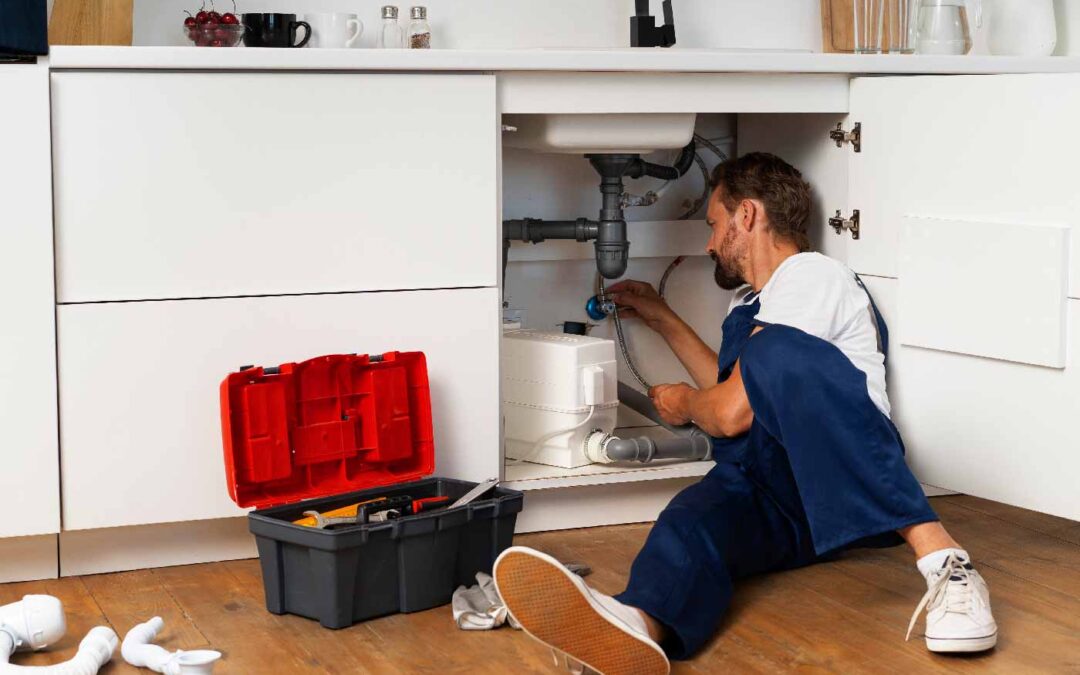
by avi | Mar 18, 2024 | plumbing Services
DIY plumbing is a fun task for most DIY enthusiasts. The feeling of diverting anything at will and making something majestic is absolute satisfaction. But not everything is suitable for DIY. Especially plumbing and electrical work. They require such massive skills which makes them prohibited in some places. If you are a resident of NYC. You may be asking yourself what plumbing work can be done without a license in NYC.
Well In NYC, only professional plumbers can perform plumbing work. If the project has deep integration with your water system or plumbing system. Then you can not do major work without the help of a plumbing license.
It is important to understand the restrictions and limitations when it comes to plumbing work. Especially for a person living in NYC. This article outlines the guidelines and regulations, providing a comprehensive idea of why a license is necessary. By being aware of these regulations, homeowners and building owners can ensure safety and efficiency. Not just that they can also avoid potential legal issues.
What Plumbing Work Can Be Done Without A License In NYC
As a resident of NYC, you might be wondering how much plumbing you can do. As NYC strictly restricts plumbing for normal citizens it’s a simple question for you. While it’s always important to consult with a professional plumber for complex tasks. There are minor repairs and routine maintenance that you can handle on your own.
Simple fix and repair
Some minor plumbing repairs can be done without a license in NYC. These include fixing a leaky faucet, replacing a showerhead, or repairing a toilet mechanism. With a little DIY knowledge and some basic tools, you can easily tackle these tasks on your own. Just be sure to turn off the water supply before starting any repairs.
Routine maintenance
Routine maintenance tasks can also be done without a license in NYC. This includes tasks like cleaning out blockage from drains using a plunger or drain snake. Maintaining the cleanliness of your garbage disposal, and checking for and fixing minor leaks under sinks. Regularly performing these maintenance tasks can prevent plumbing issues. It not only prevents but also stops from escalating and saves you from unnecessary expenses.
It’s important to note that these minor repairs and routine maintenance are easy to do, but it’s always wise to know your limits. If you’re unsure of your abilities or if the issue seems too complex. Then it’s better to consult an expert plumber to avoid any potential complications or damage.
Why it’s important to have professional accessibility
Doing plumbing work without a license in NYC is not illegal. As long as you stick to these minor repairs and routine maintenance tasks. However, if you attempt more complex plumbing projects without the necessary certification. Get ready to face penalties and fines. Additionally, it’s worth considering that a professional has the expertise and experience. That’s why they can handle more complex jobs efficiently and effectively.
To summarize, minor plumbing repairs and routine maintenance can be done without a license in NYC. However, it’s always important to prioritize your safety and know your limitations. When it comes to more complex issues or if you’re unsure. Consulting a professional plumber is the best course of action. It ensures that the job is done correctly and avoids any potential legal consequences.
Minor Plumbing Repairs
Minor plumbing repairs are common tasks that homeowners may attempt to tackle on their own. These repairs involve simple fixes that do not typically require the expertise of an expert plumber. In NYC, there are specific plumbing tasks that can be legally performed without a license. Allowing homeowners to address minor issues without incurring the expense of hiring a professional.
Replacing Faucet Washers
Replacing faucet washers is a straightforward repair task that you can carry as a homeowner. Which will not ask for any need for a plumbing license. It involves the simple process of removing the old washer and replacing it with a new one. This allows individuals to address common issues such as dripping faucets without violating licensing regulations.
Fixing Leaky Pipes
Fixing leaky pipes is another minor plumbing repair that can be undertaken without a license in NYC. This involves identifying the source of the leak and addressing it using standard household tools and materials. By allowing homeowners to attend to such issues, the regulations enable them to maintain their plumbing systems.
Routine Maintenance
When it comes to routine maintenance, certain plumbing tasks in NYC can be done without a license. These tasks are generally considered minor and do not require specialized knowledge or expertise.
Unclogging Drains
One common plumbing issue that homeowners face is blockage drains. Thankfully, you don’t need an expert plumber to tackle this problem. Unclogging drains is a routine maintenance task that can be easily handled by most homeowners without any legal repercussions. With a little bit of know-how and the right tools. You can get rid of that pesky clog and restore the proper flow of water in your drain.
So, how do you unclog a drain without a license? Here are a few steps to follow:
- Gather the necessary tools: A plunger, a drain snake, and a pair of rubber gloves.
- Remove any visible debris: Use a pair of gloves to manually remove any hair or other particles that may be causing the clog.
- Use a plunger: Place the plunger over the drain, ensuring a tight seal. Then, vigorously push and pull the plunger to create suction and dislodge the clog.
- Try a drain snake: If the plunger doesn’t work, a drain snake can come in handy. Insert it into the drain and gently twist it, pulling it out to remove the clog.
- Flush with hot water: Once the clog is out of the drain, flush the drain with hot water to ensure proper drainage.
By following these steps, you can successfully unclog your drain and save yourself the trouble of hiring an expert plumber.
Replacing Toilet Flappers
Another routine maintenance task that can be done without a license is replacing toilet flappers. Over time, toilet flappers can wear out and cause water leakage. Leading to more water bills and potential damage to your bathroom. Fortunately, replacing a toilet flapper is a straightforward process that you can accomplish.
To replace a toilet flapper, follow these steps:
- Turn off the water supply: Locate the shut-off valve near the base of the toilet. Now start turning it clockwise to stop the flow of water.
- Flush the toilet and remove excess water: After turning off the water supply, flush the toilet to empty the tank. Use a sponge or towel to mop up any remaining water.
- Remove the old flapper: Carefully detach the old flapper from the flush valve by unhooking the chain or removing any retaining clips.
- Install the new flapper: Position the new flapper onto the flush valve and reattach the chain or clips.
- Turn on the water supply: Once the new flapper is securely installed. Turn on the water supply by turning the shut-off valve counterclockwise.
By replacing the toilet flapper yourself, you can save money and ensure that your toilet functions properly. Just remember, that this routine maintenance task does not require a professional plumber. But it’s important to follow the instructions carefully to avoid any potential issues.
Is Diy Good Enough For Plumbing?
DIY projects for plumbing in NYC can be done without a license. For minor repairs like fixing leaks, unclogging drains, and replacing faucets. However, for more complex tasks such as installing new pipes or water heaters. It’s best to hire a professional to ensure safety and compliance with regulations.
When it comes to plumbing work, many homeowners in NYC find themselves wondering what plumbing work can be done without a license in NYC. While DIY projects can be a great way to save money and learn new skills they can still backstab. It’s important to consider both the pros and cons before deciding to take on plumbing work without a license.
Pros Of Diy
There are several advantages to undertaking plumbing work as a do-it-yourself project:
Cost Savings
One of the main reasons homeowners opt for DIY plumbing is to save money. Hiring a professional plumber can be expensive, and by doing the work yourself, you can avoid these costs.
Flexibility and Convenience
When you choose to handle the plumbing work yourself. You have the freedom to work at your own pace and on your schedule. You don’t have to wait for an appointment or deal with any scheduling conflicts.
Learning Experience
Taking on plumbing work as a DIY project can be a valuable learning experience. It allows you to gain new skills and knowledge, empowering you to handle other minor plumbing issues in the future.
Cons Of Diy
While there are benefits to DIY plumbing, there are also downsides that need to be considered:
Lack of Expertise
Plumbing is a special skill that requires extensive knowledge and training. Without the proper expertise, there is a risk of making mistakes. Which could lead to costly repairs or even potential damage to your home.
No Warranty or Insurance
Expert plumbers are typically ensuring and offering warranties for their work. Providing you with peace of mind. When you choose to do it yourself, you don’t have the same level of protection. Which is why you may be solely responsible for any issues that arise as a result.
Potential Legal Issues
In NYC, it is illegal to perform certain plumbing work without a license. Violating these regulations can result in severe penalties, including fines and even legal action. It’s important to be aware of the specific restrictions and requirements in your area.
When Is The Right Time To Get A License For Plumbing?
In NYC, there are specific plumbing tasks that can be legally carried out without a license. However, it’s essential to understand the limitations and regulations surrounding plumbing work to avoid legal consequences.
Which Is Better: Calling A Professional Or Getting A License For Diy?
Considering the complexity of plumbing systems and the potential risks of improper installations. Hiring a professional for complex plumbing work is often the best choice. However, for minor repairs and installations, individuals can obtain a DIY license through the NYC Department of Buildings.
Conclusion
What plumbing work can be done without a license in NYC is very little but you can go for it. But make sure it’s small and minor not a major task. However, it is important to understand the limitations and potential risks of doing so. Whether it’s a minor repair or a major installation. Knowing the legal boundaries can save you from fines and legal issues.
Always consult with a professional to ensure compliance and safety. Protect yourself and your property by staying informed about plumbing regulations in NYC.
by avi | Mar 14, 2024 | plumbing Services
Plumbing has come a long way in terms of longevity and efficiency. With the modern advancement of other plumbing instruments did not lag. From the clay type pipe to the new modern and more sturdy type pipes. Plumbing is truly rising to a new height for better liveability. With all the vast choices in the market, the thing now raises a question of what are the best pipes for plumbing. On this basis, people with new projects in hand have this question of What Type of Plumbing is Used in New Homes.
Copper and PEX are commonly used for plumbing in new homes due to their durability and versatility. When building a new home, it is crucial to choose the right type of plumbing. Because it will be able to withstand the pressure and offer your long-term service as well as efficient water supply.
Copper and PEX (cross-linked polyethylene) pipes are two popular choices for plumbing systems in new homes. Copper pipes are known for their durability and long lifespan, making them a reliable option for homeowners. They are resistant to corrosion, withstand high temperatures, and are widely available.
On the other hand, PEX pipes offer flexibility and are easier to install, making them a cost-effective choice. They are also resistant to freezing and bursting, ensuring a reliable water supply in colder climates. Overall, both copper and PEX pipes provide reliable and durable plumbing solutions for new homes.
So figuring out the value and flexibility of installation is what makes the real confusion. In terms of sturdy build, one may offer longer safety but problems with installation and changing. While the other may be more flexible in terms of plumbing work hence giving less longevity to piping appliances.
Traditional Plumbing Systems
New homes typically feature traditional plumbing systems, incorporating a network of pipes and fixtures. These systems’ design helps to efficiently supply water and remove waste, ensuring a reliable and durable plumbing infrastructure for homeowners. With the use of quality materials and professional installation, traditional plumbing systems deliver long-lasting functionality for new properties.
When it comes to plumbing in new homes, there are several types of pipes to use for efficient water flow. Traditional plumbing systems commonly include copper, PVC, and galvanized steel pipes. Each type of pipe has its characteristics and benefits. Making it essential to understand the differences and choose the most suitable option for your home’s plumbing needs.
Copper Plumbing
Copper plumbing pipes have been a favorite choice in residential plumbing for many years. This type of pipe is known for its durability, corrosion resistance, and high heat tolerance. Which is ideal for both hot and cold water applications. Copper pipes are widely known for their long lifespan, often lasting up to 50 years. Additionally, these pipes have excellent water pressure capabilities, ensuring optimal water flow throughout the home.
When it comes to copper piping fittings, plumbers use soldering to connect the pipes. This creates a secure and leak-free joint. Furthermore, copper pipes are an environmentally friendly option as you can recycle and reuse them when you like.
PVC Plumbing
PVC (Polyvinyl Chloride) plumbing pipes are another popular choice for new home installations. This type of pipe is lightweight, affordable, and easy to work with. PVC pipes are resistant to chemicals, corrosion, and abrasion, making them suitable for various plumbing applications.
One of the significant advantages of PVC pipes is their smooth inner surface. Helping to prevent the build-up of mineral deposits and improving water flow. Additionally, PVC pipes do not pose health risks as they are non-toxic and do not leach harmful substances into the water.
Galvanized Steel Plumbing
Galvanized steel pipes were commonly used in older homes but are less prevalent in new construction. The pipes have a steel coating with a layer of zinc, protecting against corrosion. Galvanized steel pipes have strength and durability, making them suitable for high-water pressure systems.
However, there are some drawbacks to using galvanized steel pipes. Over time, the zinc coating may wear off, leading to rust and potentially reducing water quality. Additionally, galvanized steel pipes are prone to scaling and may develop clogs over time, affecting water flow.
It is crucial to keep in mind that traditional plumbing systems offer reliable options. Newer materials such as PEX (cross-linked polyethylene) pipes are gaining popularity because of flexibility and ease of installation.
Modern Plumbing Systems
PEX Plumbing
In new homes, modern plumbing systems work to ensure efficient water flow and durability. One of the popular choices for water piping in new homes is PEX (cross-linked polyethylene) plumbing. PEX pipes are flexible and easy to install, making them a cost-effective option for residential plumbing. Since this pipe can get any shape easily bending and compressing is much easier. Which is why they are useful for various plumbing applications in new construction projects.
CPVC Plumbing
Another type of plumbing material useful for modern homes is CPVC (Chlorinated Polyvinyl Chloride). CPVC pipes are known for their resistance against corrosion and high temperatures. Which is why they are suitable for hot and cold water distribution systems. These pipes are lightweight, easy to install, and have a relatively low cost. This makes the CPVC a popular choice for residential plumbing installations.
ABS Plumbing
ABS (Acrylonitrile Butadiene Styrene) pipes for plumbing are very common for drainage and waste systems in new homes. ABS pipes are lightweight, durable, and resistant to chemicals, making them a suitable choice for plumbing applications. Usual for vent and drain lines in residential plumbing systems, providing reliable and long-lasting performance.
Comparing What Type Of Plumbing Is Used In New Homes
New homes feature a variety of plumbing options, including copper, PEX, and PVC pipes. Each material has its benefits and drawbacks, making it important to weigh the pros and cons before making a decision.
For new homes, the types of pipe in plumbing greatly impact the overall functionality and longevity of the system. In this section, we will compare types of pipes for plumbing systems. Which will help you identify and types of pipes helpful to you. For this, we will go through all the pros and cons of each option. From durability and lifespan to installation costs and environmental impact. We will delve into the factors that can influence your decision on what type of pipes are suitable for a new home.
Durability And Lifespan
Durability and lifespan are crucial considerations when it comes to choosing the right plumbing system for your new home. Here are some comparisons between different plumbing pipe types:
- Copper pipes: With their excellent corrosion resistance and proven longevity, copper pipes are a popular choice for many homeowners. They can withstand high pressures and are known for their durability which can last for several decades.
- PEX pipes: Cross-linking polyethylene (PEX) pipes are gaining popularity due to their flexibility and resistance to corrosion. With a lifespan of around 50 years, they offer a durable and long-lasting solution for new homes.
- CPVC pipes: Chlorinated polyvinyl chloride (CPVC) pipes are known for their resistance to scaling, corrosion, and high temperatures. With a lifespan of around 50 years, CPVC pipes provide a reliable option for new home plumbing systems.
- Galvanized steel pipes: Although galvanized steel pipes were common in the past. At present time their popularity and demand are declining. Due to their susceptibility to rust and corrosion over time. Their lifespan is typically around 40-50 years.
Installation Costs
The cost of installing a plumbing system is an important factor to consider when building a new home. Here’s a comparison of the installation costs associated with different types of plumbing:
| Plumbing Pipe Type |
Installation Costs |
| Copper pipes |
$8 – $15 |
| PEX pipes |
$0.75 – $2 |
| CPVC pipes |
$1.5 – $3 |
| Galvanized steel pipes |
$10 – $18 |
Please note that these costs may vary depending on factors. Things like location, size of the home, local labor rates, and the complexity of the installation. All of this can raise the cost of installation for an overall setup.
Maintenance Requirements
Maintaining your plumbing system is essential for its long-term performance. Here’s a comparison of the maintenance requirements for different plumbing pipe types:
Copper pipes
Copper pipes require minimal maintenance and are less prone to leaks and blockages.
PEX pipes
PEX pipes have fewer joints and fittings, reducing the chances of leakage. They also have excellent resistance to scaling and corrosion.
CPVC pipes
CPVC pipes are low-maintenance and do not require frequent upkeep. They are resistant to scaling, corrosion, and microbial growth.
Galvanized steel pipes
Galvanized steel pipes tend to require more maintenance due to their susceptibility to rust and corrosion. Regular inspections are necessary to prevent leaks and ensure optimal performance.
Water Flow And Pressure
The water flow and pressure in your home are crucial for day-to-day activities. Different plumbing pipe types can have varying effects on water flow and pressure:
- Copper pipes: Copper pipes provide excellent water flow and maintain consistent pressure throughout the system. They are ideal for homes that require high water pressure.
- PEX pipes: PEX pipes offer excellent water flow and have the advantage of being highly flexible, allowing for easy installation in tight spaces.
- CPVC pipes: CPVC pipes maintain good water flow and pressure, making them suitable for most residential plumbing needs.
- Galvanized steel pipes: Over time, galvanized steel pipes can develop restrictions and reduce water flow due to rust and corrosion buildup.
Environmental Impact
Considering the environmental impact of your plumbing system is essential for sustainable living. Here’s a comparison of the environmental impact these types of pipe tend to do in plumbing:
Copper pipes
Copper is a recyclable material, making copper pipes environmentally friendly. However, the mining and production processes might have certain environmental impacts.
PEX pipes
PEX pipes are generally environmentally friendly due to their energy-efficient production process. They also have a lower carbon footprint in comparison to other materials.
CPVC pipes
CPVC pipes are recyclable and require less energy during the manufacturing process. Which is why they are more environmentally friendly compared to some alternatives.
Galvanized steel pipes
Galvanized steel pipes have a higher environmental impact due to the energy-intensive manufacturing process and the potential for rust and corrosion to contaminate water sources.
Ultimately, having everything in consideration the impact it leaves on leaves room for discussion. So, in order to find out what type of plumbing system that best fits your new home. You need to have everything single detail under your command for better results.
4. Factors To Consider When Choosing What Type Of Plumbing Is Used In New Homes
Factors to consider when choosing the type of plumbing in new homes include budget, water efficiency, durability, and maintenance requirements. It is important to assess these factors to ensure optimal performance and long-term satisfaction with the plumbing system.
When it comes to choosing the right plumbing system there are several important factors that you need to consider. Each factor plays a crucial role in determining what type of plumbing is best suited for your specific requirements. By carefully considering these factors, you can ensure that your new home’s plumbing system not only meets your expectations. But also provides an efficient and reliable water supply throughout your house.
Budget
In any building project, budget is a critical factor that influences the decision-making process. The same applies to choosing a plumbing system for your new home. Your budget will determine the type of plumbing pipes, fittings, and fixtures that you can afford. It is important to strike a balance between cost and quality when selecting plumbing materials. While it may be tempting to opt for cheaper options. It is crucial to consider the long-term maintenance and durability of the plumbing system. Choosing high-quality plumbing pipes may require a higher initial investment. But it is worth the investment. As it can save you from costly repairs and replacements in the future.
Water Quality
The quality of water in your area is another crucial factor. It helps immensely when choosing the type of plumbing system for your new home. Different areas have different levels of water hardness. Which can have a significant impact on the lifespan and performance of your plumbing pipes. Hard water contains minerals that can cause corrosion and buildup within the pipes. Which leads to reduced water flow and potential blockages. By considering the water quality in your area, you can select pipes that are resistant to corrosion. Fairly helping you to minimize the risk of scaling and clogging.
Climate
The climate of your location plays a significant role in determining the type of plumbing pipes that are best for your new home. Extreme temperatures, such as freezing winters or scorching summers, can have adverse effects on certain types of pipes. In regions with freezing temperatures, it is important to choose pipes that are resistant to freezing and bursting. In areas with high heat or direct sunlight. Selecting pipes with UV resistance can prevent degradation and prolong the lifespan of your plumbing system.
Future Renovations
Consider any potential future renovations or expansions that you may have in mind for your new home. If you anticipate making changes to the layout or adding additional fixtures in the future. It is essential to choose a plumbing system that offers flexibility and easy modifications. Some plumbing systems allow for more straightforward alterations, while others may require more extensive and costly modifications. By considering future renovations, you can ensure that your plumbing system is adaptable and can accommodate any changes or upgrades in the future.
Frequently Asked Questions
What Type Of Plumbing Pipes Are Commonly Used In New Homes?
Commonly used plumbing pipes in new homes include copper, PVC, and PEX. Each has its benefits and suitability.
How Long Does Plumbing Last In A New Home?
The lifespan of plumbing in a new home varies. Typically it ranges from 25 to 40 years, depending on the materials used and maintenance.
What Are The Advantages Of Using Pex Plumbing In New Homes?
PEX plumbing offers advantages such as flexibility, resistance to freezing, and easier installation, making it a popular choice for new homes.
Conclusion
New homes typically use a combination of PVC, copper, and PEX plumbing pipes. Each material has its advantages. So it’s important to consider factors like cost, durability, and building codes when choosing. Then the right knowledge about What Type of Plumbing is Used in New Homes really leaves its fair share of importance. By knowing about the options, homeowners can make informed decisions for their plumbing needs.
 Call Now