Garbage disposals are indispensable appliances in modern kitchens. As it helps effortlessly dispose of food waste and maintain cleanliness. However, like any mechanical device, they require occasional maintenance to ensure peak performance. One common issue that arises is the loosening of the disposal blades. Leading to reduced efficiency and potential damage. In this comprehensive guide, we’ll explore the process of how to tighten garbage disposal blades. We will discuss the steps to safely tighten and sharpen the garbage disposal blades. Which empowers you to maintain your kitchen appliance and extend its lifespan.
How Does a Garbage Disposal Unit Work
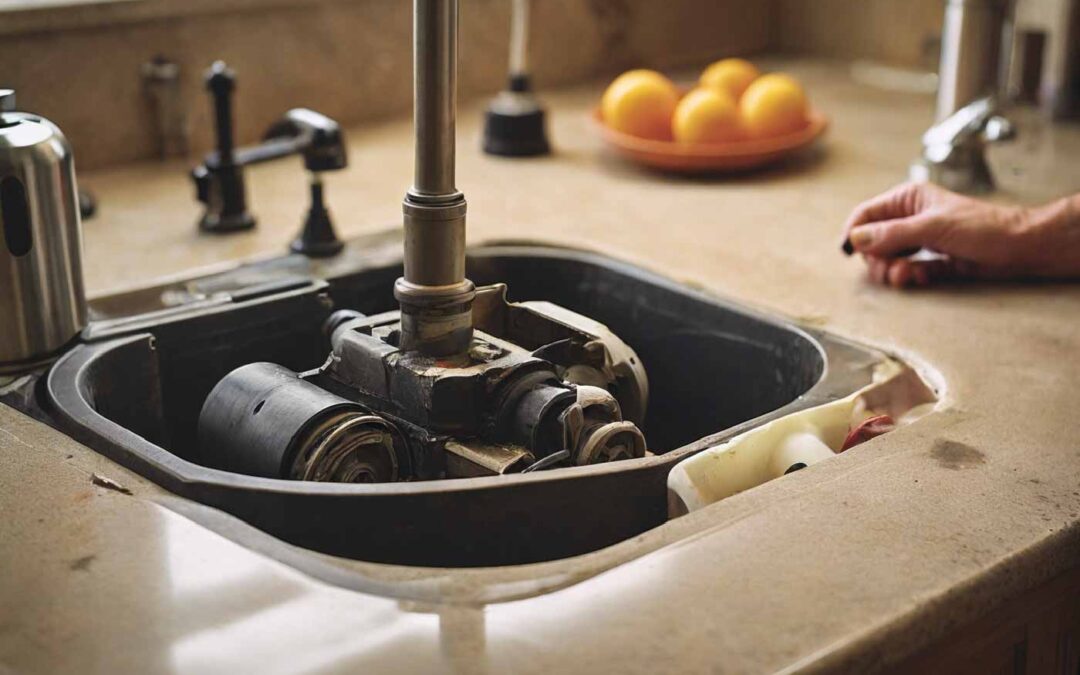
A garbage disposal unit is a mechanical device underneath your kitchen sink. Its design allows the shredding and disposal of food waste. It consists of several key components, including a motor, a shredding chamber, and sharp blades.
Motor: The motor is the heart of the garbage disposal unit. When you turn on the disposal, the motor activates, generating rotational force that powers the rest of the unit’s components.
Shredding Chamber: The motor has a connection with the shredding chamber. Where food waste deposits for grinding. This chamber typically contains a rotating flywheel or impeller that spins at high speeds.
Sharp Blades: Attached to the flywheel are sharp blades that shred food waste into smaller particles. These blades are crucial for the effective grinding and disposal of food waste.
Waste Disposal: As the blades shred the food waste. It helps the particles flush down the drain with water, leaving your sink clean and free of debris.
What is the Importance of Sharp Blades
The blades within a garbage disposal are essential for effective grinding and disposal of food waste. Over time, these blades can become dull due to regular use, impacting their ability to efficiently break down waste. Sharpening the blades not only restores their cutting edge but also enhances the disposal’s performance by reducing strain on the motor and preventing clogs. Regular maintenance, including blade sharpening, is crucial for ensuring the optimal functioning of your garbage disposal.
Step-by-step guide on how to tighten garbage disposal blades
Tightening the garbage disposal unit is important. As these blades become dull due to time and lose their edges they lose their efficiency. This can result clog in the pipe or less efficiency. Learning how to tighten garbage disposal blades is particularly fair and important. Let’s delve in and learn how we can tighten up the garbage disposal blades. So, that we can have better efficiency and comfort.
Steps to Sharpen Garbage Disposal Blades
Use a Hex Key or Wrench
Most how to garbage disposals blades have a hexagonal hole at the bottom. Which allows access to the flywheel. Insert an appropriately sized hex key or wrench into this hole. The size it requires can vary, so refer to the manufacturer’s instructions for the correct size.
Rotate the Blades
Turn the hex key or wrench back and forth a few times to manually rotate the blades. This movement helps dislodge any debris or food particles that may be stuck on the blades, improving their cutting ability.
Repeat the Process
Continue rotating the blades manually with the hex key or wrench, moving them in both directions. This action helps to sharpen the edges of the blades by removing any dull spots or buildup.
Flush with Water
After sharpening the blades, run cold water through the disposal unit for a few moments to flush away any loosened debris or residue.
Steps on how to fix a garbage disposal unit
Tighten the Blades
Insert the hex key into the central hole at the bottom of the disposal unit. Turn the hex key clockwise to tighten the blades. Apply moderate pressure, but avoid over-tightening, as this could damage the unit.
Sharpen the Blades
After tightening the blades, it’s essential to sharpen them for optimal performance. Use a sharpening tool to carefully sharpen each blade, following the manufacturer’s instructions. This process restores the blades’ cutting edge, enhancing their efficiency in grinding food waste.
Test the Disposal
Once you’ve completed the maintenance tasks, restore power to the disposal unit and test its functionality. Run water and activate the disposal to ensure everything is working correctly. Listen for any unusual noises or vibrations that may indicate further issues.
Conduct Final Safety Checks
Before concluding the maintenance process, conduct final safety checks. Ensure there are no leaks, unusual sounds, or odors emanating from the disposal unit. If everything appears to be in order, you’ve successfully tightened and sharpened the blades, optimizing the performance of your garbage disposal.
Repeat as Needed
Depending on the condition of the blades and the extent of buildup, you may need to repeat the sharpening process multiple times to achieve optimal results.
Safety Precautions
Prioritize Safety
Before beginning any maintenance work, prioritize safety. Start by disconnecting the power to the garbage disposal unit to prevent accidental start-ups. Locate the corresponding circuit breaker in your electrical panel and switch it off. Additionally, wear protective gloves to safeguard your hands during the maintenance process.
Access the Disposal Unit
Locate the how to tighten garbage disposal blades unit beneath your kitchen sink. Use a flashlight to illuminate the area, as it may be dim and difficult to see. Ensure there are no obstructions hindering access to the disposal.
Identify the Reset Button
Familiarize yourself with the location of the reset button on the disposal unit. This button serves to reset the unit in the event of overload or overheating. Pressing it can help troubleshoot potential issues before proceeding with maintenance.
Cleaning Garbage Disposal Unit
Cleaning your garbage disposal unit is an essential part of regular maintenance to keep it functioning efficiently and prevent unpleasant odors. Here’s a step-by-step guide on how to clean your garbage disposal unit effectively:
Materials You’ll Need: Gather the following materials:
Rubber gloves
Dish soap or vinegar
Baking soda
Ice cubes
Lemon or citrus peels (optional, for deodorizing)
Scrubbing the Exterior
Begin by cleaning the exterior of the disposal unit. Use a damp cloth with mild dish soap to wipe down the surface, removing any dirt, grime, or food residue.
Cleaning the Rubber Flap
Lift the rubber flap inside the disposal unit and inspect it for any buildup or debris. Use a brush or scrubbing pad to clean the flap thoroughly, removing any accumulated residue.
Removing Debris
Look inside the disposal chamber for any visible food particles, debris, or slime buildup. Use tongs or a brush to remove any large or stubborn debris that may be stuck to the walls or blades of the unit.
Deodorizing with Citrus
Drop a few lemon or citrus peels into the disposal chamber for a natural deodorizing effect. Run cold water and turn on the disposal to grind the peels, releasing their fresh scent throughout the unit.
Using Ice Cubes and Baking Soda
Freeze an ice cube tray filled with a mixture of water and white vinegar or water and lemon juice. Drop a few ice cubes into the disposal chamber along with a tablespoon of baking soda. Turn on the disposal and run cold water to grind the ice cubes and baking soda, effectively removing stubborn residue and odors.
Rinsing with Hot Water
After cleaning, flush the disposal unit with hot water to wash away any remaining debris and thoroughly clean the chamber.
Regular Maintenance
Incorporate regular cleaning into your maintenance routine to keep your garbage disposal unit clean, odor-free, and functioning efficiently. Run cold water while using the disposal to flush away food particles, and avoid dumping large or fibrous items into the unit.
Additional Common Reasons for Disposal Malfunctions
Here are the common reasons why garbage disposal units may have difficulties working. Which may cause damage or better productivity problems in our daily lives. So, knowing about certain things about disposal malfunction can work like a charm when the time comes. Here`s how:
Jamming
Food items like bones, fruit pits, potato peels, or coffee grounds can jam the disposal’s impeller plate or blades, hindering their rotation. This can result in a humming sound when the disposal is on but it’s not grinding any action.
Overload or Overheating
Excessive amounts of food waste or prolonged operation without breaks can overload the disposal’s motor. In response, the internal overload protector may trip or the motor may overheat, causing the unit to shut off automatically.
Electrical Issues
Problems with the electrical supply, such as a blown fuse, tripped circuit breaker, loose wiring connections, or a faulty switch, can prevent the disposal from receiving power or functioning correctly.
Conclusion,
In conclusion, knowing how to tighten garbage disposal blades is essential for maintaining optimal performance. Following the safety precautions and steps outlined in this guide ensures efficient operation, preventing clogs and prolonging the unit’s lifespan. Prioritize safety, consult the manufacturer’s instructions, and incorporate regular maintenance to keep your garbage disposal functioning effectively, making kitchen cleanup hassle-free.
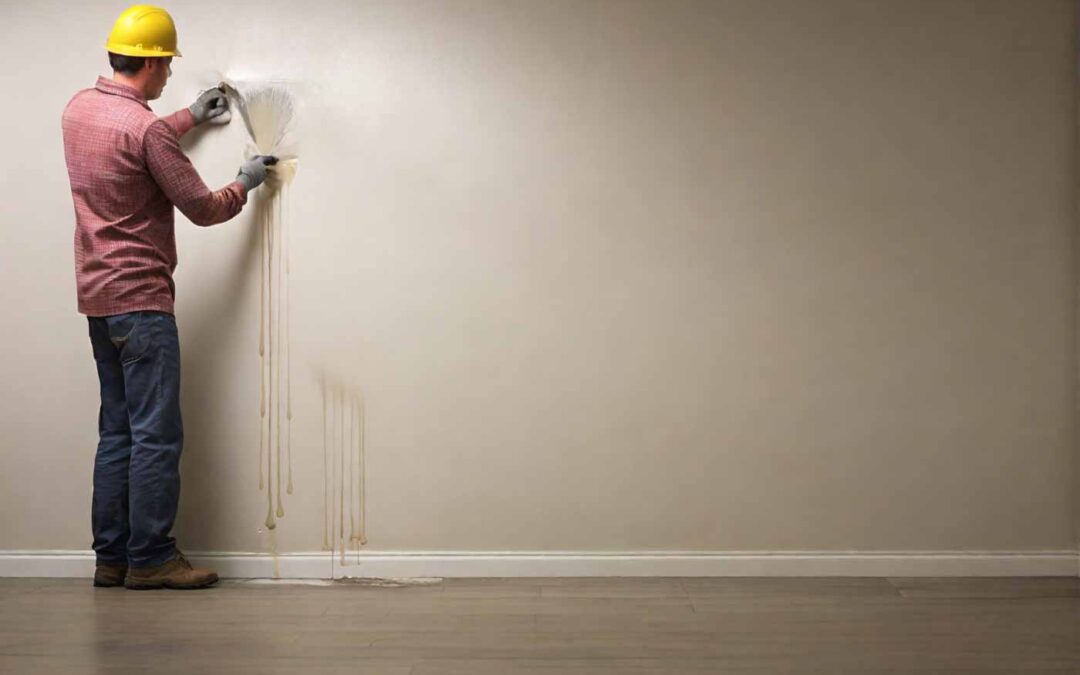
Spills behind walls are not difficult to spot, but on the off chance that not settle rapidly. They can truly harm your domestic. These spills are infamous for shape development, auxiliary harm, and water defilement, which can be hurtful to well-being and cash.
Learning how to find a leak behind a wall is critical. Continue to understand your home country because you will recognize hidden problems early and solve them. Be able to detect and repair water leaks on time. Homeowners can protect their living space from the negative effects of moisture escape. Thus ensure a safe and healthy environment and secure your business.
Signs on How to find a leak behind a wall
The most prominent thing to look for before going for any kind of solution is the signs. Water leak signs are the most essential element for any kind of permanent solution against this disaster. How to find a leak behind a wall is simple. But it requires the correct amount of information in your hand. So, as it suggests learning the signs of leaks is your first and most essential priority.
Here are some common signs which may indicate that your house has a water leak:
Unusual Odors
Cause and Identification
Musty or moldy smells often arise from damp conditions behind walls where mold and mildew can thrive unseen. These odors are particularly noticeable in areas that are usually dry and well-ventilated. The presence of a persistent, unpleasant smell, similar to wet socks or rotting wood. Is a strong indicator of hidden moisture.
Action Steps
Investigate areas where the odor is strongest to narrow down the possible location of the leak. Continuous ventilation and the use of dehumidifiers can help manage the symptoms but won’t solve the underlying issue.
Mold and Mildew Growth
Detailed Insight
Mold and mildew prefer dark, moist environments, making the hidden spaces behind walls ideal for their growth. While bathrooms and kitchens are common mold locations due to their high moisture levels. But finding mold in other areas, like living rooms or bedrooms, is a red flag for hidden leaks.
Health Considerations
Prolonged mold exposure can lead to health issues, especially for individuals with allergies, asthma, or compromised immune systems.
Action Steps
If mold is found, it’s crucial to locate and repair the source of moisture. Afterward, mold remediation by professionals is recommended to ensure it is thoroughly removed.
Staining
Water stains may appear as discolored patches with a yellowish or brownish tint. They often have a ringed appearance, growing darker towards the center where the water is most concentrated. The location and pattern of staining can offer clues about the leak source. For instance, stains directly below a bathroom or kitchen might indicate leaking pipes or fixtures in those areas.
Peeling Paint or Wallpaper
Moisture breaking down the adhesive properties of paint or wallpaper glue leads to peeling, blistering, or bubbling surfaces. This sign is often visible in the early stages of a leak, making it a valuable early warning. Regularly inspect walls for any changes in the texture or appearance of paint and wallpaper. Especially in areas known for higher moisture levels.
Warped Walls
Warping occurs when the drywall absorbs water and swells, leading to a bow or curve in the wall’s surface. This can eventually lead to structural damage if the water exposure continues. Warped walls can sometimes be subtle and require a keen eye or a straightedge tool to detect slight deviations from flatness.
Increased Water Bills
An unexplained spike in water bills, despite normal water use patterns, often points to leaks. Hidden leaks can waste a significant amount of water, leading to these unexpected increases. Modern smart water meters and leak detection systems can help monitor water usage and identify leaks. Their early detection allows sending alerts when abnormal water flow is under the radar.
Steps of How to find a leak behind a wall
If your first job is to ensure the probability of leaks behind the walls. The second step is How to find a leak behind a wall. Expanding on the steps to locate and address leaks behind walls. As well as strategies for prevention and maintenance. Provides a more holistic approach to managing this common household issue. Here’s a deeper dive into each phase of the process:
Detailed Steps to Locate a Leak
Sight: Beyond obvious signs like mold, pay attention to subtle changes in wall texture or color. Water damage might also manifest as slight discoloration before mold appears.
Smell: A musty odor is a strong indicator of mold or mildew, which thrives in damp environments. This smell is often most noticeable in enclosed spaces.
Sound: Listen for the sound of dripping or running water when the house is quiet. Especially during times when water use is minimal.
Check the Plumbing Fixtures
Look for leaks around the base of toilets, under sinks, and around shower and tub enclosures. Sometimes, what appears to be a leak behind a wall is a leak at a fixture. Which can travel along a pipe or the surface of the wall. For toilets, a dye test can help identify silent leaks. Adding a few drops of food coloring to the tank and waiting without flushing can reveal a leak if the color appears in the bowl.
Use a Moisture Meter
Place the moisture meter against the wall at various points to get a reading of the moisture levels. High moisture levels can indicate the presence of a leak.
Types of Moisture Meter
Pin-Type: Ideal for precise, targeted measurements in specific areas. These meters use pins to penetrate materials and provide moisture readings at those points.
Pinless: Best for scanning larger areas without damaging surfaces, using electromagnetic sensors to detect moisture levels across broad sections.
Understand the baseline moisture level for your home’s materials to accurately identify anomalies. This can vary depending on the type of construction and local climate.
Thermal Imaging
These devices detect temperature differences in walls, with cooler areas potentially indicating moisture. They can provide a visual map of moisture without any need for physical alterations to the wall. While thermal imaging can be done by homeowners. A professional assessment might provide more accurate interpretations of the images.
Inspect with a Camera
Insert an endoscope or inspection camera into small openings. Such as where plumbing or electrical fixtures are, to examine hidden areas of walls. Many of these devices can record video or take pictures. Allowing for a detailed inspection of areas that are otherwise inaccessible.
Prevention and Maintenance
For any kind of problem preventive methods are the best solution. Preventive solutions ensure that persistent problems do not continue for longer periods. Especially for houses, homeowners fear the most when they face the problem of leaking behind their walls. How to find a leak behind a wall has its fair value and reasoning. As well how to prevent it from happening has its importance as well. This is why some preventive steps can be a matter of concern for long-term solutions.
Regular Inspections
Regularly inspect areas prone to water damage, including under sinks, around appliances, and in basements or crawl spaces. Consider having your plumbing system professionally inspected annually, especially if your home is older or has a history of plumbing issues.
Maintain Your Plumbing System
Even small leaks can lead to significant damage over time, so address them as soon as they are detected. In cold climates, prevent pipes from freezing and bursting by insulating them or using heat tape.
Install Leak Detection Systems
Install these devices near water heaters, washing machines, and other appliances to alert you to leaks. Consider investing in a system that monitors your home’s entire water supply for unusual flow. Which will indicate a leak, offering real-time alerts and the ability to shut off water automatically.
Fixing the Leak
Calling a Professional
If the leak’s source is unclear and you have extensive damage. Otherwise, your repair requires specialized knowledge. Calling a professional plumber or water damage restoration expert is essential. Look for licensed, insured professionals with good reviews and experience with similar issues.
Doing It Yourself
Gather the necessary tools and materials, such as replacement pipes, fittings, drywall repair kits, and paint. Turn off the water supply before beginning any repairs to avoid further damage or injury. Use detailed repair guides or tutorials specific to your situation, and consider consulting with a professional before starting.
Conclusion
Finding and fixing a leak behind a wall requires patience, the right tools, and sometimes the expertise of a professional. By following the steps outlined in this guide, you can address leaks effectively. Preventing further damage to your home and safeguarding your health and finances. Always prioritize safety and don’t hesitate to seek professional help when in doubt.
Pouring boiling water down a drain to address frozen pipes may seem like a direct and efficient solution. However, this method, despite its apparent simplicity, entails significant risks and might not be the most advisable strategy for mitigating frozen plumbing issues. In this article, we delve into the consequences of using boiling water to thaw frozen pipes and suggest alternative, safer methods for managing this prevalent winter plumbing challenge. Asking “can you pour boiling water down the drain to unfreeze pipes?” reveals a common misconception about a seemingly quick fix that can cause more harm than good.
What Is A Frozen Pipe
When temperatures significantly drop, water inside pipes can freeze, leading to expansion and increased pressure on the pipes. This condition can restrict water flow or even cause pipes to burst, resulting in substantial damage and necessitating expensive repairs. The instinctual response might be to rapidly thaw the ice using the hottest water available; however, this approach can be more detrimental than beneficial.
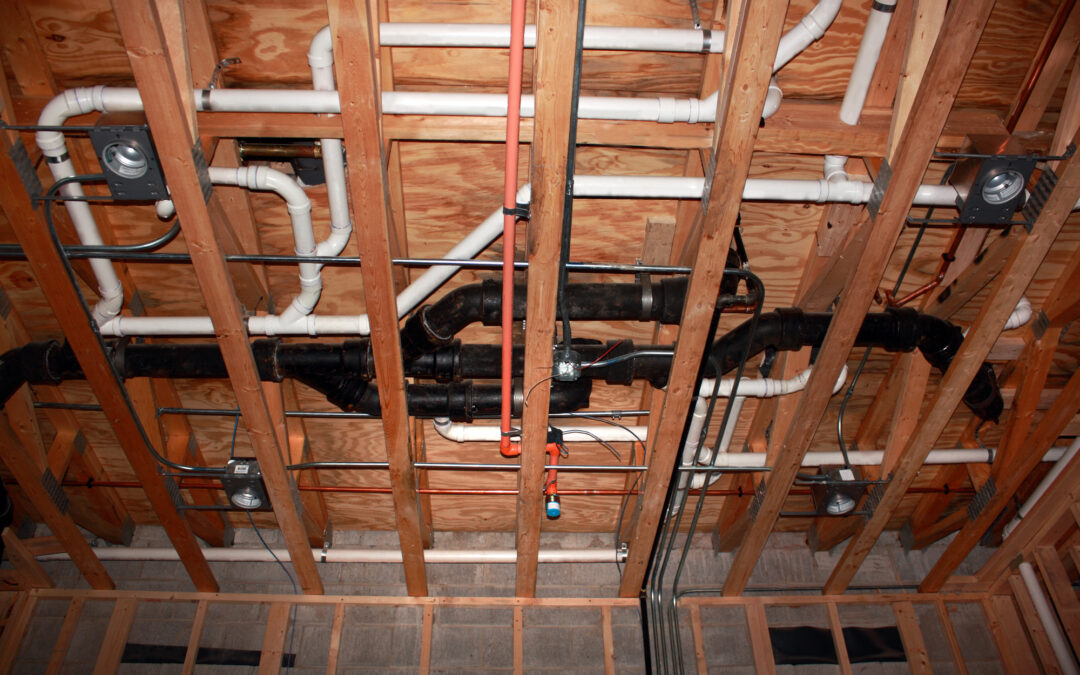
What Causes Drain Pipes to Freeze?
Drain pipes freeze due to a combination of factors, primarily exposure to severely cold temperatures and lack of insulation. When the water inside the pipes has exposure to freezing temperatures. It starts to freeze, starting from the outer walls of the pipe and moving inward. This process can be exacerbated by several conditions:
Drops in Temperature
Sudden and extreme drops in temperature can cause the water in pipes to freeze more quickly than the heating system can compensate for.
Poor Circulation
Pipes with the most rare use or little water flow are more likely to freeze. It is casual if the moving water has a lower freezing point than stagnant water.
Thermal Bridging
When pipes are in contact with materials that conduct cold more efficiently, such as metal conduits or external walls without proper insulation, they can freeze more readily.
Wind Chill
Pipes exposed to the exterior or in poorly sealed spaces can freeze due to wind chill, where the cooling effect of wind lowers the temperature around the pipes more than the ambient temperature.
What Needs to Be Done for a Frozen Burst Pipe?
In the event of a frozen burst pipe, swiftly shut off the water main, drain the pipes, turn off nearby electricity, document the damage, contact a professional for repairs, and begin cleanup to minimize water damage and hasten recovery. When a pipe freezes and bursts, it requires immediate action to minimize water damage and facilitate repairs:
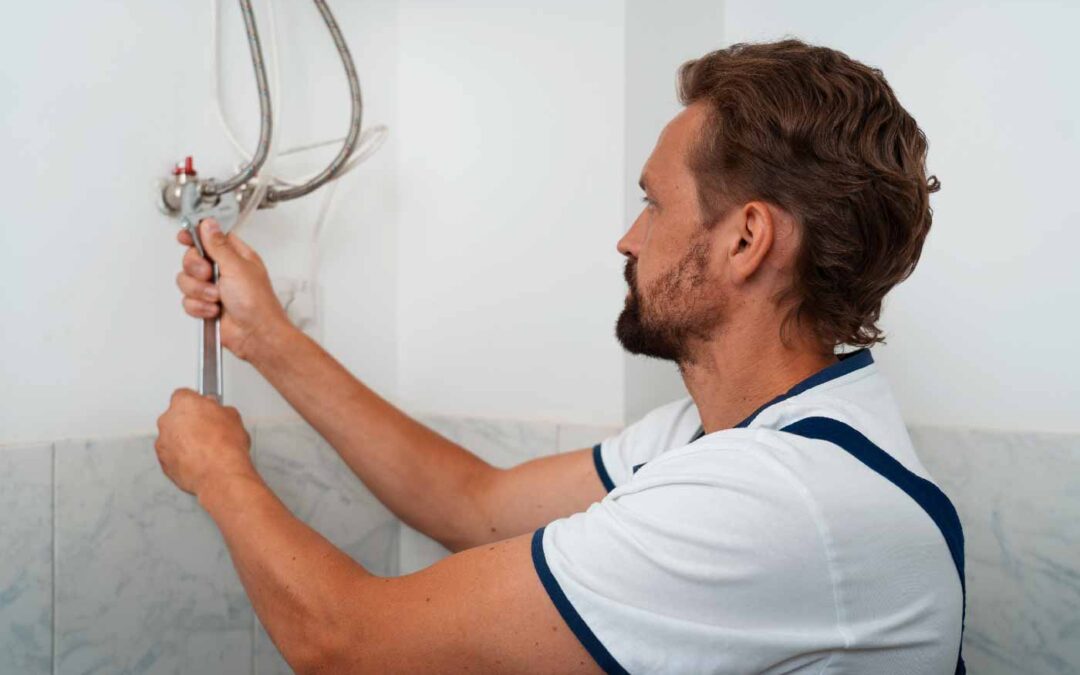
Shut Off the Water Main
Immediately turn off the main water supply to the house to stop water flow to the burst pipe. This is the most crucial step to prevent further water damage.
Drain the Pipes
Open all faucets to drain the remaining cold water and relieve any built-up pressure. This helps to prevent any more water from leaking through the burst pipe.
Turn Off Electricity
If the burst pipe is near electrical lines or outlets, turn off the electricity to that area to prevent electrical hazards.
Document the Damage
Take photos or videos of the damage for insurance purposes. Be thorough in documenting all affected areas and items.
Contact a Professional
A burst pipe often requires professional repair. Contact a licensed plumber to assess the damage and replace or repair the burst section of the pipe.
Begin Cleanup Immediately
To prevent mold and further water damage, start cleaning up the water as soon as possible. Use towels, mops, and a wet/dry vacuum if available. Consider hiring a professional water damage restoration service for extensive damage.
Insulate Pipes
Once you make repairs, take preventive measures to avoid future freezes by insulating pipes. Especially take care of the pipes that are exposed or in unheated areas.
Addressing a burst pipe efficiently can help mitigate the damage and restore your plumbing system’s integrity. It’s also important to take proactive steps to prevent pipes from freezing in the future, such as adding insulation and keeping your home at a consistent temperature.
Can you pour boiling water down the drain to unfreeze pipes?
No, we do not recommend pouring boiling water down the drain to unfreeze pipes. While this method might seem like a quick fix, it can cause more harm than good.
Here are the reasons why:
Thermal Shock
Sudden exposure to extreme temperatures can lead to thermal shock in pipes, particularly those made of metal. This rapid change can cause pipes to crack or burst due to the abrupt expansion and contraction, exacerbating the existing problem.
Material Damage
Different materials react differently to heat. PVC pipes, for example, may become soft or warp when exposed to boiling water, compromising their structural integrity. Metal pipes, while more resistant to heat, are not immune to the adverse effects of thermal shock.
Ineffectiveness of Thick Ice
Boiling water may initially seem effective, but its heat dissipates quickly upon contact with ice, reducing its efficacy. It might melt a thin layer of ice but is unlikely to thaw a pipe that is completely frozen through.
Potential for Injury
Pouring boiling water poses a risk of burns or injuries. The process of carrying and pouring the water, especially in a confined space or near slippery surfaces, can lead to accidents.
Alternative Solutions
If pouring boiling water down the drain is not feasible or safe, consider these alternative methods to unfreeze pipes:
Apply Heat
Use a hairdryer, heat lamp, or heating pad to apply gentle heat directly to the frozen area of the pipe. Be sure to keep flammable materials away from the heat source and avoid using open flames, such as blowtorches, which can pose a fire hazard.
Use a Pipe Thawing Device
Pipe thawing devices, available at hardware stores, are designed specifically to safely thaw frozen pipes. These devices use an electric current to generate heat and can be effective for stubborn blockages.
Seek Professional Help
If you’re unable to thaw the pipes yourself or if you suspect a pipe may be damaged, it’s best to seek the assistance of a licensed plumber. A professional can safely assess the situation, thaw the pipes, and make any necessary repairs to prevent future issues.
Step-by-Step Process to Thaw Frozen Pipes
Turn Off the Water Main
Before attempting to thaw the pipe, shut off the main water supply. This precaution reduces water flow and pressure to the area, decreasing the risk of a pipe bursting during the thawing process.
Open Faucet
Open the faucet that the pipe supplies. This allows water to flow through the pipe, helping to melt the ice and relieve built-up pressure.
Apply Heat
Begin to apply heat to the section of the pipe that is frozen using a hair dryer, heat lamp, electric heating pad, or towels soaked in hot water. Never use open flame devices such as a blowtorch, kerosene or propane heater, or charcoal stove, as these can cause damage or start a fire.
Thaw from Faucet Backwards
Start near the faucet and work your way down to the coldest section of the pipe. This approach helps ensure that melting ice and steam can escape through the open faucet.
Check for Leaks
After thawing the pipe and restoring water flow, check for any leaks or damage along the pipe. If you find any damage, turn off the water supply and contact a professional plumber for repairs.
Safer Alternatives to Thaw Frozen Pipes
Given the risks associated with pouring boiling water down a drain, consider these safer alternatives:
Gradual Warming
Use a hair dryer, heat lamp, or portable heater to gently warm the affected section of the pipe. Keep the device moving to distribute heat evenly and prevent overheating in any single area.
Electrical Heating Tape
Apply electrical heating tape directly to the pipe. This tape distributes heat along the pipe’s length, helping to thaw the ice without causing damage.
Increase Ambient Temperature
If the frozen pipe is in a location like a basement or a garage, raising the overall temperature of the room can help thaw the pipe gradually.
Professional Assistance
For severe cases, or if you are unsure about safely thawing the pipes yourself, it is advisable to seek professional plumbing services. Plumbers have the tools and expertise to address frozen pipes without causing further damage.
Maintaining the Perfect House Temperature
To prevent pipes from freezing and to maintain an energy-efficient home, it’s crucial to keep your house at an optimal temperature during the winter months. The ideal house temperature for both comfort and efficiency, according to the U.S. Department of Energy, is:
68°F (20°C) during the day: This temperature is comfortable for most people and can help conserve energy when you’re home and awake.
Lower at night or when you’re away: Reducing the thermostat by 7-10 degrees Fahrenheit (about 4-6 degrees Celsius) from your daytime setting during sleeping hours or when the house is unoccupied can save energy and reduce your heating bill without risking frozen pipes.
Preventive Measures for Freezing Pipes
To prevent the inconvenience and costly repairs associated with frozen and burst pipes during the winter, proactive measures are essential. By insulating pipes, maintaining a consistent indoor temperature, and addressing vulnerabilities in your plumbing system, you can protect your home against freezing pipes.
These steps not only ensure a continuous water supply but also safeguard your home’s structural integrity and prevent potential water damage, keeping your living environment warm and secure against the cold.
Prevention is key to avoiding the hassle and expense of dealing with frozen pipes. Thus, the question “Can you pour boiling water down the drain to unfreeze pipes?” should be approached with caution, favoring more protective and effective measures.
Insulate Pipes
Use foam pipe insulation to cover exposed pipes in unheated areas like basements, attics, and garages. For extra protection, consider using thermostatically controlled heat tape.
Seal Leaks
Identify and seal leaks where cold air may enter, especially around utility service areas, windows, and doors. Even small openings can lead to significant heat loss and expose pipes to freezing temperatures.
Let Faucets Drip
Allowing a trickle of water to flow through the pipes can prevent freezing. The movement of water relieves built-up pressure in the pipes, reducing the chance of a burst.
Drain Systems
Before winter, drain water from swimming pool lines, sprinkler systems, and outdoor hoses. Close inside valves supplying outdoor hose bibs and open the outside hose bibs to allow water to drain.
Conclusion
While pouring boiling water down a drain might appear to be a quick fix for frozen pipes, the potential for damage and injury makes it an inadvisable solution. Adopting a more measured approach, such as gradually warming the pipes or employing professional help, is a safer and more effective strategy for resolving frozen plumbing issues. This highlights the importance of seeking safer alternatives rather than relying on the risky method of “can you pour boiling water down the drain to unfreeze pipes?”
FAQ
What is the first thing I should do if I discover a frozen pipe?
A: Immediately shut off the main water supply to prevent water pressure from building up and causing the pipe to burst. Then, gently apply heat to the frozen section using a hair dryer, electric heating pad, or warm towels. Avoid using open flames as they pose a fire risk.
How can I tell if a pipe is frozen before it bursts?
A: Look for visible signs such as frost on the pipe or bulging areas, which indicate freezing. Reduced water flow or no water coming out of the faucet can also signal a frozen pipe. In some cases, strange noises from the pipes, like clanking or bubbling sounds, might be heard.
Are certain pipes more prone to freezing than others?
A: Yes, pipes in unheated interior spaces like basements, attics, garages, and under kitchen and bathroom cabinets are more susceptible to freezing. Pipes running through exterior walls with insufficient insulation are also at high risk.
Can insulation help prevent pipes from freezing?
A: Absolutely. Insulating exposed pipes with foam pipe insulation helps maintain higher temperatures in the pipes, significantly reducing the risk of freezing. For extra protection in very cold climates, consider adding electric heat tape before insulating.
What temperature should I keep in my house to prevent the pipes from freezing?
A: Keep your house temperature at least 68°F (20°C) during the day. At night or when you are away, it can get lower slightly. So, ensure it never falls below 55°F (13°C) to prevent the interior pipes from freezing, especially in extremely cold weather.
Tiling a bathroom is a transformative project that can significantly enhance the aesthetic appeal. Whether you’re planning a DIY project or considering hiring professionals. The timeline it requires is crucial for setting realistic expectations and a smoother renovation process. Several factors influence on How Long Does It Take to Tile a Bathroom. Let’s delve into these considerations and outline a general timeline. Which will help you plan your bathroom tiling project effectively.
How long does it take to tile a bathroom?
Tiling a bathroom can take approximately three to four full days for tiling a bathroom. This includes a shower with a tub. While larger projects need closer to a week to tile a bathroom. But causally It promptly takes up to one whole day or 6 hours at the least fro casual projects. Factors such as the complexity of the tile design and the installer’s proficiency directly impact the duration.
Preparation (1-2 days)
This initial phase includes all preparatory work, such as removing existing floor or wall coverings and making any necessary repairs.
Layout Planning (1 day)
Dry-laying tiles help in planning the layout and confirming measurements, especially important for patterns or designs.
Tile Installation (2-4 days)
The actual laying of tiles varies based on the above factors. This stage includes cutting tiles to fit around fixtures and ensuring each tile is properly aligned and level.
Grouting and Sealing (1-2 days)
After allowing the adhesive to set, grout is applied between the tiles, followed by cleaning off excess grout and applying a sealant if needed.
Curing and Final Touches (1-7 days)
The last step involves caulking, final cleaning, and allowing the installation to fully cure. While light use may be possible after 24 hours, heavy use should be avoided to ensure the integrity of the.
Factors Affecting Tiling Time
When it comes to tiling a bathroom, several factors can affect how long does it take to tile a bathroom. From the size of the bathroom to the type and size of tiles being used, each factor plays a role in determining the overall time required for tiling. Additionally, the level of preparation involved before tiling can also impact the timeline. In this blog post, we will explore these factors in detail to give you a better knowledge of long does it take to tile a bathroom.
Bathroom Size
Your bathroom size is one of the key factors in determining how long it will take to tile. Larger bathrooms naturally require more time and effort to cover the entire floor and walls with tiles. On the other hand, smaller bathrooms can be tiled relatively quickly. If you have a spacious bathroom, you can expect the tiling process to take longer compared to a smaller bathroom.
Tile Type And Size
The type and size of tiles you choose will also impact the time it takes to complete the tiling process. Larger tiles cover more space in a shorter amount of time, whereas smaller tiles can be time-consuming to install, especially if intricate patterns or designs are involved. Additionally, the type of tile, such as ceramic, porcelain, or natural stone, may require specific installation techniques, which can affect the overall tiling time.
Level Of Preparation
The level of preparation required before tiling can significantly influence the time it takes to complete the project. Proper preparation, such as cleaning the bathroom, and removing old tiles or flooring. Ensure the surface is level and smooth, is crucial to achieve a professional and durable result. The more preparation you need, the longer it will take to complete the tiling process. It is important not to rush the preparation stage to ensure a high-quality tiling job.
Overall, the time it takes to tile a bathroom depends on various factors. Including the size of the bathroom and the type along with the size of tiles you are using. This also requires a certain level of preparation. Each project is unique and may have its challenges and specifications. Consulting with a professional tiler can help you determine more accurate and specific requirements.
Preparation Time
Tiling a bathroom can take around three to four full days for a shower with a tub. And a full week for larger spaces that require tiling the shower floor. Factors such as familiarity with tilework and the complexity of the design can affect the time needed for the project.
Surface Preparation
Before tiling a bathroom floor or shower, proper surface preparation is essential. This step ensures that the tiles adhere securely and the final result is long-lasting. Surface preparation includes cleaning, leveling, and priming the floor or walls.
Start by removing any existing flooring or wall coverings, ensuring a clean and smooth surface.
Inspect for any damages or cracks and repair them accordingly.
If necessary, level the floor or walls using a self-leveling compound to create a flat and even surface.
Next, clean the surface thoroughly, removing any dust, grease, or debris that may hinder the tile adhesion.
Apply a primer to the surface to promote better tile adhesion and prevent moisture damage.
Tile Layout Planning
Proper tile layout planning is crucial to achieve an aesthetically pleasing and functional bathroom. This step involves determining the placement and pattern of the tiles before the actual installation process begins.
Measure the bathroom area accurately to determine the number of tiles needed.
Consider the size and shape of the tiles, as well as the necessary pattern. Such as diagonal, herringbone, or straight.
Layout the tiles on the floor or walls, ensuring a symmetrical appearance.
Make adjustments as necessary to avoid small, awkward cuts and ensure a visually appealing layout.
Once you are good with the tile arrangement. Mark the layout using guidelines or chalk lines for easy installation.
three hours, including surface preparation and tile layout planning. This crucial step ensures the success and longevity of the tile installation process. By taking the time to prepare the surface and plan the tile layout properly. You can achieve a stunning and durable tiled bathroom floor or shower.
Tiling Process
When considering how long does it take to tile a bathroom, the drying time for tile adhesive is a significant factor. Tiling a bathroom involves several essential steps that contribute to the overall timeline. The entire process includes tile installation, grouting, and sealing. Each stage demands attention to detail and precision, impacting the overall duration of the project.
Tile Installation
The tile installation phase determines the duration of the project. Factors such as the size of the area, the complexity of the design, and the installer’s expertise. All these directly influence the timeline of the project. Generally, for tile bathroom floors, it may take around 1-2 days to complete the installation process. On the other hand, for a shower tiling job, it can range from 3-4 days for a standard shower. While for larger projects It will require a whole week for more extensive spaces.
Grouting And Sealing
Once the tiles are laid, the subsequent grouting and sealing steps also play a significant role in the overall time to tile a bathroom. While grouting can take approximately 1-2 days for a bathroom. Sealing the tiles might add an extra 1-2 days to the project timeline. These phases are vital to ensure the durability and longevity of the tiling work. Thus requiring careful attention and a proper approach to implementation.
Completion And Clean-up
Tile installation in a bathroom can take anywhere from three to four full days. If it includes a shower with a tub, it can take up to a week. Factors such as tile design complexity and obstacles like fireplaces or cabinets can add additional time to the process.
Trim Work
Once the tiling of your bathroom is complete, the next step is to focus on the trim work. This includes installing baseboards, corner trims, and edging tiles to have a polishing look. The time it takes to complete the trim work depends on the complexity of your chosen design and the size of your bathroom. On average, you can expect this step to take a few additional hours to a day.
Cleanup And Final Inspection
After all the tiling and trim work is done, it’s time to clean up and do a final inspection. Cleaning up is an important step to ensure that your new bathroom looks its best. This includes removing any grout residue, wiping down the tiles, and polishing them to a shine.
Additionally, it’s important to inspect the tiling job to check for any uneven tiles. Including loose grout, or other imperfections that may need addressing. During the cleanup and final inspection process, it’s a good idea to take your time and ensure that everything is in top-notch condition. This will help you avoid any future issues and ensure the longevity of your newly tiled bathroom. On average, you can expect this step to take a few hours.
In conclusion, the completion and clean-up stage of tiling a bathroom includes the final inspection and cleaning. The time it takes to complete these steps varies depending on the complexity of the design and the size. However, with careful attention to detail and proper cleaning. You can ensure that your newly tiled bathroom will look stunning and ready to enjoy.
Frequently Asked Questions
Can You Tile A Bathroom In One Day?
Tiling a bathroom in one day is possible but depends on the size and complexity of the space. It typically takes a professional about a day to tile a regular sizing room. However, factors like extra patterns and smaller tiles can add time.
How Long Should It Take To Tile A Shower?
Tiling a shower typically takes 3-4 days for a standard size with a tub. Larger spaces or intricate designs may require up to a week. Difficulty, experience, and tile size can impact the timeline.
How Long Should A Tile Job Take?
Tiling a job typically takes 3-4 days for a shower with a tub and around a week for larger spaces. The duration depends on familiarity with tiling, space size, and complexity of the design. Professional installation of tiles in a casual room can take a day.
Conclusion
Tiling a bathroom can be a time-consuming process, with various factors that can affect the timeline. Depending on your level of expertise, the size of the space, and the complexity of the tile design. It can take anywhere from three to four full days for the whole installation.
It’s important to consider detailed patterns and smaller tiles, which can extend the time even further. Additionally, obstacles like fireplaces and cabinets can complicate the installation. Overall, tiling a bathroom requires careful planning and preparation to ensure a successful and timely completion.
Although it is a part of your living area, your basement is also a major part of your house. Helping you big time with protection from basement flood, to prevent this sump pumps are essential. But what if they fail to do their job? Let`s discuss the reasons for sump pump failure and what to do when this happens out of the blue.
What Does Sump Pumps Mean
Sump pump is an essential part of the waterproofing system like a second layer of guard. This helps to downpressure the extra water from overflowing in the house basement and decrease water pressure. Helping us to control the level of water due to natural reasons or man-made purposes.
Causes of Sump Pump Fail
Power Outages: Unoperatable due to power outages can deliver significant hassle. So, it is recommended to install a backup service.
Pump Overload: Considering the right size is a critical ratio to maintain as the device will try to uphold its work it also needs to able to handle the required pressure,
Stuck Switch: The floating switch helps a little but its auto functionality is a pain if it gets stuck.
Frozen or Clogged Discharge Pipe: Freezing temperatures or debris can block its normal functionality. Making them incapable of flowing water.
Lack of Maintenance: Without proper maintenance, the sump pump can fail regularly. This can affect the amount of service that was promised to be given.
How Sump Pump Fail Effect House Plumbing System
Failure of a sump pump can have disastrous and expensive effects:
Basement Flooding
Homeowner’s greatest nightmares, sump pump damage will frequently results in basement flooding. Water damage may casue problem on walls or within.
Mold and Mildew
Moisture can lead upto mold and mildew. Mold may cause harm to your health beacuse it could lead upto allergies, respiratory conditions.
Structural Damage
Structural integrity causally weakened by extended exposure to water. Which eventually lead to structural problems that comes with costly repair.
Financial Burden
Sump pump failure can have crippling financial repercussions. Repairs, replacements, and maybe mold and mildew treatment will cost money.
Ways to Resolve Sump Pump Fail
Battery Backup
If you have a sump pump, always install a battery backup system. So, that blackout and other electrical disaster doesn`t effect much. Consider looking at a water-powered backup system as well.
Appropriate Sizing
The sump pump you choose needs to be the required size you are needed. Small pump, will fail to withstand the amount of work you might need. Seek expert asvice if needed.
Frequent Testing
Check regualry for maintenance regularly. Fill it up and trigger the pump and confirm its functionality. Testing enables you to find and fix any problems before they get out of hand. Also try to note on regualr basis if you think something is odd.
Conclusion,
Sump pump failure is one of the greatest fear. But you can safeguard your basement from possible calamities by taking preventative steps and performing routine maintenance. So it is better not let sump pump fail in order to protect and save money. Consider getting in touch with experts at AcePlumbing if you’re having problems with your sump pump or need professional advice on how to keep your basement safe.
Tankless water heaters are becoming increasingly popular in homes across the country due to their energy efficiency and capacity to supply endless hot water. While they require less maintenance than traditional water heaters, they are not invulnerable to problems.
1. Lack of Hot Water
If you notice that your tankless water heater is not providing sufficient hot water, the problem may be due to a clogged or dirty filter, gas pressure issues, or a malfunctioning heating element. Check the filter and clean or replace it if necessary. If the issue persists, consider calling in a professional plumber to perform a thorough inspection.
2. Noisy Water Heater
Tankless water heaters may sometimes produce strange noises such as hissing, whistling, or gurgling sounds. These sounds may be caused by various issues, such as mineral buildup inside the pipes, air bubbles in the lines, or a loose part. If you notice any unusual noises coming from your water heater, turn it off and call a professional plumber to inspect and repair it.
3. Water Temperature Fluctuations
Another issue that you might encounter with your tankless water heater is fluctuations in water temperature. These fluctuations may be due to an improperly set temperature controller, a faulty heating element, or a problem with the water flow sensor. To troubleshoot this issue, check the controller settings, and adjust them if necessary. If the issue persists, call in a professional plumber to diagnose and repair the problem.
4. Error Codes
Modern tankless water heaters are usually equipped with digital displays that show error codes when a problem arises. These error codes may indicate issues such as a failed igniter, a gas leak, or low water pressure. If you see an error code on your water heater display, consult the manual for guidance or call a professional plumber to diagnose and repair the problem.
5. Lime Scale Buildup
One of the most common problems with tankless water heaters is lime scale buildup, which can clog pipes, reduce water flow, and damage the heating elements. To prevent this issue, flush your water heater regularly and consider investing in a water softener if you live in an area with hard water. If you notice signs of lime scale buildup, such as reduced water flow or temperature fluctuations, contact a professional plumber to clean and repair your water heater.
Conclusion
In conclusion, tankless water heaters are excellent choices for energy-efficient and cost-effective hot water solutions. However, they are not immune to problems, and homeowners should be aware of the common issues that can arise. By following these tips and contacting a professional plumber when necessary, you can keep your tankless water heater running smoothly and efficiently for years to come. Don’t hesitate to contact Ace Plumbing Repair if you need assistance with your tankless water heater or any other plumbing issues. You can give us a call at (844) 711-1590 or visit our website at aceplumbingrepair.com.
 Call Now