
by avi | Mar 28, 2024 | Maintenance
How to have light fixtures installed is a simple process that can add style and functionality to any space. To have light fixtures installed, start by choosing the appropriate fixtures for your space and ensuring they meet safety standards.
Then, turn off the power, remove the old fixtures, and carefully follow the manufacturer’s instructions to install the new ones. Finally, turn the power back on and enjoy your newly illuminated space. Introducing new light fixtures into your space can significantly enhance the ambiance and functionality of your home or office.
Whether you are replacing old fixtures or adding new ones, the installation process doesn’t have to be daunting. In this step-by-step guide, we will walk you through the process of installing light fixtures in a way that is safe, efficient, and aesthetically pleasing. By following these simple instructions, you can transform your space with new lighting in no time.
Selecting The Right Light Fixtures
When it comes to how to have light fixtures installed. One of the crucial steps is selecting the right light fixtures for your space. The type of light fixtures you choose can greatly affect the ambiance and functionality of a room. In this section, we will guide you through the process of selecting the perfect light fixtures for your needs.
Assessing The Room’s Purpose
Before diving into the world of lighting installation, it is important to review the purpose of the place where the device will be installed. Consider how the space will be used and what will be done there. This will help you determine the type and amount of lighting you need.
- Identify the main activities performed in the room
- Estimate the square footage of the room
- Determine the desired level of brightness
By conducting this assessment, you can ensure that the light fixtures you choose will meet the specific lighting requirements of the room.
Considering The Aesthetic And Style
While the functionality of the light fixtures is important, considering the aesthetic and style of the fixtures is equally crucial. The right light fixtures can enhance the overall design and atmosphere of a room. Here are some key factors to consider when selecting light fixtures:
- Match the style of the light fixtures with the room’s decor
- Consider the size and scale of the fixture concerning the room
- Choose the right finish (e.g., brushed nickel, bronze, chrome) to coordinate with other elements
- Ensure the fixtures complement the architectural features of the space
By paying attention to these details, you can create a cohesive and visually pleasing lighting design that seamlessly blends with the overall aesthetics of the room.
Installation Of Lighting Fixtures
Once you’ve selected the right light fixtures for your space, it’s time to move on to the installation process. Light fixture installation typically involves three main steps: ceiling light mounting, light fixture wiring, and wire light fixture. While the complexities of the installation can vary depending on the type of fixture, it’s important to follow the manufacturer’s instructions and, if necessary, consult a professional electrician.
Preparing For Installation
Before you dive into the exciting process of how to have light fixtures installed, there are a few essential steps to undertake for a smooth and effortless experience. In this section, we’ll guide you through gathering the necessary tools and materials and turning off the power source before you get started with the installation of lighting fixtures. Let’s get started!
Gathering Necessary Tools And Materials
Having the right tools and materials is crucial for a successful light fixture installation. Here’s a handy list of what you’ll need:
| Tools |
Materials |
- Screwdriver set
- Wire stripper
- Needle-nose pliers
- Tape measure
- Electrician’s tape
|
- Light fixture
- Mounting bracket
- Screws and anchors
- Wire connectors
- Electrical box
|
Turning Off The Power Source
Before any electrical work, it’s essential to turn off the power source to ensure your safety. Follow these steps:
- Locate your electrical panel, usually found in the basement, utility room, or garage.
- Open the electrical panel box by removing its cover.
- Identify the breaker that corresponds to the area where you’ll be working.
- Switch off the breaker by flipping it to the “off” position.
- Double-check that the power is off by testing the light switch.
Remember, electricity can be dangerous, so it’s crucial to take these precautions and ensure ceiling light mounting occurs in a safe environment.
Now that you’ve gathered the necessary tools and materials, as well as turned off the power source, you’re ready to move on to the next step: light fixture wiring. Stay with us as we guide you through the process, step by step!
How to Have Light Fixtures Installed
Ready to transform your space with new light fixtures? The installation process may seem daunting but fear not with this step-by-step guide on how to have light fixtures installed, you’ll be shining bright in no time. Let’s dive into the nitty-gritty of light fixture installation, starting with the crucial step of Installing the Light Fixtures.
Mounting The Fixture To The Ceiling
The ceiling light mounting is the first task at hand. Begin by turning off the power supply to the fixture location at the breaker box. Once the power is off, carefully remove the existing light fixture. Then, follow the manufacturer’s instructions to securely mount the light fixture to the ceiling. Use the appropriate screws and hardware to ensure a stable and safe installation.
Connecting The Wiring And Installing The Bulbs
Once the device is secure, it’s time to cut the wires. Start by connecting the devices and wires to their wires in the electrical box according to the color code and label. Once the connection is in place, the cable must be carefully routed in the electrical box and the device connected to the mounting bracket. Finally, install the bulbs according to the manufacturer’s instructions and voila, your new fixture is ready to light up your space.
Testing And Adjusting The Fixtures
When it comes to testing and adjusting the fixtures, the final steps of the light fixture installation process are crucial in ensuring that everything is functioning as intended. This phase involves turning on the power to test the light fixtures and making necessary adjustments for proper alignment.
Turning On The Power And Testing The Light
First, it is important to turn off the power supply to the lamp to avoid problems. After making sure the power is off, connect the device to the power cord according to the manufacturer’s instructions. After all the connections are made, turn on the device and check if the device is working properly.
Making Necessary Adjustments For Proper Alignment
If initial tests reveal problems with lamp performance or illumination, it may be necessary to replace the lamp. This can include upgrading equipment, adjusting angles, and making sure all parts are in good condition. It is important to follow the manufacturer and these repair instructions to avoid damage or malfunction of the device.
Final Touches And Safety Checks
This step-by-step guide to installing a flashlight covers the final touches and safety checks. To ensure a safe and effective installation. Make sure all connections are secure, wiring is secure, and equipment is properly grounded.
Securing Loose Wires And Covering The Junction Box
Before wrapping up the light fixture installation process, it’s essential to secure any loose wires and cover the junction box properly. Loose wires can pose a safety hazard and may result in malfunction or even electrical issues. Follow these simple steps to ensure everything is securely in place:
Inspect the wires
Once you have connected the light fixture to the electrical wiring, check for any loose or exposed wires. Carefully feel along the connections to ensure they are firmly attached.
Use wire nuts
If you notice any loose wires, use wire nuts to fasten them securely together. Twist the wire nut clockwise until it is tightly fitted over the exposed ends of the wires. This will prevent any electrical shorts.
Wrap with electrical tape
After securing the wires with wire nuts, wrap electrical tape around each nut to provide an extra layer of protection. This step will help secure the connection and prevent any accidental dislodging or exposure.
Cover the junction box
Then cover the junction box properly. The junction box is where the cables are stored and connected. The case is important to protect phones and maintain safety standards.
Secure the cover plate
Install the appropriate cover plate in the junction box. Use the screws provided and fix the cover plate securely. This will secure your electrical connection.
Double-checking The Stability And Safety Of The Installation
Once you have completed the final touches, it is crucial to double-check the stability and safety of the light fixture installation. This step ensures that the installation is secure and poses no potential risks or hazards. Consider the following steps for a thorough assessment:
Inspect the support system
Verify that the light fixture is securely mounted to the ceiling or wall. Test its stability by gently applying pressure and checking for any movement.
Test the light switch
Turn the light switch on and off to ensure it operates smoothly and without any flickering. This step ensures that the electrical connections are functioning correctly.
Check for proper grounding
Confirm that the light fixture is properly grounded. This safety feature prevents the risk of electrical shocks. Use a voltage tester to ensure there is no electrical current present in the metal parts of the light fixture.
Inspect the bulbs
Finally, check the light to make sure it vibrates and works. Replace defective bulbs before completing installation.
Completing these final steps and safety checks you are finishing the steps on How to Have Light Fixtures Installed. Taking the time to secure loose wires, cover junction boxes, and check the stability and security of your installation will put your mind at ease and ensure proper lighting.
Cost of Installation
The cost of installing light fixtures can vary depending on the complexity of the job and the location of the fixtures. On average, you can expect to pay anywhere from $50 to $200 per fixture for professional installation. However, by doing it yourself, you can save on labor costs and only need to budget for the cost of the fixtures themselves.
Frequently Asked Questions
How Much Does It Cost To Install Light Fixtures?
The cost of installing light fixtures can vary depending on factors such as the type of fixture, complexity of the installation, and location. On average, homeowners can expect to pay between $100 and $500 per fixture, including labor and materials.
Can I Install Light Fixtures Myself?
If you have experience with electrical work and feel comfortable working with wiring, you may be able to install light fixtures yourself. However, it is always recommended to hire a professional electrician to ensure safety and proper installation.
How Long Does It Take To Install Light Fixtures?
The time it takes to install a fixture will vary depending on factors such as the number of fixtures being installed and the complexity of the installation. Generally, an electrician can complete the installation of a single appliance within an hour.
What Tools Do I Need To Install Light Fixtures?
To install light fixtures, you will typically need a set of basic tools including a screwdriver, wire cutters, wire strippers, pliers, and a voltage tester. It is important to have the right tools and equipment to ensure a safe and successful installation.
Conclusion
In conclusion, this step-by-step guide provided a clear and concise process for installing LED lights. By following these simple guidelines, you can transform your space and enjoy the benefits of beautiful lighting.
Increase security, collect the necessary equipment, and take the time to ensure a successful installation. With this new knowledge, you can adjust the lighting scheme and achieve the look you want in your home.
by avi | Mar 28, 2024 | Maintenance
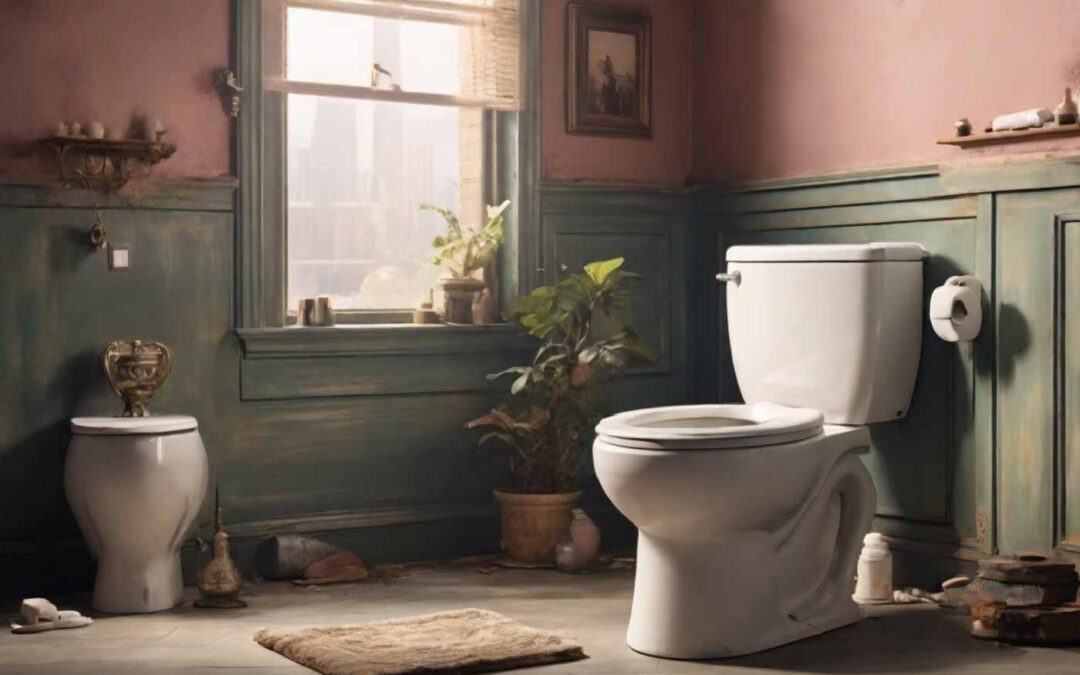
A good toilet is durable, efficient, and comfortable to use. Which has easy maintenance and water-saving features. Also, the type of toilet that has quality flush and less sound when flushing. This suggests why having a high-quality toilet is essential for any functioning bathroom.
In this article, we delve into the attributes that will explain what is a good toilet and how you will figure it out. As well we will share five notable models, detailing their advantages and drawbacks to fixate your decision.
What is a good toilet?
The solution to what is a good toilet lies in terms of what makes a good toilet. A good toilet is one that you feel comfortable using and is easy to keep clean. It should flush away waste properly and not leak. It’s also helpful if it saves water. Some toilets have extra features like a bidet or a seat that’s easier to sit on. A good toilet should work well for everyone, including people who might need a little extra help getting up and down.
Key Qualities of a Good Toilet
While determining to choose a toilet most face serious problems. To most individuals what is a good toilet is very confusing. Most people don’t know about the key features they should look for while choosing a toilet. The innate problem lies in the root of selection. Here are some key features you should look after while choosing a toilet:
Efficient Flushing System
The best toilets ensure waste is cleared in a single flush, preventing clogs and reducing water usage. Look for models with a high MaP score, indicating superior flushing performance.
Water Efficiency
Water-saving toilets, often bearing the WaterSense label, consume 1.28 gallons per flush or less, offering significant savings on water bills and conserving environmental resources.
Comfort and Accessibility
Comfort-height toilets, which stand at about 17-19 inches tall, are more accessible for most adults. Elongated bowls provide additional comfort but require more space than their round counterparts.
Ease of Cleaning
Features such as smooth surfaces, rimless designs, and special glazes can make toilets easier to clean and more hygienic.
Durability and Style
High-quality materials resist wear, while the toilet’s design should complement your bathroom’s aesthetic. One-piece toilets tend to have a sleeker appearance but may come with a higher price tag.
Top 5 Toilets: Features, Pros, and Cons
TOTO Ultramax II
Manufacturer: TOTO
Price Range: Typically around $575 to $700
Features
One-piece toilet with an elongated bowl for additional comfort. WaterSense certified, using 1.28 gallons per flush (gpf), making it highly water-efficient. Features TOTO’s Tornado Flush system for powerful bowl cleaning. CeFiONtect glaze prevents particles from adhering to the ceramic, simplifying cleaning. Universal height for ease of use across all ages.
Pros
The TOTO Ultramax II is a WaterSense-certified, one-piece toilet with a powerful Tornado Flush system. Its elongated bowl and universal height make it comfortable for most users, while CeFiONtect glaze facilitates easier cleaning.
Cons
Its higher price point might be a barrier for some budgets, and the sleek design requires careful handling during installation to avoid damage.
American Standard Champion 4
Manufacturer: American Standard
Price Range: Around $400 to $550
Features
Known for its 4-inch piston action Accelerator flush valve, it can flush 2.2 lbs of waste in a single flush. EverClean surface inhibits the growth of stain and odor-causing bacteria. Comes with a 10-year warranty, ensuring long-term reliability. Features a comfortable height and elongated bowl for greater comfort.
Pros
Known for its robust flushing system, the Champion 4 can move a mass 70% larger than the industry standard. It also features an EverClean surface that inhibits the growth of bacteria.
Cons
Some users report that the flush mechanism can be noisy, and its powerful flush might necessitate additional water usage in certain scenarios.
Kohler Highline Classic
Manufacturer: Kohler
Price Range: Approximately $320 to $450
Features
Two-piece toilet with Class Five Flushing Technology for great bulk waste removal. Comfort Height feature offers chair-height seating that makes sitting down and standing up easier. Uses 1.28 gpf, meeting EPA WaterSense criteria. The elongated bowl design provides added room and comfort.
Pros
This two-piece toilet offers a comfortable height and an elongated bowl for added room and comfort. Its Class Five flushing technology ensures effective waste removal and bowl cleanliness.
Cons
The traditional design may not appeal to those seeking a modern look, and installation can be slightly more complicated due to its two-piece nature.
Delta Turner 2-Piece
Manufacturer: Delta Faucet Company
Price Range: Around $200 to $300
Features
Economical option that doesn’t sacrifice performance for price. WaterSense certified, with a 1.28 gpf efficiency to reduce water use. Round-front bowl design is space-efficient, making it suitable for smaller bathrooms. Comes with Delta’s limited lifetime warranty on the flush mechanism.
Pros
The Delta Turner is an affordable option that doesn’t skimp on performance, featuring WaterSense certification and an effective flushing system. Its round bowl is ideal for smaller spaces.
Cons
The round bowl may not be as comfortable for all users as an elongated one, and some may find the flush less powerful than higher-end models.
Woodbridge T-0001 Dual Flush
Manufacturer: Woodbridge
Price Range: Approximately $250 to $350
Features
Sleek, one-piece design with a luxurious modern look. A dual flush system allows you to choose between 1.0 gpf for liquid waste and 1.6 gpf for solid waste, conserving water. Soft closing seats included preventing slamming and reducing noise. Easy-to-clean design with a skirted trapway that simplifies maintenance.
Pros
This sleek, one-piece toilet offers a modern design with a dual flush system for water efficiency. It also boasts a soft-closing seat to minimize noise.
Cons
Installation can be challenging due to the one-piece design and heavier weight. Additionally, the unique design might require adapting to its flush system.
Making the Right Choice
When choosing the best toilet for your home, it is important to balance functionality, comfort, design, and budget. Consider your bathroom layout, household requirements, and goals to reduce environmental impact. What is a good toilet? You save water and reduce electricity bills with the right toilet, but you also get a comfortable, hygienic, and aesthetically pleasing element in your bathroom.
Good toilets improve your daily routine, provide reliable performance, and enhance the overall design and functionality of your bathroom. Whether you want more eco-friendliness, relaxation, or easy maintenance, the options above suit different tastes and requirements, so you’re sure to find a model that suits your needs.
FAQ
How Do I Choose The Right Toilet For My Bathroom?
Consider the size, style, flushing mechanism, water efficiency, and ease of cleaning when selecting a toilet for your bathroom.
Are Dual-Flush Toilets Worth It?
Dual-flush toilets are worth it as they allow you to choose between a light flush for liquid waste and a heavy flush for solid waste, which saves water.
How Can I Improve The Water Efficiency Of My Toilet?
You can improve water efficiency by installing a dual-flush or low-flow toilet and ensuring there are no leaks in the toilet tank or pipes.
by avi | Feb 18, 2024 | Maintenance
Backflow preventer is a big deal for homeowners. This device helps to safeguard the water system by preventing backflow pressure. Which helps the integrity of the main water system. But what happens when a backflow preventer gets severely faulty? It can cause backpressure in the system eventually making backflow. Which can start to contaminate your water system making your family and house sick. So, in particular times like this, the need for fixing reaches its maximum necessity. But, how to fix a leaking backflow preventer?
Well, to fix a leaking backflow preventer. First, check the washer seal in the female connection, as it may need replacement if deteriorates or dries. Ensure the washer is properly seated in the fitting.
If the preventer is faulty, it needs faster replacement entirely. Because patching will not provide a long-term solution. It is recommended to seek professional help from a plumber for proper repair or replacement. A leaking backflow preventer can lead to water waste, increased utility bills, and potential contamination. Making it essential to address the issue promptly.
How to fix a leaking backflow preventer
To fix a leaking backflow preventer, start by identifying the problematic part. Common parts that may cause leakage. Parts like the check valve, relief valve, and vacuum breaker. Begin by inspecting the backflow preventer and looking for any signs of damage or debris. If the check valve is causing the leak, remove the valve cover and check for damage. Flushing the system can also help to remove any clogs or blockages.
If the relief valve is the problem. Remove the relief valve cover and inspect for any signs of damage or corrosion. Replacing the faulty relief valve may be necessary. Similarly, if the vacuum breaker is causing the leakage. Check for any blockages or debris and clean or replace the breaker if you require. Once the problematic part has proper replacement or repair, you can test the backflow preventer to ensure it is functioning properly.
Identifying The Problem
When it comes to understanding backflow preventers and how to fix a leaking backflow preventer. One of the first steps is identifying the problem. Checking for water leakage is crucial in determining if your backflow preventer is functioning properly.
The first step to troubleshooting starts by inspecting the washer seal in the female connection. Over time, the rubber washer can deteriorate or dry out, causing leaks. If necessary, replace the washer to prevent further leakage.
Tools And Materials Needed
When it comes to fixing a leaking backflow preventer, you’ll need a few tools and materials to get the job done. To start, make sure you have gloves and safety equipment to protect yourself while working. You’ll also need an adjustable wrench to tighten or loosen any connections. As well as pipe sealant tape to ensure a tight seal.
With these tools in hand, you can begin fixing the backflow preventer and prevent any further leaks. Remember to always follow proper safety procedures and guidelines when working with plumbing systems.
Shutting Off The Water Supply
When it comes to fixing a leaking backflow preventer. The first step starts with shutting off the water supply. Start by locating the shut-off valve, usually near the water meter. Turn off the water supply by rotating the valve in a clockwise direction.
Next, relieve the pressure in the system. You can do that by opening a faucet or hose bib downstream from the backflow preventer. This will help prevent water from leaking out when you work on the preventer. Once the pressure is free, you can proceed with repairing or replacing the leaking backflow preventer.
Disassembling The Backflow Preventer
When it comes to fixing a leaking backflow preventer. Disassembling the backflow preventer is an essential step. This involves removing the bonnet and inspecting and cleaning the components.
- Start by turning off the water supply to the backflow preventer.
- Then, remove the bonnet using a wrench or pliers. Inside the bonnet, you will find the check valves and relief valve.
- Carefully inspect these components for any signs of damage or debris.
- Clean them thoroughly using a brush or a cloth.
- It’s important to ensure that all the components are in good working condition and free from any obstructions.
Once you have inspected and cleaned all the components. Reassemble the backflow preventer and turn on the water supply. This should fix the leaking issue. Remember to test the backflow preventer to ensure that it is functioning properly.
Reassembling The Backflow Preventer
When it comes to applying pipe sealant tape. Start by wrapping the tape in the direction of the threads to ensure a tight seal. For tightening the components, use adjustable wrenches to securely fasten all connections. Proper alignment is crucial. Ensure pipes are straight and fittings have the correct alignment to prevent leaks.
Testing The Backflow Preventer
- First, turn on the water supply and check for any leaks. Inspect the backflow preventer for any signs of water dripping or pooling.
- Next, verify that the backflow preventer is functioning properly. This can be done by checking the pressure vacuum breaker, sprinkler system check valve, relief valve, and other components.
- Troubleshoot any issues that you find, such as a deformed seal or clogged system, and fix them accordingly.
- Once everything is in order, you can flush the system and turn the water back on.
Remember to periodically replace the rubber washer seal in the female connection of the backflow preventer to prevent future leaks.
Regular Maintenance And Prevention
To fix a leaking backflow preventer, check the washer seal in the female connection. If the seal is deteriorating or getting dry, replace it. Make sure the washer is in the proper place. Additionally, cleaning corrosion and checking the assembly seat can help troubleshoot the issue.
Regular maintenance is essential to keep your backflow preventer functioning properly. Cleaning and flushing the preventer regularly will help remove any debris or buildup. As they can cause blockages or damage. It is essential to schedule professional inspections at least once a year. Ensuring that all components are in good working condition and that any potential issues are under notice promptly.
During a professional inspection, the technician will carefully examine the preventer. Check for any leaks or signs of damage, and make any necessary repairs or replacements. This can help prevent major issues and ensure that your backflow preventer continues to operate efficiently.
Conclusion
In how to fix a leaking backflow preventer. It’s essential to follow the troubleshooting steps and make necessary repairs carefully. Regular maintenance and periodic replacement of deteriorated parts will help ensure efficient functioning. By addressing leaks promptly, you can minimize water wastage and prevent potential contamination issues. Safeguarding your plumbing system and the environment from any major problem and disaster.
by avi | Feb 11, 2024 | Maintenance
When it comes to ensuring the house’s integrity and saving the system from water pressure. Pressure vacuum BRekaer is the first choice homeowners go for. With all the fuzz around What Is A Pressure Vacuum Breaker? PVB is a device that helps to prevent the contamination of drinking water from water backflow. By using a check valve and air inlet valve this device prevents the water pressure from creating a water vacuum. Maintaining minimal water pressure ensures the safety of the water supply alongside your family.
In this blog, we will discuss in-depth information about A PVB device. We will also explain why this single device is important for your house and family health. As well as simple installation and maintenance steps for longer utilization.
What Is A Pressure Vacuum Breaker
A pressure vacuum breaker is a device used to prevent backflow in plumbing systems. It works by creating a barrier that prevents water from flowing back into the main water supply. These devices are commonly used in irrigation systems and outdoor plumbing fixtures to protect against contamination.
A pressure vacuum breaker is commonly known as a vacuum breaker. It is a crucial component in plumbing systems that helps prevent backflow in water systems. Backflow occurs when the flow of water turns backward. Making contaminated water enter the clean water supply. This can lead to health hazards and contamination of the water supply.
How Does A Pressure Vacuum Breaker Work?
A pressure vacuum breaker operation is quiet and effective as well. It consists of two main parts: a check valve and an air inlet valve. The check valve permits water to flow in one direction while preventing it from flowing backward. The air inlet valve allows air to enter the system, creating a pressure vacuum. This vacuum helps to break the flow and prevents backflow.
When there is an increase in pressure within the plumbing system. Like pressure failure in the system or pump. The check valve closes, preventing water from flowing backward. Necessarily, the air inlet valve opens, allowing air to enter and create a backward pressure. This breaks the vacuum and stops the water from flowing in reverse. Which is why it’s so effective in preventing backflow.
The Importance Of Backflow Prevention
Protecting the Clean Water Supply
A pressure vacuum breaker plays a vital role in safeguarding the integrity of the water supply. Preventing the backward flow of contaminated water ensures that only clean, potable water reaches our taps, reducing the risk of waterborne diseases and health hazards.
Adherence to regulations
Plumbing codes requires the installation of pressure vacuum breakers. In order to comply with backflow prevention regulations and better agreements. By implementing this device, property owners and plumbers stay in compliance with local laws and regulations. While also avoiding potential fines and penalties.
Maintaining water quality
Backflow incidents can contaminate the stream water supply. Things like hazardous substances, chemicals, and bacteria can contaminate them. Pressure vacuum breakers act as a critical barrier. They prevent this contamination and maintain a high quality of our drinking water.
Preventing cross-connections
Cross-connections between potable and non-potable water sources can occur. In settings, like residential, commercial, and industrial spaces this is fairly common. Pressure vacuum breakers effectively prevent cross-connections. Eliminating the risk of cross-contamination and protecting the integrity of the clean water supply.
Cost-effective solution
Installing a pressure vacuum breaker is a cost-effective measurement. In comparison to other potential consequences of backflow incidents. By integrating this device into the plumbing system. Both homeowners and businesses can safeguard their health and investments.
As an essential component of any plumbing system, a pressure vacuum breaker ensures the safety and quality of our drinking water. By understanding how it works and acknowledging the importance of backflow prevention, we can take proactive measures to protect ourselves, our communities, and the environment from the dangers of contaminated water.
Common Applications For Pressure Vacuum Breakers
Residential Irrigation Systems
A pressure vacuum breaker (PVB) is commonly used in residential irrigation systems to protect against backflow contamination. To stop water from returning to the main water supply, a PVB is installed at the sprinkler system’s water outlet. This guarantees that the water utilized for the water system stays separate from the public water supply, defending against expected contaminations and synthetics that might be available in the water system framework.
Commercial Watering Systems
Pressure vacuum breakers are common in commercial settings. Places such as parks, sports fields, and golf courses, to maintain the water supply’s safety and integrity. These frameworks help to prevent water system reversal. This can happen anytime if there is a sudden drop in pressure in the water system. By creating a vacuum it prevents foul water from entering into the normal water supply.
Installation And Maintenance Of Pressure Vacuum Breakers
Pressure vacuum breakers are essential for the installation and maintenance of plumbing systems as they prevent the backflow of contaminants into the water supply. These devices create a vacuum to break the pressure and protect water quality.
Installing and maintaining a pressure vacuum breaker (PVB) is crucial for the proper functioning of your plumbing system. Understanding the proper installation guidelines and maintenance checklist can ensure the longevity and effectiveness of your PVB.
Proper Installation Guidelines
When it comes to installing a pressure vacuum breaker, it is essential to follow these guidelines to guarantee its correct operation:
Locate the ideal placement
Select an area with better ventilation. Position the PVB at least 12 inches above the highest point in your irrigation system. This elevation will ensure maximum performance for your system.
Protect from freezing
Install the PVB in an area that can protect your device from a freezing atmosphere. Proper insulation or heat tape can help when you are dealing with cold situations. In this way, you can also prevent damage by freezing conditions.
Consider local regulations
Familiarize yourself with the specific plumbing codes and regulations in your area. This ensures compliance and helps avoid potential issues down the line.
Secure connections
Use appropriate fittings to ensure leak-free connections. Tighten the nuts and bolts properly without overtightening, as this may lead to damage or leaks.
Keep it accessible
Make sure the PVB is easily accessible for future inspections, repairs, and maintenance. This accessibility will save you time and effort in the long run.
Maintenance Checklist Tips For Longevity
To ensure the longevity and functionality of your pressure vacuum breaker, it is necessary to conduct regular maintenance using the following checklist:
- Visual inspection: Regularly examine the PVB for signs of wear, leaks, or damage. Look for cracks, corrosion, or loose fittings, and address any issues immediately.
- Clean the vents: Inspect the air vents to ensure they are clear of debris or obstructions. Clear any blockages, using a brush or high compression of air blast.
- Check valve operation: Verify that the check valves are working correctly. They should open and close smoothly without any resistance. Replace any faulty valves promptly.
- Test the backflow preventer: Periodically test the backflow preventer to confirm its effectiveness. This can be done using a gauge or a professional testing kit. Consult the manufacturer’s instructions for the appropriate testing protocol.
- Flush the system: Regularly flush your irrigation system to remove any materials or debris that may accumulate over time. This preventive measure helps maintain optimal performance.
Remember, proper installation and ongoing maintenance are crucial for the efficient operation of your pressure vacuum breaker. Following certain guidelines and regular check-ups will ensure optimal conditions. By which you can ensure the safety of your drinking water and extend the life of your PVB.
Choosing The Right Pressure Vacuum Breaker For Your Needs
Now that you know What Is A Pressure Vacuum Breaker it’s time to pick the right PVB. For safety and reliability reasons a pressure vacuum breaker (PVB) plays a crucial role. But with so many options choosing the right PVB for your needs can be hard to figure out. It’s important to consider several factors, top brands in the market, and why houses require a PVB.
Factors To Consider
Before making a decision, it’s essential to keep a few key factors in mind:
- Water Pressure: Determine the water pressure in your area, as different pressure vacuum breakers are suitable for different water pressure levels.
- Application: Consider the proper use of the pressure vacuum breaker. Are you installing it for a residential property, commercial building, or irrigation system?
- Size and Space: Ensure that you choose a pressure vacuum breaker. If it fits the available space and meets the size requirements of your plumbing system.
- Price Range: Set a budget and explore options within that range. Keep in mind that quality and reliability should be the primary consideration. So while making a decision don’t look over price alone.
- Manufacturer Warranty: Check if the pressure vacuum breaker accompanies a manufacturer guarantee. In the event of any defects or malfunctions, this may offer assurance and protection.
Top Brands In The Market
Several reputable brands offer high-quality pressure vacuum breakers. The following are some of the top brands worth considering:
| Brand |
Features |
| Apollo Valves |
Known for their durable construction and reliable performance, Apollo Valves pressure vacuum breakers are a popular choice among professionals. |
| Watts |
With their extensive experience in the industry, Watts offers a range of pressure vacuum breakers with advanced features to ensure optimal protection against backflow. |
| Febco |
Febco pressure vacuum breakers are known for their easy installation and maintenance, making them a preferred choice for homeowners and DIY enthusiasts. |
| Wilkins |
Wilkins’s pressure vacuum breakers are designed to meet stringent industry standards, providing reliable backflow prevention for residential and commercial applications. |
Why Houses Require A PVB
By installing a PVB, you ensure that the water always flows in the right direction. Protecting your drinking water from potential pollutants and also your system from blocking up. This is especially important for houses with irrigation systems or other sources. Mostly for systems that could introduce non-potable water into the plumbing system.
Choose a pressure vacuum breaker that meets your specific needs. Make sure it provides reliable protection against backflow, ensuring the safety of your water supply. Don’t jump for any PVB when you’re facing a problem. Be more creative and accurate about it when it comes time to choose one.
Troubleshooting And Repairing Pressure Vacuum Breakers
A pressure vacuum breaker is a critical component of your irrigation system. They ensure the safety of your potable water supply. However, like any device, it can have issues that may require troubleshooting and repair. So it’s common to have ideas about the repair and maintenance of pressure vacuum breakers. This will enable optimal performance and better health integrity along with your house.
Identifying Common Issues
When it comes to identifying common issues there are a few key choices. Such as leaks, abnormal pressure with water flow, or an irregular discharge from the device. Additionally, visible signs of corrosion or damage to the components can be your root cause.
Steps To Fixing A Faulty Pressure Vacuum Breaker
It is essential to address any abnormalities with your pressure vacuum breaker. When attempting to fix or troubleshoot a broken pressure vacuum breaker, follow these steps:
- Inspect the device for any visible damage, leaks, or corrosion, focusing on the valve components and seals.
- Clean the pressure vacuum breaker to remove any debris or sediment that may be obstructing the proper flow of water.
- Test the device for proper functionality by conducting a system check. This will make sure that all components are operating as they are meant to.
- If necessary, replace any faulty or worn-out parts. This will restore the pressure vacuum breaker to its previous optimal working conditions.
Frequently Asked Questions
What Is A Pressure Vacuum Breaker?
A Pressure Vacuum Breaker (PVB) is a mechanical device used in plumbing systems to prevent the backflow of contaminated water into the main water supply.
How Does A Pressure Vacuum Breaker Work?
A Pressure Vacuum Breaker works by utilizing a check valve and an air inlet valve. It creates a barrier that keeps foul water from streaming into the main water stream. The air inlet valve opens when the water pressure drops. This allows the air to enter the system and prevents backflow.
Why Is A Pressure Vacuum Breaker Important?
A Pressure Vacuum Breaker is essential. Because it guarantees that the water in your pipe framework stays safe and contamination-free. It keeps you and your family safe through the prevention of harmful substances.
Conclusion
To safeguard drinking water supplies from contamination, a pressure vacuum breaker is an essential component. Understanding its capability and support is fundamental for guaranteeing the security and honesty of our water frameworks. We can maintain the health and well-being of our communities by adhering to the appropriate installation and maintenance guidelines.
by avi | Nov 18, 2023 | emergency plumbing fix, Maintenance, Repairs
Although it is a part of your living area, your basement is also a major part of your house. Helping you big time with protection from basement flood, to prevent this sump pumps are essential. But what if they fail to do their job? Let`s discuss the reasons for sump pump failure and what to do when this happens out of the blue.
What Does Sump Pumps Mean
Sump pump is an essential part of the waterproofing system like a second layer of guard. This helps to downpressure the extra water from overflowing in the house basement and decrease water pressure. Helping us to control the level of water due to natural reasons or man-made purposes.
Causes of Sump Pump Fail
Power Outages: Unoperatable due to power outages can deliver significant hassle. So, it is recommended to install a backup service.
Pump Overload: Considering the right size is a critical ratio to maintain as the device will try to uphold its work it also needs to able to handle the required pressure,
Stuck Switch: The floating switch helps a little but its auto functionality is a pain if it gets stuck.
Frozen or Clogged Discharge Pipe: Freezing temperatures or debris can block its normal functionality. Making them incapable of flowing water.
Lack of Maintenance: Without proper maintenance, the sump pump can fail regularly. This can affect the amount of service that was promised to be given.
How Sump Pump Fail Effect House Plumbing System
Failure of a sump pump can have disastrous and expensive effects:
Basement Flooding
Homeowner’s greatest nightmares, sump pump damage will frequently results in basement flooding. Water damage may casue problem on walls or within.
Mold and Mildew
Moisture can lead upto mold and mildew. Mold may cause harm to your health beacuse it could lead upto allergies, respiratory conditions.
Structural Damage
Structural integrity causally weakened by extended exposure to water. Which eventually lead to structural problems that comes with costly repair.
Financial Burden
Sump pump failure can have crippling financial repercussions. Repairs, replacements, and maybe mold and mildew treatment will cost money.
Ways to Resolve Sump Pump Fail
Battery Backup
If you have a sump pump, always install a battery backup system. So, that blackout and other electrical disaster doesn`t effect much. Consider looking at a water-powered backup system as well.
Appropriate Sizing
The sump pump you choose needs to be the required size you are needed. Small pump, will fail to withstand the amount of work you might need. Seek expert asvice if needed.
Frequent Testing
Check regualry for maintenance regularly. Fill it up and trigger the pump and confirm its functionality. Testing enables you to find and fix any problems before they get out of hand. Also try to note on regualr basis if you think something is odd.
Conclusion,
Sump pump failure is one of the greatest fear. But you can safeguard your basement from possible calamities by taking preventative steps and performing routine maintenance. So it is better not let sump pump fail in order to protect and save money. Consider getting in touch with experts at AcePlumbing if you’re having problems with your sump pump or need professional advice on how to keep your basement safe.
by avi | Nov 15, 2023 | Maintenance, Tips
Introduction
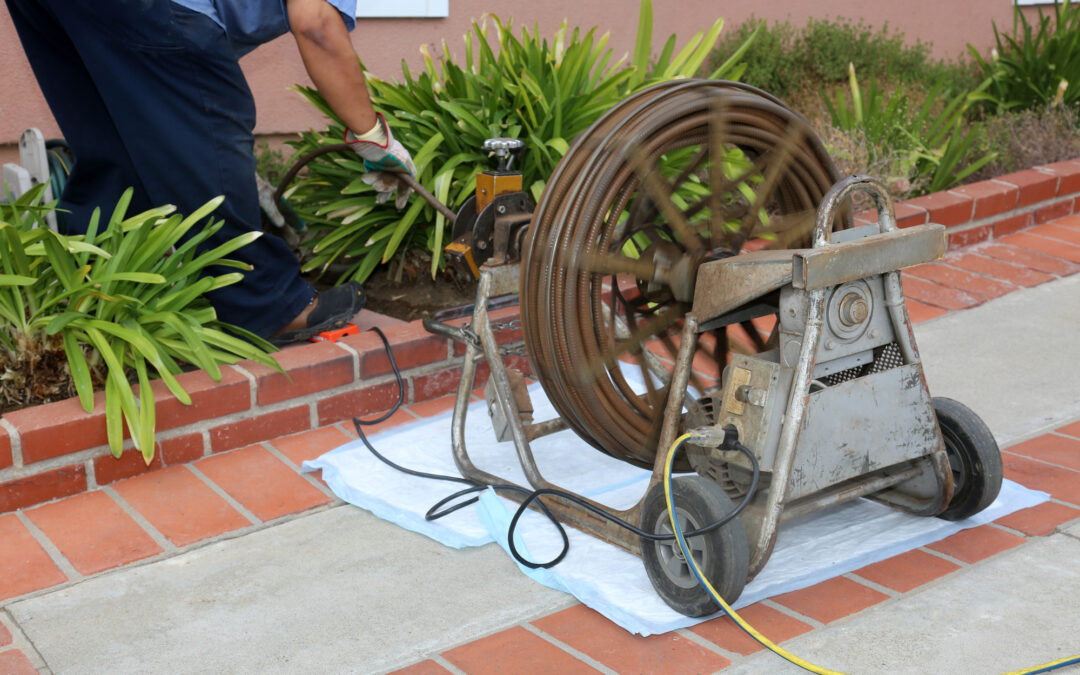
Nothing beats the unanticipated frustration of an unexpected drain blockage in your home. As homeowners, we often overlook the importance of maintaining our plumbing systems, only to be met with eventual hefty costs of problematic repairs. As your go-to expert in the plumbing industry, I will discuss why regular drain cleaning services not only save you from potential future headaches but also promote a healthy home environment.
Understanding Drain Cleaning
To fully appreciate the importance of regular drain cleaning, let’s first understand what it entails. Drain cleaning involves the process of clearing obstructions from the drains of your home, using specific tools and techniques. It is crucial for maintaining the overall health of your residence’s plumbing system.
Reasons for Regular Drain Cleaning
Prolonged Plumbing Life
Numerous issues can arise when drains are left unchecked, such as pipe deterioration or severe blockages. Routine drain cleaning services can essentially prevent these issues from escalating and prolong the lifespan of your entire plumbing system.
Improved Home Health
Blocked drains can lead to stagnant water, which often equates to harmful bacteria and foul odors. By ensuring your drain stays clear and clean, you are also promoting a cleaner, healthier home.
Preventing Major Plumbing Issues
A basic drain cleaning service could save you huge amounts down the line. When a professional plumber services your drains, they can spot any potential concerns that might escalate into costly repairs if left unchecked.
Hiring a Professional Plumber
While there are several do-it-yourself drain cleaning methods available, nothing replaces the efficient work of a professional plumber. They have an arsenal of tools and experience to not only handle existing issues but also to preemptively highlight potential problem areas.
A good plumber will provide a comprehensive service, including diagnostics, cleaning, and preventive maintenance. Furthermore, hiring a proficient plumber equates to invaluable peace of mind, knowing your plumbing system remains in top-notch condition.
In conclusion, regular maintenance, particularly drain cleaning, plays an indispensable role in preserving the functionality of your home’s plumbing systems. Neglecting such services could lead to serious implications on your home’s health and your pocket! Therefore, it is worth investing in routine drain cleaning services to keep your plumbing system in optimal condition.
Considering this, be sure to seek out professional plumbing services for regular drain cleaning. It’s a preventative step that will save you from stressful and costly issues down the line.
 Call Now