by avi | Apr 16, 2024 | Water heater repair and installation
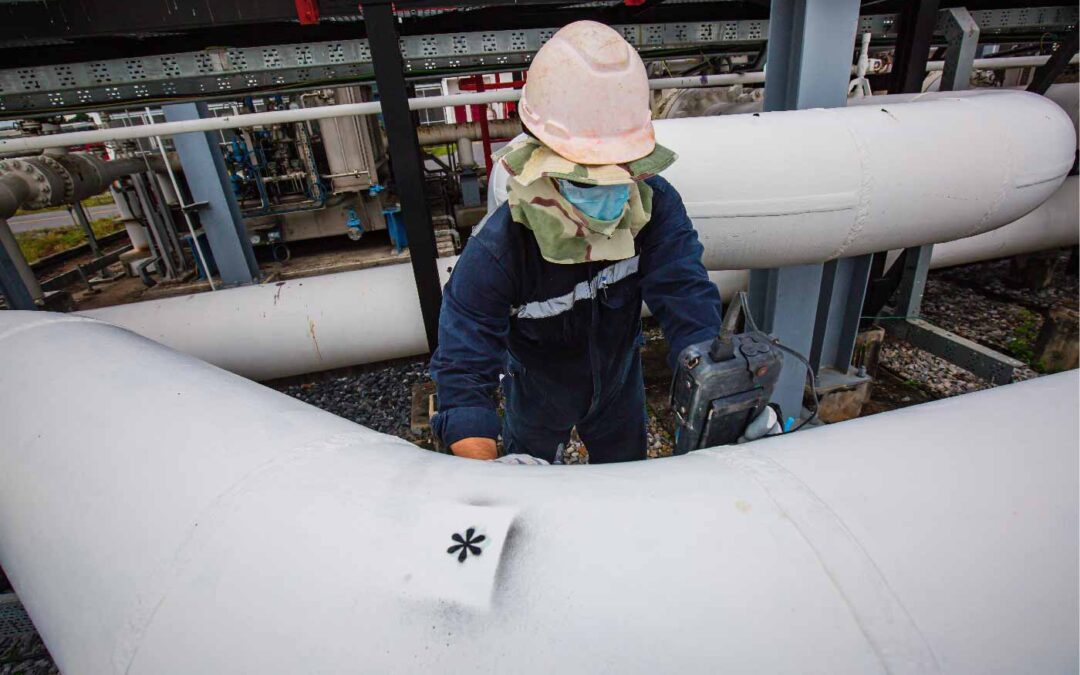
Winter brings a unique set of challenges for homeowners, notably the risk of frozen pipes which can cause significant inconvenience and potential damage. Understanding the role of heat tape in mitigating this issue is crucial. Specifically, many ask, “How long does it take for heat tape to thaw frozen pipes?” This question underscores the anxiety many feel when faced with the prospect of frozen plumbing. By exploring the use of heat tape, the factors influencing thawing time, and preventive measures, we aim to provide a comprehensive guide to managing and overcoming the challenge of frozen pipes.
What is Heat Tape
When it comes to preventing frozen pipes or unfreezing them, heat tape is often the go-to solution for many homeowners. But how does heat tape work, and how long does it take for it to thaw frozen pipes? In this article, we’ll delve into the world of heat tape and explore its various types, as well as its effectiveness in thawing out those stubborn frozen pipes.
Types Of Heat Tape
Before we delve into how heat tape works, let’s first take a look at the different types available in the market. There are primarily two types of heat tape: self-regulating heat tape and constant-wattage heat tape.
- Self-regulating heat tape: This type of heat tape is designed to automatically adjust its heat output based on the temperature. It contains a conductive core that expands or contracts with temperature changes, regulating the heat accordingly. Self-regulating heat tape is energy-efficient and helps prevent overheating or damage to the pipes.
- Constant-wattage heat tape: Unlike self-regulating heat tape, constant-wattage heat tape provides a constant and consistent heat output. It is ideal for longer runs or applications where a higher level of heat is necessary. However, it is important to control the heat output carefully to avoid excessive temperatures that could damage the pipes.
Identifying Frozen Pipes: The First Line of Defense
The early signs of a frozen pipe include reduced water pressure, no water output from faucets, and visible frost or ice on exposed pipes. These symptoms suggest an immediate need for action. Locating the frozen section is crucial and it is trackable from a faulty faucet. Especially in areas lacking insulation or along external walls.
Thawing Frozen Pipes: A Step-by-Step Approach
A homeowner’s toolkit for tackling frozen pipes includes a drywall knife, reciprocating saw, hair dryer, heat tape, space heater, towels, fans, a dehumidifier, a shop vac, a mop, and crucially, pipe insulation.
Factors Affecting Thawing Time
The time it takes for heat tape to thaw frozen pipes depends on several variables:
- Pipe Material and Size: Metal pipes conduct heat more efficiently than plastic ones, potentially leading to quicker thawing. Larger pipes may take longer to thaw due to the greater volume of frozen water inside.
- Extent of Freezing: Pipes that are completely frozen solid will take longer to thaw than those that are only partially frozen.
- Ambient Temperature: The colder the environment, the longer it may take for the heat tape to overcome the freezing conditions.
- Type and Installation of Heat Tape: The effectiveness of heat tape also depends on its wattage, quality, and whether it’s been installed correctly, covering the necessary length of the pipe.
How Heat Tape Works
Now that we have a better understanding of the different types of heat tape, let’s dive into how it works to thaw frozen pipes. Heat tape essentially uses heat-generating elements embedded within its structure to warm up the pipe’s surface. As the heat tape energizes, it radiates heat, gradually thawing the ice within the pipes.
The time it takes for the heat tape to thaw frozen pipes depends on several factors, such as the length of the pipe, the severity of the freezing, and the heat tape’s wattage. In general, it may take several hours, or even a full day, to completely thaw frozen pipes.
Note: If your pipes are severely frozen, it is advisable to seek professional help or consult a plumber to avoid any potential damage to the pipes or the heat tape.
Preparing to Use Heat Tape
The first step is identifying the frozen section, indicated by decreased water pressure or no water flow. Selecting the right heat tape is crucial for compatibility with the pipe’s material and size, considering the environmental conditions. Gathering necessary tools like electrical tape, pipe insulation, and hand tools for securing the heat tape is also essential.
Installation and Thawing Process
Turning off the water supply to the affected pipe is a necessary safety measure. Following the manufacturer’s instructions closely, the heat tape should be wrapped evenly around the frozen section without any overlaps. Once the heat tape is in place, covering it with pipe insulation enhances efficiency, a step that is particularly crucial for pipes in outdoor or unheated areas. Monitoring the progress of the thawing process is essential to avoid overheating.
Safety Tips and Best Practices
Reading instructions carefully is vital to avoid fire hazards or pipe damage. Regular inspections of the heat tape and electrical connections for wear are especially important before the winter season. For severe issues or uncertainties about the installation process, seeking professional help is advisable.
Troubleshooting and Maintenance
Testing the heat tape before the cold season begins ensures its functionality. Regularly inspecting the tape for any signs of damage or wear and replacing it as necessary helps maintain protection against freezing.
Preventing Frozen Pipes: Long-Term Solutions
Prevention is paramount when it comes to frozen pipes. Insulating your home, especially areas prone to cold like basements or outer walls, can significantly reduce the risk. Applying pipe insulation and heat tape provides an additional layer of protection, ensuring pipes remain above freezing temperatures. For homeowners who winter elsewhere, maintaining a minimum home temperature and arranging periodic checks can prevent freezing incidents.
How long does it take for heat tape to thaw frozen pipes?
Heat tape can take several hours to thaw frozen pipes, depending on the length and severity of the freeze. Thawing time can range from 30 minutes to several hours.
Dealing with frozen pipes can be a common issue during the winter months, causing inconvenience and potential damage to your home. Having a good understanding of how heat tape works and the time it takes to thaw frozen pipes can help you effectively manage the situation.
We will discuss the process of using heat tape to thaw frozen pipes, the factors that can affect thawing time, and some tips for preventing frozen pipes in the future. Let’s dive in to learn more about this important topic.
Best Practices and Safety Tips
Follow Manufacturer Instructions
Each heat tape product comes with specific guidelines for installation and use. Adhering to these instructions is vital for safety and effectiveness.
Inspect Regularly
Regularly check the heat tape and pipes for signs of wear or damage. Improper use of heat tape can be a fire hazard.
Seek Professional Help
If unsure about the installation process or if the pipes do not thaw within a reasonable timeframe, consult a professional. Persistent freezing issues may indicate a need for further insulation or a change in the plumbing system to prevent future freezes.
Alternatives To Heat Tape
When it comes to unfreezing pipes, heat tape is a commonly recommended solution. However, there are alternative methods that can be just as effective. Let’s explore some alternatives to using heat tape for thawing frozen pipes.
Heat Gun
A heat gun is a powerful tool that can quickly and efficiently thaw frozen pipes. It produces a high-intensity stream of hot air that can be directed at the frozen portion of the pipe. The heat from the gun will gradually melt the ice, allowing the water to flow freely once again.
Hair Dryer
A hairdryer is a more accessible option for thawing frozen pipes. Simply plug in the hair dryer, set it to the highest heat setting, and direct the hot air towards the frozen area. Move the hair dryer in a back-and-forth motion to evenly distribute the heat. The warm air will slowly melt the ice, restoring water flow.
Hot Towels
Another alternative to heat tape is using hot towels. Soak a towel in hot water and wring out the excess moisture. Wrap the hot towel around the frozen section of the pipe and leave it there until the ice is melted. This method may take longer than the others, but it is a safe and effective way to thaw frozen pipes without using any electrical devices.
FAQ
Q: How quickly does heat tape thaw frozen pipes?
A: The speed of thawing depends on factors like the severity of freezing, type of heat tape, and environmental conditions. In general, it may take a few hours to a day. Refer to the manufacturer’s guidelines for precise instructions.
Q: Can I leave heat tape on continuously to prevent frozen pipes?
A: While it’s designed for temporary use during freezing conditions, leaving heat tape on continuously is not recommended. Follow the manufacturer’s recommendations to avoid energy waste and potential damage.
Q: Does the outdoor temperature affect the thawing time with heat tape?
A: Yes, outdoor temperatures play a role. Colder temperatures may prolong the thawing process. Insulating pipes and using high-quality heat tape can enhance performance in extreme cold.
Q: Are there different types of heat tape, and do they vary in thawing times?
A: Yes, there are various types of heat tape with different specifications. Self-regulating tapes adjust their heat output, affecting thawing times. Always choose a product suitable for your specific needs and follow guidelines accordingly.
Q: Can I use multiple heat tapes on the same pipe for faster thawing?
A: While it might be tempting, using multiple heat tapes on a single pipe is not recommended. It can lead to overheating and potential hazards. Follow the manufacturer’s instructions and use one tape per pipe as directed for optimal results.
Conclusion
Frozen pipes are a significant winter challenge. Yet with proper knowledge and preparation, also by learning how long does it take for heat tape to thaw frozen pipes? We can effectively manage this situation. By adopting proactive home maintenance strategies and utilizing heat tape appropriately, homeowners can keep their homes safe and warm. As winter unfolds, let this concise insight guide you toward maintaining a secure and comfortable living environment.
by avi | Mar 27, 2024 | Water heater repair and installation
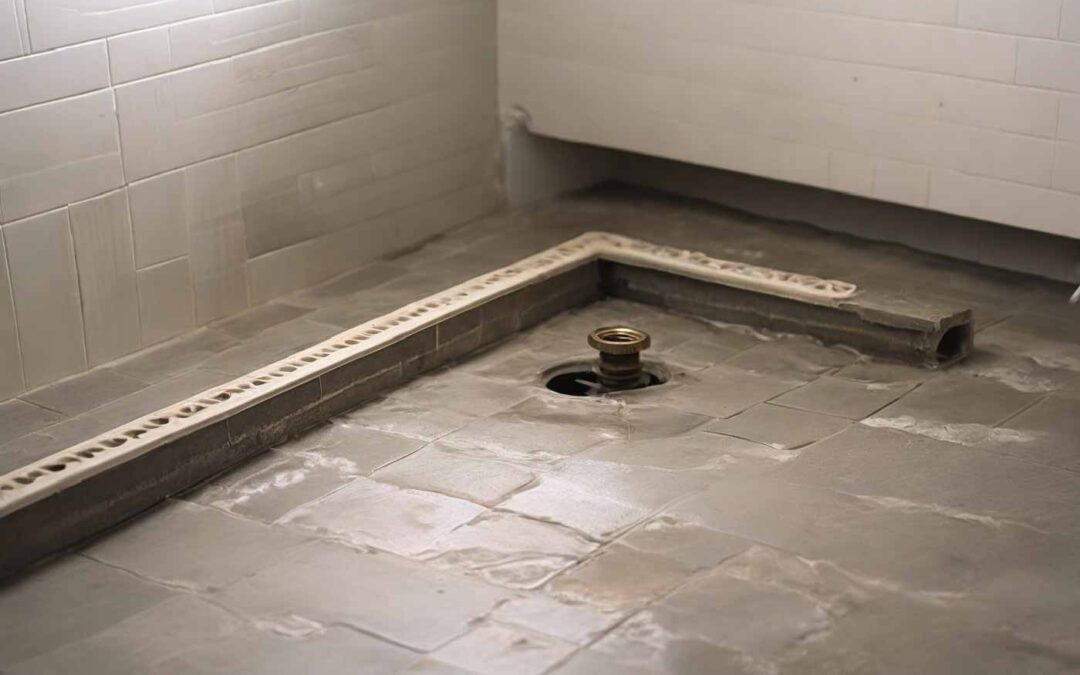
Whether you are a seasonal DIY enthusiast or a beginner looking to tackle a new project. Knowing the process of how to plumb a tile shower drain is essential.
To plumb a tile shower drain, start by installing the drain assembly into the shower pan, ensuring a secure fit. Then, connect the drain pipe to the existing plumbing using solvent cement.
Next, waterproof the shower pan using a waterproofing membrane. Finally, install the drain grate and apply grout to finish the project. Plumbing a tile shower drain is a crucial step in creating a functional and aesthetically pleasing shower.
This comprehensive guide will walk you through the step-by-step process of effectively and efficiently plumbing a tile shower drain. By following these instructions, you can ensure that your tile shower drain is installed correctly and functions properly.
Step-by-step guide on How to plumb a tile shower drain
Gathering The Materials And Tools
Before you begin the process of a tile shower drain, it’s important to gather all the necessary materials and tools. This will ensure a smooth and efficient installation of your drain shower and tile on shower pan. Here are the essential steps and items you’ll need:
Selecting The Correct Tile Shower Drain
First and foremost, you need to select the shower drain that is suitable for your tile shower project. There are various types of shower drains available, such as linear drains and center drains. Consider the design and layout of your shower area when making your selection, ensuring that the drain fits seamlessly into your overall design aesthetic. Additionally, check the compatibility of the drain with the type of tile you’ll be using for your shower floor.
Gathering Necessary Plumbing Materials And Tools
Once you’ve chosen the right shower drain, it’s time to gather the necessary plumbing materials and tools for the installation process. Here’s a handy list to help you get started:
| Materials |
Tools |
- PVC drain assembly
- PVC primer and cement
- Teflon tape
- Shower pan liner
- Gravel or sand
- Tile adhesive or mortar
- Tile grout
|
- Tape measure
- Hacksaw or PVC cutter
- Trowel
- Utility knife
- Level
- Rubber mallet
- Tile spacers
- Sponge or cloth
|
Preparing The Shower Area
Before you begin to plumb a tile shower drain, it’s important to properly prepare the shower area. This involves measuring and marking the drain location as well as preparing the subfloor for the drain installation. Following these steps will ensure a successful and leak-free shower drain installation.
Measuring And Marking The Drain Location
To start, you need to accurately measure and mark the location of the drain in your shower area. Here’s how:
- Begin by determining the centerline of the shower drain installation. This will be where the main drain pipe will be located.
- Next, measure the distance between the walls and the centerline of the drain to ensure proper positioning of the drain shower.
- Using a pencil or marker, mark the centerline of the drain and the distances you measured on the subfloor.
- Make sure to double-check your measurements and marks before moving on to the next step.
Preparing The Subfloor For The Drain Installation
Once you have accurately marked the drain location, it’s time to prepare the subfloor. Here’s what you need to do:
- Start by removing any existing flooring, such as tiles or vinyl, down to the subfloor.
- If you are installing a tile on the shower pan, make sure the subfloor is smooth, level, and clean. Any unevenness in the subfloor will affect the overall stability of the shower drain.
- If your shower area is on a concrete slab, you will need to create a recessed area. This can be done by using a chisel or a grinder.
- Ensure that the recessed area is slightly larger than the size of the drain. It allows for proper fitting during the installation.
- Before proceeding, make sure the subfloor is completely dry and free from any debris or dust. Because debris and dust could affect the adhesion of the shower drain.
Installation process on how to plumb a tile shower drain
When it comes to the installation of a tile shower drain, it’s crucial to ensure that it’s done correctly. This helps to prevent potential leaks and water damage. A properly installed shower drain is an essential element in the construction of a watertight shower. In this step-by-step guide on how to plumb a tile shower drain, we will focus on the process of installing the shower drain, from assembling the drain components to connecting it to the plumbing system.
Assembling The Drain Components
Before you begin the installation, it’s important to assemble all the necessary drain components. Here’s a list of components you will typically need for a standard shower drain:
- Drain body
- Rubber gasket
- Locking nut
- Strainer
Connecting The Drain To The Plumbing System
Once the drain components are assembled, you can proceed with connecting the drain to the plumbing system. This process involves securing the drain body to the shower pan and connecting it to the existing plumbing lines.
Start by applying a layer of waterproofing membrane around the drain hole on the shower pan to create a watertight seal. Then, carefully position the drain body over the hole, ensuring that it sits flush with the surface of the pan. Secure the drain body in place using the rubber gasket and locking nut, making sure to tighten it firmly to create a secure seal.
After the drain body is in place, you can proceed to connect the drain to the existing plumbing lines. Use a suitable solvent cement to securely join the drainpipe to the waste line, ensuring a watertight connection to prevent any potential leaks.
Setting The Tile Around The Drain
Setting the tile around the drain is a crucial step in ensuring a properly functioning and visually appealing tile shower drain. This is the stage where attention to detail is key, as it involves both the aesthetic and functional aspects of the drain shower. The process involves applying a waterproofing membrane, followed by the installation and grouting of the tiles.
Applying Waterproofing Membrane Around The Drain
When setting the tile around the drain, it’s imperative to apply a waterproofing membrane to prevent any water intrusion. This step acts as an additional barrier to protect the tile on the shower pan and ensure a watertight seal. The membrane should be carefully applied to the area around the drain. Take care to cover the entire surface thoroughly to prevent any potential leaks during the shower drain installation.
Installing And Grouting The Tiles
With the waterproofing membrane in place, the next step is to proceed with installing and grouting the tiles. The tiles should be strategically positioned around the drain. Ensuring a snug fit and proper alignment. Additionally, how to plumb a tile shower drain involves meticulous attention to detail. During the tile installation maintain the integrity of the shower drain installation. Once the tiles are in position, you need to proceed with grouting. Make sure it is done properly to ensure a seamless and durable finish for the shower drain.
Testing And Finishing
Discover a step-by-step guide on how to efficiently plumb a tile shower drain. Learn about testing and finishing techniques for a seamless installation process.
Testing The Shower Drain For Leaks
Once you have successfully installed the shower drain, it is crucial to test it for any potential leaks. Failure to do so can result in water damage and costly repairs down the line. Testing the shower drain for leaks is a relatively simple process that ensures a watertight seal and guarantees the longevity of your tile shower. Here’s how you can test the shower drain for leaks:
- Start by filling the shower pan with water, ensuring that the water level remains below the height of the shower curb.
- Allow the water to sit in the pan for at least 15 minutes. During this time, carefully inspect the area around the drain for any signs of leakage. Be careful about water seeping through the tile or pooling on the shower floor.
- If you notice any leaks, promptly identify the source, as it could be due to an improper connection or faulty sealant.
- Common areas where leaks may occur include the connection between the drain and the shower pan, as well as the junction between the shower pan and the surrounding walls.
- To rectify the issue, disassemble the problem area and carefully examine the fittings. If needed, apply additional sealant and ensure a secure connection between the components.
- Rerun the water test after making the necessary adjustments. Repeat this process until you no longer observe any leaks.
Remember, accurately testing the shower drain for leaks is crucial to prevent water damage and maintain the integrity of your tile shower. Taking the time to ensure a tight seal will give you peace of mind and guarantee a long-lasting, leak-free installation.
Applying Sealant And Finishing Touches
Applying sealant and adding finishing touches is the final step in plumbing a tile shower drain. This step is essential to prevent water from infiltrating the surrounding areas and causing structural damage. Follow these guidelines to achieve a professional finish:
- Carefully clean the area around the drain and remove any debris or excess mortar.
- Apply a high-quality silicone sealant to the gap between the shower pan and the tile. Smooth the sealant using a caulk tool or a damp cloth to ensure an even, watertight seal.
- Pay close attention to the corners and edges, ensuring complete coverage and smooth lines.
- Allow the sealant to dry completely as per the manufacturer’s instructions. This usually takes at least 24 hours.
- Once the sealant has dried, apply a grout sealer to protect the grout lines from moisture and potential staining. This will also enhance the overall appearance of your tile shower.
- Inspect the entire shower drain and surrounding tile for any imperfections, such as uneven grout lines or loose tiles. Make any necessary repairs or adjustments to ensure a flawless finish.
Plumbing a tile shower drain might seem complex. But with the right instructions, it’s manageable. From installing the drain, and testing for leaks, to applying sealant, these steps ensure a durable, waterproof, and aesthetically pleasing tile shower. Remember, a perfect shower drain is key to a long-lasting and functional shower space.
Frequently Asked Questions
How Do You Lay Tile Around A Shower Drain?
1. Start by measuring and marking the tile layout around the drain.
2. Cut the tiles using a tile cutter or wet saw to fit around the drain.
3. Apply a thin layer of adhesive on the floor and press the tiles into place.
4.Use tile spacers to maintain even gaps between tiles.
5. Once the tiles are set, apply grout and wipe off any excess.
How Do You Hook Up A Shower Drain Pipe?
To hook up a shower drain pipe, follow these steps. First, locate the drain hole in the shower base. Then, attach the drain pipe to the base using adhesive or screws. Next, connect the other end of the pipe to the main drain system.
Finally, seal the connections with a plumber’s putty or silicone sealant to prevent leaks.
Should Shower Drain Be Flush With Tile?
Yes, the shower drain should be flush with the tile to ensure proper drainage and avoid potential tripping hazards. A flush drain also provides a seamless and aesthetically pleasing finish to the overall shower floor.
Conclusion
How to plumb a tile shower drain requires careful steps and attention to detail. By following the step-by-step guide we are providing in this blog post, you can confidently tackle this project. While ensuring a leak-free and functional shower drain. Remember to gather the necessary tools and materials, and prepare the subfloor and drain assembly. Be cautious about installing and connecting the drain components properly.
by avi | Jan 30, 2024 | Water heater repair and installation
We all love hot water on a cold winter day. Nobody likes to freshen up with cold water after a long day. This is why our trusty water heater comes into the clutch. But with all the heroism they can also fall victim to faults or problems. So, if yours is also suffering from the same disease. Then who do you call for water heater repair?
Depending on your water heater repair, call a professional plumber or HVAC technician. They have the expertise to diagnose and fix any issues quickly and efficiently.
Regardless of whether your water heater has a leak, no hot water, or any other issue. It’s crucial to contact an expert for help. Attempting to fix it yourself could result in additional damage or safety risks. Handymen and air conditioning experts work in water warmer fixes and have the fundamental devices and information to take care of business properly.
By reaching an expert, you can guarantee that your water radiator is working Quickly. Reestablishing your high-temperature water supply and forestalling any possible long-haul harm.
Common Water Heater Problems
Water radiators are fundamental in each family, giving boiling water to different exercises. However, they are susceptible to certain issues that could impede the flow of hot water, causing homeowners inconvenience. You can quickly identify and resolve issues by knowing about the most common problems with water heaters, ensuring a consistent supply of hot water.
No Hot Water
The lack of hot water is one of the most common issues with water heaters. A broken heating element may be the root of this issue. Typically for a defective thermostat or circuit breaker. It is significant to look at these parts to analyze the underlying driver of the issue and redress it proficiently.
Insufficient Hot Water
Another common issue is the stockpile of inadequate boiling water. The explanation can be dregs develop in the tank. A little warming component or a flawed plunge cylinder can likewise cause this issue. Normal upkeep and flushing of the water warmer can forestall silt gathering, guaranteeing a predictable progression of boiling water.
Water Leaks
Water spills from the water radiator can show different issues. Normal causes can be free fittings or a flawed temperature and strain help valve. Distinguishing the wellspring of the hole and tending to it speedily is fundamental. to guarantee the water heater’s effective operation and prevent water damage.
Strange Noises
A loose heating element, excessive pressure within the tank, or sediment buildup could be the cause of unusual noises like banging, rumbling, or popping from your water heater. Customary upkeep and flushing can assist with easing these commotions, guaranteeing the smooth activity of the water warmer.
Reasons For Water Heater Problems
Sediment Buildup
One common reason for water heater problems is sediment buildup. Over time, minerals and sediment can accumulate inside the tank, causing issues with efficiency and functionality. When sediment settles at the bottom of the tank, it can create a barrier between the heating element and the water, reducing the heater’s ability to heat water effectively. This buildup can also lead to strange noises. Reducing hot water output, and even premature failure of the water heater if you don’t fix it. Regular maintenance, such as flushing the tank, can help prevent sediment buildup and prolong the life of your water heater.
Thermostat Issues
Another explanation you might encounter issues with your water radiator is because of indoor regulator issues. The indoor regulator is responsible for controlling the temperature of the water in the tank. Assuming the indoor regulator is defective or skewed, it can bring about water that is excessively hot or not hot enough. This can be disappointing and badly arranged, as it can influence the solace of your showers and the productivity of your water radiator. To guarantee legitimate working, it’s critical to have an expert review and recalibrate the indoor regulator if important.
Faulty Heating Element
A faulty warming component is one more typical reason for water radiator issues. The warming component is answerable for warming the water in the tank and can become compromised over the long haul. Assuming the component is harmed or broken down, it may not warm the water appropriately, bringing about tepid or cold water. Furthermore, a defective warming component can consume more energy, prompting higher service bills. It’s fundamental to have a prepared professional evaluate the warming component and supplant it if necessary, guaranteeing ideal execution and energy effectiveness.
Pressure Relief Valve Malfunction
Your water warmer’s tension alleviation valve is a significant security include. It releases exorbitant strain to hold the tank back from exploding. If the strain assists valve breakdowns, it with cause brief issues like spillages, superfluous pressure, or even absolute disillusionment with the water hotter.
Dregs development, high water pressure, or a broken valve are typical causes of pressure-help valve problems. Ordinary assessment and backing by a specialist can help with perceiving potential issues with the strain help valve and prevent any sad disillusionments. With everything taken into account, residue improvement, indoor controller issues, inadequate warming parts, and strain help valve errors are typical clarifications behind water hotter issues.
To keep your water radiator operating efficiently and ensure a consistent supply of heated water for your family’s needs, regular maintenance, appropriate repairs, and expert investigations can assist in identifying and determining these issues. Remember, that it’s crucial to call an ensured capable for any water hotter fix or upkeep needs to avoid extra troubles and assurance the life expectancy of your system.
When To Call A Professional
When your water radiator needs a fix, it’s essential to call an expert. A professional will be able to analyze and fix the issue proficiently. Guaranteeing your boiling water supply works in a matter of moments.
Lack Of Hot Water Despite Troubleshooting
The most disappointing issue to experience is the absence of warm water. Even after endeavoring essential investigating steps. This could be an indication of a more huge issue that requires proficient skill. A professional plumber can look deeper into the problem and determine what’s causing it.
Persistent Water Leaks
Water spills around your water radiator can prompt huge harm whenever left ignored. It is essential to contact a reputable water heater repair company if you observe persistent leaking. A certified handyman can examine the unit, recognize the wellspring of the break, and decide the best strategy. Not only can ignoring a water leak result in water damage, but it can also pose a safety risk due to electrical hazards.
Electrical Or Gas Connection Problems
Issues with the electrical or gas associations of your water warmer can be dangerous. Which can require expert take care for the time being. Attempting fixes on electric or gas association issues without vital skill can prompt mishaps. For example, gas spills or electrical shocks. A professional handyman can securely survey and fix. Also, guarantee the legitimate working and well-being of your water warmer.
Malfunctioning Pressure Relief Valve
The tension help valve is a basic security part of your water radiator. If it breaks down, it could cause damage and an excessive buildup of pressure. Recognizing a breaking down pressure help valve requires proficient mastery. A certified handyman can evaluate the valve, guarantee it is working accurately, and supplant it if fundamental. Overlooking issues with the strain alleviation valve can bring about disastrous disappointment in your water warmer and risky circumstances.
Who Do You Call For Water Heater Repair
At the point when your water radiator needs fixing, trust the specialists who have practical experience in tackling these issues rapidly and effectively. For prompt and dependable solutions, contact a professional aceplumbingrepair.com water heater repair service in your area.
Regarding water radiator fixes, various kinds of warmers require explicit information and aptitude. Depending on the kind of water heater you have, here is a breakdown of who to call:
Gas Water Heater
If you have a gas water radiator, it’s critical to call an expert who has practical experience in gas machines. They are professional enough to handle gas-related repairs safely and effectively. Ensure the specialist has authorization and experience in managing gas water radiators.
Electric Water Heater
An expert plumber or electrician who is familiar with electrical systems is required for electric water heaters. They can analyze and fix any electrical issues that might be influencing your water warmer.
Tankless Water Heater
Tankless water radiators require specific abilities because of their novel plan and usefulness. Search for a professional who has insight into tankless water radiators explicitly and can rapidly analyze and resolve any issues that might emerge.
Keep in mind, no matter what sort of water warmer you have, it’s essential to recruit an expert who is authorized, protected, experienced, and educated about your particular kind of radiator. This guarantees a careful and compelling fix, drawing out the life expectancy of your water warmer. While confronting a water warmer fix issue, finding expert help that offers quality workmanship at a sensible price is significant. By thinking about the expense of expert administrations and the mastery expected for your particular warmer sort, you can pursue an educated choice and guarantee your water radiator gets the maintenance it needs. Thus, if you experience any issues with your water radiator, contact a respectable expert in your space decisively!
How Much A Professional Service Cost?
It’s normal to ponder the expense of employing an expert for a water warmer fix. It is essential to understand that investing in professional repair is frequently more cost-effective in the long run, even though the price can vary depending on various factors such as the complexity of the issue and the region in which you live. Attempting to fix the issue on your own could result in additional damage and higher costs. On average, professional water heater repair services may range from $150 to $600.
Things To Consider When Hiring A Professional
At the point when your water warmer separates, it’s essential to find an expert who can productively fix the issue. Picking the perfect individual for the gig can save you time, cash, and migraines over the long haul. Here are a few significant elements to consider before recruiting an expert for a water warmer fix.
Check For Proper Licensing And Insurance
When considering a professional for water heater repair. The first thing you should do is verify their license. A professional will have the fundamental preparation and mastery to deal with your particular water radiator model. Moreover, protection inclusion safeguards you and the specialist in the event of any mishaps or harm that might happen during the maintenance cycle.
Read Customer Reviews And Testimonials
Take the time to read customer reviews and testimonials about the professional or business offering water heater repair services before making a decision. These audits can give important experiences into the nature of work and client assistance given. To better comprehend the professional’s strengths and weaknesses, look for patterns in the reviews. Consider both positive and negative criticism to settle on an educated choice.
Compare Prices And Get Multiple Quotes
With regards to the water warmer fix, valuing can shift among experts and organizations. It’s important to compare prices and get multiple quotes to make sure you get a fair and competitive price. Contact a few experts in your space and solicit definite statements for the maintenance work. Remember that the least expensive choice may not generally be awesome, so consider factors like standing, experience, and client audits notwithstanding the cost.
You can make a decision and entrust your water heater repair to a professional. But take into consideration these important factors when looking for a professional.
Tips For Preventing Water Heater Problems
Proper maintenance and care can significantly prolong the lifespan of your water heater, saving you both time and money. Here are some essential tips for preventing water heater problems.
Flush The Water Heater Regularly
Regularly flushing your water heater helps to remove sediment build-up, preventing clogs and prolonging the life of the unit. It also ensures that your water heater operates at maximum efficiency. In turn, this can help prevent costly repairs and extend the lifespan of your water heater.
Monitor Water Pressure
Keeping an eye on your home’s water pressure can help keep your water heater from being put under too much stress. High water tension can harm your warmer and plumbing framework. Consider introducing a strain controller to keep an ideal tension territory and forestall possible issues.
Schedule Regular Maintenance
Standard expert support by a specialist expert is vital for the prosperity of your water hotter. A specialist can research deeper issues. Fix the parts, and assurance everything is working top-notch. Regular support planning can assist in identifying and addressing minor issues before they become more serious.
Is Diy Any Good For Repair?
Many homeowners often wonder whether they should attempt to fix their water heater issues themselves or call in a professional. While DIY repair can be cost-effective, it’s important to understand the potential drawbacks before deciding. Let’s explore the problems of DIY water heater repair.
Problems Of Diy
While attempting to fix your water heater on your own may seem like a money-saving idea. Instead, it can lead to various issues if not done properly. Some common problems of DIY water heater repair include:
- Incorrect diagnosis of the problem
- Using the wrong replacement parts
- Voiding the manufacturer’s warranty
- Creating safety hazards
- Causing further damage to the water heater
Without the expertise and experience of a professional, the DIY approach can potentially exacerbate the problem and result in costly repairs or even the need for a full replacement.
Frequently Asked Questions For Who Do You Call For Water Heater Repair
Q: Is It Worth It To Repair A Hot Water Heater?
A:Yes, it is worth repairing a water heater. Repairing can be cost-effective and extend the lifespan of your heater.
Q:Is the Water Heater An HVAC?
A: No, a water heater is not an HVAC system. HVAC refers to heating, ventilation, and air conditioning systems. While a water heater is a vital component of a home’s plumbing, it is not directly related to the HVAC system.
Q:What To Do If Your Water Heater Is Broken?
A:If your water heater is broken, first check for any visible issues such as leaks or pilot light outages. If you can’t identify the problem, it’s best to call a professional plumber or technician to diagnose and repair the issue promptly.
Conclusion
Considering the significance of a utilitarian water warmer, it is essential to know who to call for fixes. With the direction given in this blog entry, you presently have an unmistakable comprehension of the critical variables to consider while choosing a dependable and experienced proficient.
To ensure that your hot water requirements are met effectively and efficiently, don’t hesitate to contact a reputable water heater repair company.
by avi | Dec 14, 2023 | Water heater repair and installation
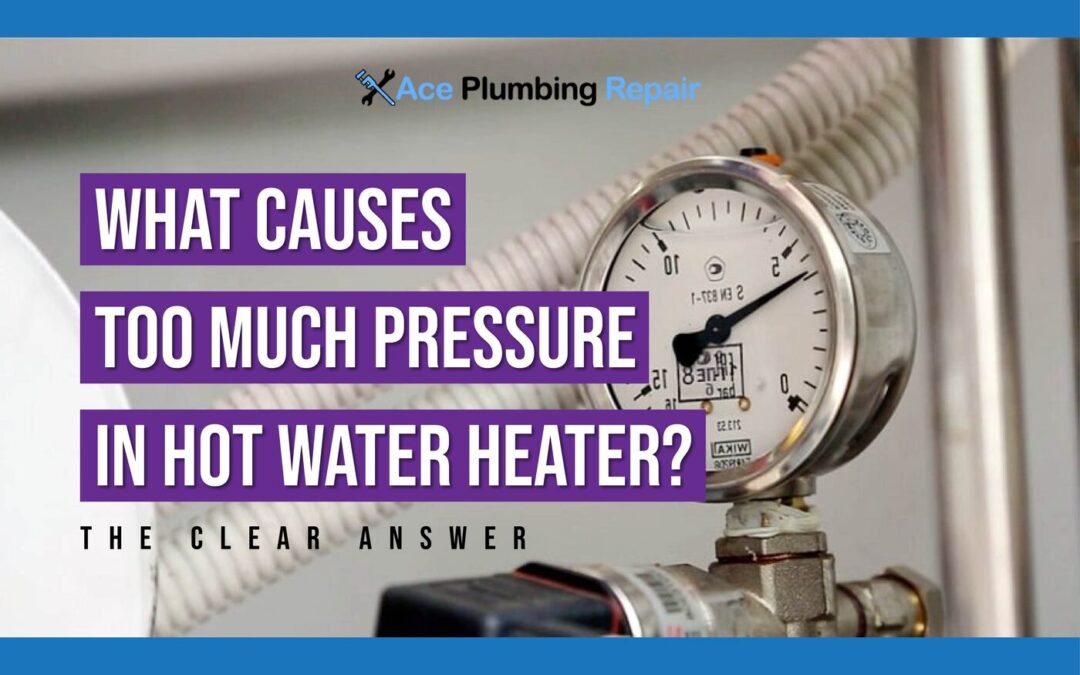
Welcome to our comprehensive guide on what-causes-too-much-pressure-in-hot-water-heater. Your water heater is an indispensable part of your daily life, ensuring you have a steady supply of warm water for various household needs. However, when your trusty appliance experiences excessive pressure, it can lead to a host of problems, from leaks to potentially dangerous situations. In this blog, we’ll dive deep into the reasons behind high pressure in hot water heaters and explore practical solutions to prevent them. Understanding the causes and taking preventive measures can save you from costly repairs and safeguard your home and family.
How does a hot water heater work?
A water heater, an essential appliance in most homes, plays a crucial role in ensuring you have a steady supply of warm water for various household needs. Whether you’re taking a relaxing shower, doing the dishes, or washing your hands, your water heater is there to provide that comforting warmth. But how does it accomplish this task? Let’s break down the workings of this essential plumbing device.
The basics:
At its core, a water heater is a storage tank that holds and heats water to a preset temperature. The process begins when cold water enters the tank through a pipe connected to your home’s water supply. Inside the tank, a heating element, powered by electricity, gas, or both, heats the cold water until it reaches the desired temperature, typically set by you on the thermostat.
Temperature regulation:
For safety and comfort, a timer checks the temperature of the water and heats it up when it drops below a certain level. It turns off when the temperature is reached.
Convection:
As the water inside the tank heats up, it undergoes a natural process known as convection. Warmer water tends to rise to the top of the tank, while cooler water sinks to the bottom. This movement creates a consistent temperature throughout the tank, ensuring that you have access to hot water whenever you turn on a faucet or shower.
Continuous supply:
When you open a hot water faucet, the hot water exits the tank, and the cold water supply valve opens to replace it with fresh cold water. The heating element then kicks in again to reheat the water, maintaining a constant supply of hot water for as long as needed.
Your water heater essentially puts in endless hours in the background to provide you hot water whenever you need it, which is convenient and comfortable. Gaining a comprehensive understanding of its internal mechanisms will enable you to develop a deeper appreciation for this essential device and effectively address any potential problems that may occur in the future.
What causes too much pressure in hot water heater?
Excessive pressure in a water heater might be worrisome since it has the potential to create safety risks and harm the appliance. Several factors might contribute to the occurrence of high pressure in your water heater:
Temperature setting:
If the temperature setting on your water heater is too high, it can cause the water to boil, leading to an increase in pressure inside the tank. Most residential water heaters have a recommended temperature setting between 120°F and 140°F (49°C to 60°C) to prevent this issue.
Thermal expansion:
When water heats up, it expands. In a closed system, such as a water heater, this expansion can lead to an increase in pressure. To address this, many water heaters are equipped with expansion tanks or valves to release excess pressure.
Faulty pressure relief valve:
Every water heater should have a pressure relief valve installed to prevent excessive pressure buildup. If this valve is malfunctioning or if it’s blocked by debris, it may not operate properly, allowing pressure to build up inside the tank.
Sediment buildup:
Over time, minerals and sediment can accumulate at the bottom of the water heater tank. This can insulate the heating element, causing it to overheat and generate excess pressure. Regular maintenance, such as flushing the tank, can help prevent this issue.
Closed water system:
If your home’s plumbing system is a closed loop (water doesn’t have an escape route, like a well-designed expansion tank), it can contribute to increased pressure. Adding an expansion tank to the system can help alleviate this.
Faulty temperature and pressure relief valve (T&P Valve):
The T&P valve is designed to release excess pressure if it becomes too high. If this valve is faulty or hasn’t been replaced as recommended, it can lead to pressure issues.
High inlet water pressure:
If the municipal water supply to your home has excessively high pressure, it can put extra strain on your water heater and potentially lead to pressure-related problems. A pressure-reducing valve may be needed to regulate the incoming water pressure.
To prevent damage or safety issues, promptly address excessive pressure in your hot water heater by adjusting temperature settings, replacing defective valves, cleaning the tank, or adding additional components. Seek expert guidance if uncertain.
What to do if you suspect high pressure?
If you suspect that your home’s plumbing system is experiencing high water pressure, it’s essential to take prompt action to avoid potential issues and ensure the safety and longevity of your plumbing fixtures and appliances.
Check water pressure:
Begin by confirming your suspicions. You can use a water pressure gauge to measure the pressure at a hose bib or faucet. Standard household water pressure typically falls within the range of 40 to 60 psi (pounds per square inch). If your reading exceeds this range, you likely have high water pressure.
Install a pressure regulator:
If high water pressure is confirmed, consider installing a pressure regulator (pressure-reducing valve) in your main water line. This device will help reduce the incoming water pressure to a safe level for your plumbing system.
Regular maintenance:
Schedule regular maintenance for your plumbing system to check for leaks, worn-out seals, and damaged pipes. High water pressure can exacerbate wear and tear on your plumbing, so addressing any issues promptly is crucial.
Monitor appliances:
Keep an eye on your appliances, especially water heaters, as high pressure can lead to damage or failures. Ensure that the pressure relief valve is functioning correctly on your water heater and have it inspected if needed.
Consult a professional:
If you’re unsure about your plumbing system or don’t have the necessary skills to install a pressure regulator, it’s advisable to consult a licensed plumber. They can assess your system, recommend appropriate solutions, and ensure the proper installation of any necessary equipment.
Addressing high water pressure promptly can prevent costly damage to your plumbing, appliances, and fixtures, ultimately saving you money and ensuring the continued functionality of your water system.
Proper maintenance to prevent high pressure
Maintaining your hot water heater is crucial to prevent the issues associated with high pressure. Regular maintenance ensures that your appliance operates efficiently, extends its lifespan, and keeps your home safe from potential hazards. Here’s what you need to do to prevent high pressure in your hot water heater:
-
Check for leaks:
Inspect all the pipes and connections around your hot water heater every few months. Look for any signs of leaks or cracks. Address any issues promptly, as leaks can lead to pressure problems and water damage.
-
Flush sediment:
Annually, flush out sediment buildup from the tank. Over time, minerals and debris can accumulate in the bottom of the tank, reducing its efficiency and potentially causing pressure-related issues. Follow these steps to flush your hot water heater:
- Turn off the power or gas supply to the heater.
- Shut off the cold water supply valve that feeds into the heater.
- Connect a hose to the drain valve at the bottom of the tank and place the other end in a drain or bucket.
- Open the drain valve and allow the water to flow out. You may need to open a hot water faucet in your home to facilitate drainage.
- Once the tank is empty, close the drain valve, remove the hose, and turn on the cold water supply valve.
- Let the tank fill up completely before turning the power or gas supply back on.
-
Choose the right expansion tank:
Ensure that you’re using the appropriate size expansion tank with your hot water heater. An expansion tank helps absorb excess pressure that can build up within the system as water heats and expands. Choosing the correct size ensures your system operates safely without excessive pressure.
Performing routine maintenance on your hot water heater helps avoid the build-up of excessive pressure, protects your property from potential damage, and guarantees optimal efficiency. Seek the guidance of a licensed plumber or technician for expert help, with a focus on ensuring safety and tranquility.
conclusion
In conclusion, understanding what causes too much pressure in hot water heater. By addressing issues such as temperature fluctuations, faulty pressure relief valves, or sediment buildup, homeowners can mitigate the risks associated with high-pressure situations. Regular maintenance and vigilant monitoring of the system can prevent catastrophic failures and ensure the longevity of the water heater. Overall, a proactive approach to identifying and addressing what causes too much pressure in a hot water heater is essential for the well-being of your home and the safety of your loved ones.
by avi | Dec 8, 2023 | Water heater repair and installation
Embarking on the journey of understanding the safety of our household essentials, we delve into the common concern: Can Water Heater Explode If Turned Off? In this exploration, we unravel myths, explore the intricacies of water heater mechanisms, and provide practical insights. Join us on a quest to demystify the possibilities, dispel misconceptions, and equip you with the knowledge needed to ensure your water heater is not just a source of comfort but a safe and reliable addition to your home. Let’s separate fact from fiction in this critical exploration of water heater safety.
How does water heaters work?
Water heaters, the unsung heroes of our daily routines, operate with a simple yet effective mechanism to provide us with comforting warmth. Whether you have a gas or electric water heater, the basic principle remains consistent.
Picture this: inside the tank, water awaits its turn to be warmed. For gas heaters, a burner ignites, heating the water through a heat exchanger, while electric heaters employ heating elements submerged in the water. The thermostat keeps things in check, ensuring the water reaches the desired temperature.
Once you turn on the hot water tap, this pre-warmed water flows out, ready to make your shower or dishwashing experience cozy. It’s a process of constant maintenance – the thermostat monitors and adjusts the temperature, and a pressure relief valve prevents the tank from turning into a pressure cooker.
So, the next time you enjoy a soothing hot shower, know that your water heater is working behind the scenes, turning chilly water into a warm embrace.
Can water heater explode if turned off?
No, a water heater is unlikely to explode if it’s turned off. When a water heater is turned off, it means that the heating elements, whether gas burners or electric heating elements, are not actively heating the water. Explosions occur from factors like overheating, pressure buildup, or valve malfunction.
However, it’s essential to understand that even when turned off, a water heater can pose minimal risks if certain issues are present. For example:
- Sediment Buildup: Over time, sediment can accumulate at the bottom of the tank. If the sediment is not regularly flushed out, it can lead to overheating and potentially cause pressure issues.
- Pressure Relief Valve Malfunction: The pressure relief valve is a crucial safety component. If it malfunctions or is blocked, it might not effectively release excess pressure, increasing the risk of a problem.
- Corrosion and Wear: Over the years, water heaters can experience corrosion and wear. This can weaken the tank, making it more susceptible to failure.
For optimal safety, regularly maintain your water heater by flushing the tank to clear sediment and checking the pressure relief valve. If safety concerns arise, consult a professional plumber or technician for an inspection, issue resolution, and assurance that safety features are in order.
How to prevent a water heater explosion?
Preventing a water heater explosion is crucial for the safety of your home. While water heater explosions are rare, they can be catastrophic. Here are some tips to help you prevent a water heater explosion:
Install a pressure relief valve (PRV)
Every water heater should have a pressure relief valve installed. This valve is designed to release excess pressure from the tank. Make sure it is properly installed and has not been tampered with.
Regular maintenance
Schedule regular maintenance for your water heater. This includes flushing the tank to remove sediment and checking the anode rod for corrosion. Follow the manufacturer’s guidelines for maintenance.
Temperature setting
Set the water heater’s temperature to a safe level, usually around 120 degrees Fahrenheit (49 degrees Celsius). Higher temperatures can increase pressure inside the tank and create a potential for problems.
Check for leaks
Regularly inspect your water heater for any signs of leaks. Address any leaks promptly, as they can lead to increased pressure and stress on the tank.
Install an expansion tank
In closed water systems, installing an expansion tank can help accommodate the expansion of water when it is heated, reducing stress on the water heater.
Proper ventilation
Ensure proper ventilation around the water heater. Combustion air is necessary for gas water heaters, and lack of it can lead to improper burning and potential hazards.
Secure the tank
Make sure the water heater is securely anchored to the floor or wall to prevent tipping. This is especially important in earthquake-prone areas.
Replace aging water heaters
If your water heater is getting old, consider replacing it. As water heaters age, they may become more susceptible to issues that could lead to a failure.
Educate household members
Teach everyone in your household about the importance of not tampering with the pressure relief valve and regularly checking for signs of problems.
Professional installation
Ensure that your water heater is installed by a qualified professional. Proper installation is critical for the safe and efficient operation of the appliance.
Monitor strange noises
Be attentive to any strange noises coming from the water heater. Popping or rumbling sounds could indicate sediment buildup, which can lead to overheating.
If you suspect any issues with your water heater or are unsure about its safety, it’s essential to consult with a professional plumber or technician for a thorough inspection. Remember that safety should always be the top priority when dealing with any appliance in your home.
How to choose a water heater that won’t explode?
If you’re still wondering whether a water heater can explode when turned off, selecting a water heater that prioritizes safety and is less prone to issues is crucial in preventing the risk of explosions. Here are some key considerations to help you choose a water heater that minimizes the risk of such incidents:
Research brands and models
Before purchasing, research reputable brands and models known for their safety features. Customer reviews and testimonials can provide insights into the reliability of a water heater.
Energy source
Choose between gas and electric water heaters based on your preferences and available energy sources. Both types can be safe if installed and maintained properly.
Check for safety features
Look for safety features such as a temperature and pressure relief valve, an automatic shutoff feature, and corrosion-resistant materials. These features contribute to the overall safety of the water heater.
Proper sizing
Select a water heater that is appropriately sized for your household’s needs. Proper sizing ensures optimal performance and prevents unnecessary energy consumption.
Professional installation
Always hire a licensed professional for water heater installation. Proper installation is critical for ensuring safety and optimal performance.
By carefully considering these factors, you can choose a water heater that is not only efficient but also designed with safety in mind, reducing the risk of explosions or other safety hazards. If you have any doubts or questions, consult with a professional plumber or technician for advice tailored to your specific situation.
When to call a professional for water heater issues?
Knowing when to call a professional for water heater issues is vital for preventing potential hazards. If you observe visible damage, such as rust or leaks, it’s time to seek expert assistance. Inconsistent hot water supply or strange noises from the heater are also red flags that necessitate a professional’s attention.
Additionally, if you detect unusual odors, especially those resembling gas, take immediate action. Evacuate your home and contact a professional for emergency assistance. A malfunctioning pressure relief valve, evident through water discharge, is another critical reason to call in a professional.
Timely intervention by a qualified technician is crucial to addressing these issues and preventing further damage. Attempting to fix complex problems without expertise can lead to more significant complications.
By recognizing these signs and promptly reaching out to a professional, you prioritize the safety of your home and ensure the efficient functioning of your water heater. Remember, a proactive approach to addressing concerns can save you from potential hazards and costly repairs in the long run.
Conclusion
In conclusion, can water heater explode if turned off? Maintaining a safe water heater demands regular checks, proper maintenance, and informed decisions. Routine inspections, sediment removal, and choosing a reliable appliance contribute to a secure system. Recognizing signs of trouble and promptly engaging professionals ensure longevity and safety. A well-maintained water heater is more than an appliance; it’s a cornerstone of a secure and comfortable home. Prioritizing these measures safeguards against potential hazards and ensures the efficient functioning of this essential household asset, fostering a sense of security and peace of mind for residents.
by avi | Dec 7, 2023 | Water heater repair and installation
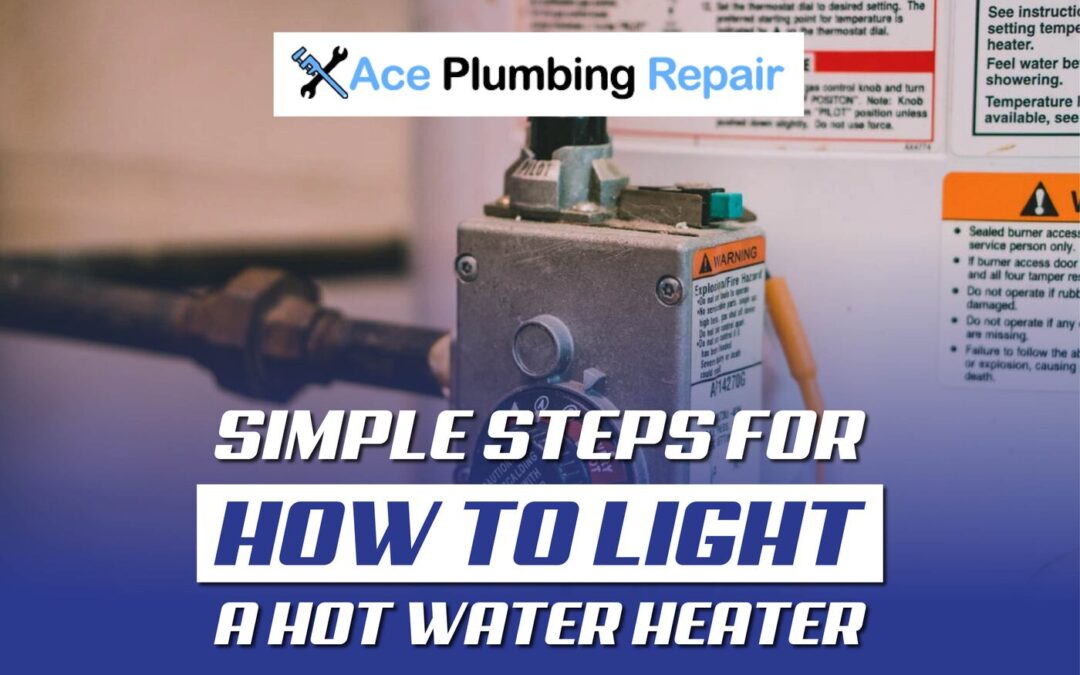
Lighting a hot water heater is a crucial skill that ensures you always have access to warm water for your daily needs. Whether you’re dealing with a pilot light that’s gone out or setting up a new system, this guide on How to light a hot water heater offers step-by-step instructions to safely and efficiently reignite your heater. Understanding this process not only saves you time and money on professional services but also empowers you to handle common household maintenance tasks with confidence. So, let’s dive into the essentials of lighting your hot water heater, ensuring you’re never left in the cold!
Understanding your hot water heater
Before diving into the specifics of how to light a water heater, it’s essential to familiarize yourself with the different types available and their basic operating principles. Generally, hot water heaters fall into two main categories: gas and electric. Each type has its unique features and methods of operation.
Gas water heaters are effective heating units that heat water in tanks using either natural gas or propane. They have a pilot light, which is a little flame that starts the gas burner. This light must be operated safely.
Electric water heaters, on the other hand, use electrical heating elements to warm the water. These units don’t require a pilot light, making their operation somewhat simpler but still requiring an understanding of their components for troubleshooting and maintenance.
Regardless of the type, safety is paramount when dealing with hot water heaters. For gas models, this includes ensuring there are no gas leaks and that the area is well-ventilated. It’s also important to follow the manufacturer’s instructions and local codes for installation and maintenance.
Familiarize yourself with the user handbook for your hot water heater model for important information on lighting, maintenance, and safety considerations, guaranteeing effective functioning and safety for yourself and your home.
Preparation steps for lighting your hot water heater
Safety first! Before you attempt to light your water heater, it’s crucial to undertake certain preparatory steps to ensure a safe and successful process. Here’s a detailed checklist to guide you:
- Check for Gas Leaks: If you have a gas water heater, sniff around the unit for any unusual odors that resemble rotten eggs, a common indicator of a gas leak. If you detect this smell, do not proceed. Evacuate the area and call a professional immediately.
- Ensure Proper Ventilation: Adequate ventilation is vital, especially for gas water heaters. Make sure the area around the water heater is clutter-free and well-ventilated. This step is crucial to prevent the buildup of gas fumes.
- Turn Off the Gas: Before lighting the pilot light, turn off the gas to the water heater and wait for a few minutes. This precautionary step helps in clearing out any residual gas.
- Gather Necessary Tools: Depending on your water heater model, you may need a lighter or matches to light the pilot. Keep these tools handy along with a flashlight for better visibility.
- Consult the User Manual: Each water heater has specific instructions for lighting the pilot. Review your heater’s manual for model-specific guidance and safety warnings.
- Wear Protective Gear: Consider wearing safety gloves and glasses for added protection.
By following these steps diligently, you can ensure that you are fully prepared to light your water heater safely and effectively. Remember, if you are unsure or uncomfortable with any of these steps, it’s always best to consult a plumbing professional.
Step-by-step guide: How to light a hot water heater
Lighting a hot water heater, whether it’s a newer model with electronic ignition or an older model requiring manual lighting, is a process that can be done safely with the right instructions. Here’s a detailed guide for both scenarios:
For newer models with electronic ignition:
Set the Thermostat to ‘Pilot’: Begin by turning the temperature control to its lowest setting and the gas regulator valve to the ‘Pilot’ position.
- Access the Pilot Light: Remove the access panel to reveal the pilot light. In some models, you might need to press a button to access it.
- Initiate Ignition Sequence: Depending on your model, you will either press or hold a button labeled ‘Ignition’ to start the pilot light. Some models may require you to press the button repeatedly.
- Check the Pilot Light: Once the pilot light is lit (you should see a small blue flame), continue to hold the ignition button for about a minute to ensure the flame stays lit.
- Adjust Temperature Setting: After confirming that the pilot is lit, turn the gas regulator valve to the ‘On’ position and adjust the temperature setting to your preference.
- Replace the Access Panel: Carefully replace the access panel.
For older models with manual lighting:
- Turn Off Gas and Wait: Turn the gas control knob to the ‘Off’ position and wait for a few minutes to clear any residual gas.
- Set to ‘Pilot’: Turn the gas knob to the ‘Pilot’ position.
- Locate Pilot Light: Remove the access cover if your model has one. The pilot light is usually located near the bottom of the unit.
- Light the Pilot: Hold down the reset button (pilot light button) and bring a long lighter or match to the pilot light opening. Once the pilot flame ignites, continue holding the button for about one minute.
- Check the Pilot Light: Release the button and observe if the pilot light stays lit. If it goes out, repeat the process.
- Turn On the Heater: Once the pilot light is steady, turn the gas knob to the ‘On’ position and set your desired temperature.
- Replace the Cover: If your water heater has a cover, replace it carefully.
If the pilot light doesn’t stay lit:
This could be due to a faulty thermocouple or a gas flow issue. If relighting the pilot light doesn’t work after several attempts, it may be time to call a professional for a more thorough inspection and repair.
By following these step-by-step instructions, you can safely and efficiently light your hot water heater, whether it has an electronic ignition or requires manual lighting. Remember, safety is paramount, so if at any point you feel unsure, it’s best to seek professional assistance.
Troubleshooting common issues
Even with careful attention to instructions, you might encounter issues when lighting your water heater. Here are some common problems and their practical solutions:
1. The pilot light won’t stay lit
If the pilot light goes out soon after releasing the button, it could indicate a faulty thermocouple or a problem with the gas supply. Ensure the thermocouple is properly positioned in the flame and not dirty or damaged. If it appears damaged or worn out, it may need replacement.
2. No gas flow
If you can’t light the pilot at all, there might be an issue with the gas supply. Check to ensure the gas valve to the heater is fully open. If it is, and there’s still no gas flow, there might be a blockage in the line or an issue with the gas supply itself.
3. Strange noises
Rumbling or popping noises can occur due to sediment buildup in the tank. Flushing the tank can often resolve this issue. However, if you hear hissing or whistling, it could be a gas leak, which requires immediate attention from a professional.
4. Weak or yellow pilot flame
A strong pilot flame should be blue. If it’s yellow or weak, the burner may be dirty. Cleaning the burner and adjusting the pilot can often fix this issue.
5. Water heater doesn’t heat water
If the pilot light is lit but the water isn’t heating, the issue could be with the thermostat or the heating element (in electric models). These components might need to be checked or replaced by a professional.
When you attempt these troubleshooting methods and still have problems, it is advisable to get advice from a qualified specialist. They are capable of safely and effectively diagnosing and fixing more complicated issues. Recall that several typical problems with hot water heaters may be avoided with routine maintenance.
Maintaining your hot water heater
Regular maintenance of your hot water heater is crucial for its longevity and efficiency. Here are some key tips to help keep your water heater in top condition:
- Annual Flush: Sediment buildup can affect your heater’s efficiency. Annually flush the tank to remove sediment. This involves turning off the power or gas supply, attaching a hose to the drain valve, and letting water run until clear.
- Inspect the Anode Rod: The anode rod protects the tank from corrosion. Check it every 2-3 years and replace it if significantly corroded. This simple step can significantly extend the life of your tank.
- Test the Temperature-Pressure Relief Valve: This valve prevents pressure buildup. Test it yearly by lifting the lever and letting it snapback. If it doesn’t release a burst of water into the drain tube, it may need replacement.
- Monitor Water Temperature: Keep the temperature setting around 120°F. This prevents overheating and reduces the risk of scalding, as well as conserves energy.
- Check for Leaks and Corrosion: Regularly inspect your water heater for signs of leaks or corrosion. Early detection can prevent extensive damage and costly repairs.
- Professional Inspection: Consider having a professional inspect your water heater every few years. They can identify issues that might not be apparent to the untrained eye.
By adhering to these maintenance practices, you ensure the efficient operation of your hot water heater, prevent potential problems, and extend its lifespan, saving you time and money in the long run.
Conclusion
Mastering how to light a hot water heater is an invaluable skill for homeowners and renters alike. This guide has walked you through each step, ensuring you can tackle this task with confidence and safety. Remember, regular maintenance and understanding your specific heater model are key to preventing future issues. Whether you’re dealing with an older model requiring manual lighting or a newer one with electronic ignition, the ability to reignite your hot water heater is empowering. If you ever feel unsure, don’t hesitate to seek professional help. Stay warm, and here’s to many more comfortable, hot showers!
 Call Now