by avi | Mar 11, 2024 | plumbing Services
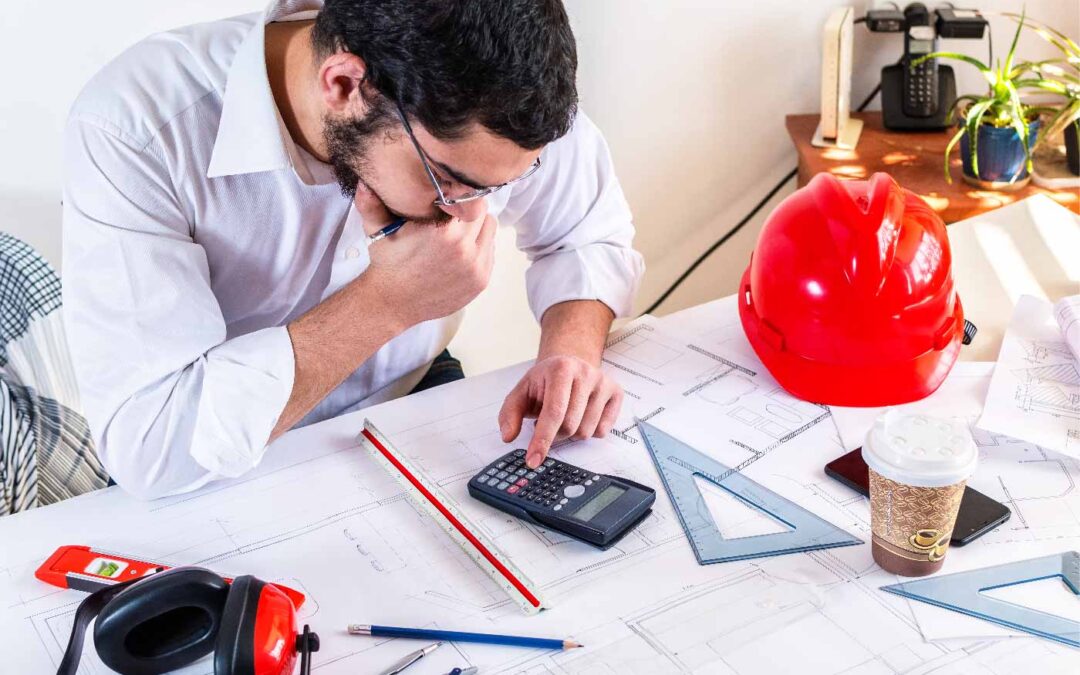
Building a new construction project requires careful planning and budgeting. When it comes to plumbing, estimating costs is essential to ensure a smooth and efficient process. By accurately assessing the expenses, you can avoid financial burdens and keep the project within budget. Understanding How to Estimate Plumbing Cost for New Construction is necessary.
To estimate plumbing costs for new construction. Start from factors such as the size of the project, type of materials, and labor costs. By analyzing these key elements, you can accurately calculate the overall plumbing expenses.
We will explore the key factors involving plumbing costs for new construction. From the size of the project to the materials you are about to use. Understanding these aspects will help you determine the financial investment you require for your plumbing needs. By the end, you will acquire the knowledge to estimate plumbing costs accurately. Allowing you to plan and execute your new construction project with confidence.
How To Estimate Plumbing Cost For New Construction
Estimating plumbing costs for new construction consider different factors. Things like building size, the number of fixtures you require, and the complexity of the plumbing system. Consulting with a professional plumber and getting multiple quotes can help ensure an accurate estimate.
How to Estimate Plumbing Cost for New Construction Estimating plumbing costs for new house construction can be a daunting task. However, understanding the primary costs involving your project helps in a more accurate estimate. In this article, we will discuss the key factors that contribute to plumbing costs for a new house. We will also provide you with valuable insights on how to estimate these costs effectively.
What Are The Primary Costs Of Plumbing For A New House?
When it comes to estimating plumbing costs for a new construction project. Several factors need further consideration. Here are the primary cost components:
1. New Construction Plumbing Rough-in Cost
The rough-in stage is the initial phase of plumbing installation in a new construction project. It involves installing the necessary piping and fixtures before the walls are shut off. The Minimal Cost is around $5,800 whereas the Total Minimal Cost: is $5,800. On average, the rough-in plumbing cost accounts for about 15-20% of the total plumbing expenses.
2. Plumbing Fixtures And Appliances
Plumbing fixtures and appliances, including sinks, toilets, showers, and water heaters, are vital components of any residential plumbing system. The cost of these fixtures can vary depending on their quality, brand, and specific features. It is essential to consider the number and type of fixtures necessary for your new house when estimating plumbing costs. The Minimal Cost Addition is $5,000 while the Total Minimal Cost is $5,000.
3. Labor And Installation
Labor and installation costs play a significant role in estimating plumbing costs for new construction. Hiring a professional plumber to install the plumbing system correctly is crucial to avoid costly repairs in the future. Labor costs can vary depending on the complexity of the project and the local market rates. So, surrounding this the total or minimal labor cost will move around between $1,000 to $2,500. It is important to get multiple quotes from reputable plumbing contractors. This will ensure you receive fair pricing for the labor and installation work.
4. Materials And Supplies
Materials and supplies, such as pipes, fittings, valves, and adhesives, are essential for plumbing installation. The cost of these materials can vary on the things you are about to choose. It is crucial to select durable and reliable materials within your budget to ensure a long-lasting plumbing system. For this, you can simply think around $1000 for a minimal price.
5. Permits And Inspections
Obtaining permits and scheduling inspections is a necessary step in new construction plumbing. The cost of permits and inspections can vary depending on your local jurisdiction. It is essential to factor in these costs when estimating the overall plumbing expenses for your new house. Permits may cost around $200-$500 with better facilities.
Assessing Plumbing Needs
Estimating plumbing costs for new construction involves assessing the specific plumbing needs of the project. By considering factors and choosing them, you can accurately estimate the cost of the plumbing installation.
Determining Fixture Requirements
One of the first steps in estimating plumbing costs for new construction is determining the fixture requirements. This involves identifying the number and type of fixtures that will be installed in the new house. Fixtures include sinks, toilets, showers, bathtubs, washing machines, and dishwashers. By knowing the fixture requirements, you can calculate the amount of plumbing materials you may need. Pipes, fittings, and valves will ultimately impact the overall plumbing cost for the project.
Evaluating Layout And Design
The layout and design of the plumbing system impact the overall plumbing cost. By evaluating the layout and design. You can identify factors that may affect the complexity of the installation. Factors to consider include the number and location of bathrooms. As well as the proximity of fixtures to the main water supply and drainage lines. Also, specific customization or special requirements can cost the homeowner. Evaluating the layout and design allows you to accurately estimate the plumbing cost for the new construction project. It will make sure the plumbing system meets the needs and preferences of the homeowner.
Material Cost Estimation
Estimating material costs is a crucial aspect of how to estimate plumbing cost for new construction. When budgeting for a new house, accurately assessing the cost of necessary materials is essential for staying within budget.
Piping And Fitting Costs
Piping and fittings are foundational components of any plumbing system. Their cost should be under the new construction plumbing rough-in cost. Materials like as PVC, copper, or PEX, will impact the overall cost. Additionally, considering the length and diameter of the pipes you need will help in estimating the new construction plumbing cost per square foot.
Cost Of Fixtures And Appliances
Fixtures and appliances are essential for the functionality and aesthetics of a new plumbing system. Incorporating the cost of sinks, faucets, toilets, showers, and water heaters into the budget is crucial in plumbing cost for new house. While basic fixtures may be more cost-effective, opting for high-quality, water-efficient appliances can lead to long-term savings on water bills.
Labor And Installation Expenses Plumbing Cost For New House
Estimating plumbing costs for new construction involves considerations such as labor and installation expenses. Unlike retrofitting existing plumbing, new house plumbing costs can vary depending on the size and design of the property. Factors including the number of bathrooms, fixtures, and the overall layout are key in determining the final expense.
Hourly Rates
When estimating plumbing costs for a new construction project, it’s essential to consider labor and installation expenses. These factors play a significant role in determining the overall plumbing cost for a new house. Let’s delve into the specifics, starting with hourly rates and manpower. Determining the hourly rates for plumbing labor is crucial, as it directly influences the overall cost. Plumbing contractors typically charge hourly rates, which can vary depending on factors such as location and expertise. How can you estimate the number of hours of leave consideration for the project? Consider the following:
- Size of the house: Larger homes generally require more plumbing work, which may result in higher hourly rates.
- The complexity of the plumbing system: Intricate designs or custom installations often require more time and expertise, affecting the hourly rates.
- Experience of the plumber: Highly professional plumbers usually charge higher rates per hour.
Manpower
It’s important to get quotes from multiple plumbing contractors and compare their hourly rates. Keep in mind that choosing the cheapest option isn’t always the best strategy. Balance affordability with quality to ensure a successful plumbing installation. Next, let’s explore the manpower aspect of estimating plumbing costs for a new house. The number of workers working on the project can significantly impact the overall plumbing expenses. A team of expert plumbers working together can complete the task quicker, reducing labor costs. On the other hand, a smaller team may take longer to finish the work, resulting in higher costs.
- Size of the project: A larger house may require more plumbers to handle the workload efficiently.
- Timeline: If there are time constraints for the construction project, more plumbers may be necessary to expedite the process.
- The complexity of the plumbing system: Complex installations may require special plumbers, adding to the manpower needs.
- Efficiency of the workforce: Professional and efficient plumbers may require fewer team members to complete the job effectively.
Plumbing Cost Per Square Foot
Considering these factors will help you determine the appropriate number of workers you require. To further refine your estimate of new construction plumbing cost per square foot. In addition to the hourly rates and manpower considerations, it’s important to factor in any additional installation costs. These costs may include:
- Materials: The type and quality of plumbing materials needed for the installation can significantly impact the overall cost. Factors such as pipe material, fixtures, and fittings should be taken into account.
- Permits and Inspection fees: Depending on your location, you may need to obtain permits and undergo inspections.
- Demolition and disposal: If any existing plumbing needs removal, there may be additional costs for disposal or cleanup.
- Post-installation services: Consider post-installation services such as testing, adjustments, and maintenance, as these may incur extra expenses.
New Construction Plumbing Cost For Permitting And Inspection Fees
When it comes to estimating the plumbing cost for new construction. One aspect that often gets out of notice is the permitting and inspection fees. These expenses are an essential part of any new construction project. As they ensure that the plumbing work complies with local building codes and regulations. In this section, we will break down the different elements that make up the plumbing cost for permitting and inspection fees. Including permit application costs and inspection and compliance fees.
Permit Application Costs
To begin any plumbing work in new construction, you will need to obtain the necessary permits from your local municipality. These permits serve as official permission to carry out plumbing installations and modifications by building codes. The cost of permit applications can vary depending on the scope of the project, the size of the property, and the location.
Inspection And Compliance Fees
Once the plumbing work is done. It is crucial to schedule inspections to ensure that everything is up to code. These inspections are done by professional inspectors. Who will check for compliance with local regulations and verify. They will ensure that all plumbing systems are functioning correctly. Inspection will charge on per visit and may vary depending on the complexity of the project
Contingency And Miscellaneous Costs
Contingency and miscellaneous costs play a significant role in estimating the overall plumbing cost for new construction. These additional expenses are crucial to consider as they can significantly impact the budget and project timeline.
Unforeseen Expenses
Unforeseen Expenses are potential costs that may arise during the construction process, beyond what is initially planned. These can include issues such as unexpected site conditions, changes in building codes, or unforeseen structural challenges. Estimating these costs requires a careful assessment of the project’s scope and potential risks. The unforeseen expenses may come in total around $1,500.
Insurance and Warranty Costs
Additionally, Insurance and Warranty Costs are essential considerations when estimating plumbing costs for new construction. These costs may include insurance coverage for the plumbing work, as well as warranties on materials and installations. Factoring in an estimated cost of $1,200 for insurance and warranties is essential. They ensure that the plumbing project is adequately protected and complies with any legal requirements. This proactive approach helps avoid potential financial liabilities. Which makes sure that the construction project has enough coverage in case of any unforeseen issues.
Conclusion
In short before going for any news house learning about the total cost is essential. So, knowing How to Estimate Plumbing Cost for New Construction plays crucial role. Estimating plumbing costs for new construction is a multifaceted process. By considering factors such as materials, labor, specific requirements, and additional costs. You can have an accurate and realistic budget. Working closely with an experienced plumber and utilizing cost estimation tools can help you stay within budget and avoid unnecessary expenses.
Total Estimated Cost: $13,800 (Sum of all minimal cost additions)
Remember, these figures are minimal estimates, and actual costs may vary based on specific project details and local conditions. Always consult with professionals to obtain accurate quotes for your unique project.
by avi | Mar 9, 2024 | plumbing Services
In plumbing clogging or blockage is a common insight. But a very common sign is freezing during the winter season. A frozen vent stack can lead to a myriad of problems. Including restricted airflow, potential damage to pipes, and even the risk of carbon monoxide buildup. So, if you are facing such mischief you may wonder How To Prevent Plumbing And Heating Vent Stack Freeze Up.
To prevent plumbing and heating vent stack freeze, insulate the pipes and keep the area ventilated. It’s essential to prevent freezing to avoid costly damage and disruptions. We’ll discuss some effective methods for preventing plumbing and heating vent stack freeze and keeping your pipes and systems safe and functional.
What Does Plumbing Vent-freezing Stack Mean?
Preventing plumbing and heating vent stack freeze is crucial to avoid potential damage. A plumbing vent-freezing stack occurs when the stack gets blocked. This leads to drainage issues and potential burst pipes. Regular maintenance, insulation, and proper ventilation can help prevent this issue.
When it comes to preventing plumbing and heating vent stack freeze. It’s important to first understand what it means when the vent stack freezes up. The plumbing vent stack is a vertical pipe that helps to regulate air pressure and allow for proper drainage. It extends through your roof and allows air to enter the plumbing system. Preventing airlock and enabling the smooth flow of water and waste.
However, during extremely cold temperatures, the vent stack can freeze, causing a range of issues. When the vent stack freezes, it restricts the airflow and can create a buildup of pressure in your plumbing system. This can lead to drains running slowly or becoming completely blocked, causing backups and potential flooding in your home. Understanding how to prevent the vent stack from freezing is essential to maintain the functionality. Especially during the freezing winter months when vents face freezing problems.
What Are The Signs When A Frozen Vent Stack?
If you suspect that your vent stack is frozen, there are several signs to look out for. It’s important to keep an eye out for these indicators. As addressing the issue promptly can help prevent further complications and potential damage to your plumbing system. Here are some common signs that could indicate a frozen vent stack:
Slow or non-existent drainage
If you notice that your sinks, showers, or toilets are draining slower than usual. It may also have a problem like not draining at all. All these indicate that it could be a sign that your vent stack is frozen. The lack of airflow due to the blockage can impede the smooth movement of waste and water through your plumbing system.
Gurgling or bubbling sounds
When you hear gurgling or bubbling sounds coming from your drains or toilets, it may be a sign of a frozen vent stack. The trapped air in the blocked plumbing system can create these sounds. Because the water may try to find an alternative path.
Sewer odors
A frozen vent stack can also result in unpleasant sewer odors in and around your home. The lack of proper ventilation allows these odors to linger and permeate the air inside your living space.
Visible frost or ice
If you can physically see frost or ice buildup on your plumbing vent stack. It’s a clear indication that freezing has occurred. This visible evidence should prompt you to take immediate action to prevent further damage.
Addressing a frozen vent stack as soon as possible is crucial to avoid more severe plumbing issues and potential damage. By understanding the signs and symptoms of a frozen vent stack, you can take the necessary steps to prevent frozen vent stack problems from occurring or escalating.
Taking proactive measures to prevent vent stack freezes. Such as using upheat tape or sewer skewers, can also help in avoiding costly repairs down the line. Keep your plumbing system running smoothly and efficiently even during freezing temperatures by being vigilant and proactive. So, if you are having much worry try having the help of an expert.
How To Prevent Plumbing And Heating Vent Stack Freeze Up
Freezing temperatures are a common adversary for plumbing and heating systems, often leading to vent stack freeze-ups. When this happens, the vent stack becomes blocked, resulting in poor ventilation and potential damage to the entire system. To avoid such complications, it’s essential to take preventive measures and ensure proper ventilation. In this article, we’ll explore the ventilation requirements and techniques to clear blockages effectively.
Ventilation Requirements
Proper ventilation is crucial to prevent plumbing and heating vent stack freeze-ups. Here are a few key requirements to keep in mind:
Installation of Heat Tape
Consider using heat tape, also known as heating tape or heat tape, for your pipes. This electrical device wraps around the open sections of the vent stack. Then simply generates heat to prevent freezing.
Insulation with Pipe Heat Tape
Insulate the vent stack using pipe heat tape or a pipe heater. And wrap to provide an extra layer of protection against freezing temperatures.
Wrap Pipes with Heat Wrap
Likewise, use heat wrap for pipes or heat wrap for pipes on vulnerable sections of the vent stack. This will help maintain the temperature and prevent freeze-ups.
Regular Inspection
Ensure regular inspection of the vent stack to identify any signs of damage or blockages. Early detection allows for timely intervention, reducing the risk of freeze-ups.
Clearing Blockages
Despite taking preventive measures, blockages can still occur in the vent stack. When this happens, it’s crucial to act promptly to restore proper ventilation. Here are some effective techniques to clear blockages:
Electric Heat Tape
In case of a blockage, employ electric heat tape specifically for the vent stack. The tape’s conductivity will help thaw the ice and clear the obstruction.
Using a Sewer Skewer
A sewer skewer is a handy tool that you can insert into the vent stack. It helps to break up any ice or debris causing the blockage. Gently maneuver the skewer to clear the path and restore proper airflow.
Professional Assistance
If the blockage is severe or persistent, it is necessary to seek the expertise of a professional plumber. They have the necessary tools and expertise to handle complex situations and ensure thorough blockage clearance.
Prevention of plumbing and heating vent stack freeze-ups requires a combination of preventive measures and prompt action when encountering blockages. By following the ventilation requirements and employing effective blockage clearance techniques like electric heat tape and sewer skewers. You can ensure the smooth operation of your plumbing and heating systems even in freezing temperatures.
Insulation And Heat Trace Tape
Insulation and heat trace tape are essential components in preventing plumbing and heating vent stack freeze. These measures provide insulation and heat to keep the pipes and vents functioning properly even in freezing temperatures.
Importance Of Insulation
Insulation plays a crucial role in protecting plumbing and heating vent stacks from freezing. When the external temperatures drop, insulation acts as a barrier, preventing the transfer of cold air into the pipes. This barrier limits heat loss and maintains a stable temperature inside the vent stack.
There are various options for insulating vent stack pipes. One effective method is using pipe heater wrap or heat wrap for pipes. This insulating material helps to wrap around the pipes. Which creates a protective layer that reduces heat transfer and prevents freezing.
Application Of Heat Trace Tape
Heat trace tapes, also known as heat tapes or electric heat tapes. Another valuable tool in preventing plumbing and heating vent stack freeze. These tapes specifically generate and distribute heat along the length of the pipes. Keeping them warm and preventing freezing.
To apply heat trace tape, follow these simple steps:
- Before installation, make sure the pipe is clean and free of any debris.
- Start at the lowest point of the pipe and wrap the heat trace tape in a spiral pattern. Also, make sure to overlap each wrapping by at least 1 inch.
- Secure the tape in place using adhesive or heat-resistant tape.
- Connect the heat trace tape to a power source according to the manufacturer’s instructions.
- Regularly inspect the heat trace tape for any visible damage or wear, and replace it if necessary.
It’s important to note that heat trace tape you should install it using a professional. To further ensure proper application and avoid any potential risks or hazards.
Using a combination of insulation and heat trace tape, you can effectively prevent plumbing and heating vent stack freeze. By implementing these measures, you can protect your pipes from damage, and prevent costly repairs. This ensures the continuous and efficient operation of your plumbing and heating systems throughout the winter season.
Maintenance Practices
When it comes to preventing plumbing and heating vent stack freeze, maintenance practices play a crucial role in keeping the system functional. By implementing regular inspections and drainage management. You can ensure that your plumbing and heating vent stack remains safe.
Regular Inspections
Regular inspections are essential in identifying potential vulnerabilities in the plumbing and heating vent stack. Inspect the vent stack for any signs of damage or wear that may compromise its ability to withstand freezing temperatures. Utilize upheat tape or heating tape to safeguard vulnerable areas prone to freezing such as connections and joints. Make sure to check for proper insulation and seal any gaps. As they could allow cold air to infiltrate the vent stack.
Drainage Management
Proper drainage management is crucial in preventing the accumulation of water that can lead to freezing issues in the heating vent stack. Ensure that the stack has adequate drainage to prevent water from pooling and freezing within the system. A sewer skewer or sewer vent defroster helps to maintain the flow of water and prevent blockages. That could lead to frozen sewer vents. Regularly clear any debris or obstructions that could impede proper drainage and contribute to freezing.
Emergency Solutions
When facing a plumbing and heating vent stack freeze. It’s crucial to act quickly to prevent further damage and restore functionality. Here are some emergency solutions to help you thaw the frozen vent stack and prevent future occurrences.
Thawing Techniques
One effective solution to thaw a frozen plumbing and heating vent stack is by using heat tape or wrap. This unique heating tape is also known as upheat tape. It can wrap around the frozen portion of the vent stack to gradually thaw the ice. It’s essential to follow the manufacturer’s instructions and safety guidelines when using heat tape for pipes or pipe heater wrap. Additionally, using electric heat tape is a reliable option to prevent recurring freeze-ups in the future.
Another method is to utilize a sewer skewer or sewer vent defroster to clear frozen sewer vents. These tools can effectively break through the ice obstruction and restore proper airflow in the vent stack. Consider reading sewer skewer reviews to find a reliable and efficient solution for your situation.
Contacting Professionals
If the freezing issue persists or if you’re unsure about the thawing techniques. It’s advisable to seek assistance from plumbing and heating professionals. Contacting professionals who are experts in dealing with frozen sewer vents and heating systems. They ensure a safe and effective resolution to the problem. Professionals have the expertise and necessary equipment to address the root cause. Which can stop the freeze and implement preventive measures. Such as using a heating wrap for pipes to avoid future occurrences.
Conclusion
Preventing plumbing and heating vent stack freeze is crucial for maintaining a functioning and efficient system. By following these preventive measures, such as insulating the vent pipe, ensuring proper ventilation, and sealing any gaps or cracks. So, learning How To Prevent Plumbing And Heating Vent Stack Freeze Up is fairly an essential skill. Which can help you avoid costly repairs and inconveniences in the future.
Remember, proactive steps can go a long way in ensuring a smooth operation. For both of your plumbing and heating systems throughout the winter months. Stay warm and enjoy a worry-free winter season!

by avi | Mar 6, 2024 | plumbing Services
When planning plumbing systems for residential or commercial spaces, understanding how to calculate plumbing fixture counts is crucial. This process involves determining the number of fixtures needed for optimal functionality. Let’s delve into the key steps and considerations to ensure an accurate and efficient plumbing fixture count.
The process of plumbing fixture count calculations requires a methodical approach by designers and engineers. It is crucial for crafting resourceful and proficient hydraulic systems that align with the specific requirements of the structure. While adhering to pertinent codes and regulations. This intricate process involves a meticulous evaluation of various fixture types and their minimal quantities. Taking into account factors such as occupancy, usage patterns, and adherence to building codes. Professionals in the fields of building design and construction need to have a thorough understanding of how to calculate.
Significance of Plumbing Fixture Count
The importance of plumbing fixture count surfaces prominently when configuring or renovating a structure’s hydraulic system. Determining the accurate fixture count is indispensable to guarantee sufficient plumbing capacity and adherence to building codes. Accurate computation of the fixture count serves to preemptively circumvent potential hydraulic issues. Also, uphold hygiene standards, and create a functional environment for occupants.
Ensuring Adequate Hydraulic Capacity
Adequate hydraulic capacity is paramount to cater to the occupants of a structure. An excess of fixtures can precipitate drainage blockages, sluggish water flow, and an overall decline in the performance of the hydraulic system. The precise calculation of plumbing fixture count ensures the provision of an adequate number of sinks, toilets, showers, or other fixtures.
One methodology for computing the plumbing fixture count involves considering the population of the structure. In residential settings, the number of bedrooms often serves as an indicative factor for determining the number of occupants. The International Plumbing Code (IPC) provides guidelines for various fixture facilities, be they residential, commercial, or public.
Adherence to Building Codes
Conforming to building codes is not just a safety and functionality prerequisite but a legal obligation. These codes govern the plumbing fixture count to ensure the hydraulic system’s capacity aligns with necessary occupancy and usage.
Non-compliance can result in penalties, project delays, or legal entanglements. Given the variability of building codes across jurisdictions. It is imperative to consult local hydraulic regulations or collaborate with adept plumbers cognizant of specific prerequisites. Plumbing fixture count calculations consider factors such as facility type, occupancy classification, and the distinctive needs of occupants.
Accurate plumbing fixture count computation, contemplating with strict adherence to building codes. Not only do they guarantee hydraulic system functionality but also safeguard the well-being of occupants. Additionally, meeting code requirements can enhance the structure’s overall value and marketability. Showcasing a commitment to superior construction and alignment with industry standards.
Understanding Plumbing Fixture Units (PFUs)
Grasping the concept of Plumbing Fixture Units (PFUs) is imperative when delving into plumbing fixture count calculations. PFUs serve as a metric to gauge the demand for a hydraulic system.
Definition of PFUs
PFUs denote the water supply necessary for a fixture or group of fixtures in a building. Alongside consider flow rates, duration of use, and frequency. Different fixtures boast distinct PFUs.
Assigning PFUs to Various Fixtures
To calculate the plumbing fixture count for a specific project. One must ascertain the PFUs for each fixture and subsequently amalgamate them. You can manually accomplish it, by referencing plumbing codes, or by employing a plumbing fixture calculator.
Definition of Fixture Units
In simple terms, a fixture unit is a standardized measure gauging a plumbing fixture’s impact on a water supply system. It facilitates the comparison of different fixtures in terms of their influence on a structure’s water usage. Each fixture, whether toilets, sinks, showers, or urinals, has a different workflow. This is why each specific fixture unit has a different value. Also a ratio of rate and drainage potential.
Examples of fixture unit values, subject to building code specifications and local regulations, include:
- Toilet (flush valve): 3 fixture units (F.U.)
- Sink (residential): 1 F.U.
- Shower (residential): 2 F.U.
- Urinal (flush valve): 4 F.U.
Calculating Fixture Units
To compute the total fixture unit count for a certain area or structure. One must calculate the fixture units for each plumbing fixture and sum them up. The formula is straightforward:
Total Fixture Unit Count = (Fixture 1 Units) + (Fixture 2 Units) + (Fixture 3 Units) + …
A hypothetical calculation for an apartment might involve:
- 2 toilets (3 units each) = 6 units
- 2 sinks (1 unit each) = 2 units
- 1 shower (2 units) = 2 units
Thus, the total fixture unit count for the apartment would be 10 fixture units. Understanding the concept of plumbing fixture units and accurately calculating the plumbing fixture count ensures the hydraulic system is tailored to meet the project’s requirements.
Step-by-step Guide On How To Calculate Plumbing Fixture Count
Calculating plumbing fixture counts is an indispensable step in ensuring your plumbing system effectively meets the occupants’ needs. Here’s a comprehensive guide to assist you in performing the calculations:
Determine The Occupant’s Load
Commence by determining the number of people the plumbing system will serve. This involves considering factors such as the building type, occupancy classification, and usage. Understanding the initial purpose and capacity of the space is crucial for determining the correct occupant load.
Determine The Required Fixture Units Per Occupant
Each plumbing fixture has a fixture unit value Depending on its flow rate and usage. Consult the Plumbing Fixture Unit (PFU) chart to identify the fixture units along each type of fixture. Multiply the fixture units by the number of occupants to calculate the necessary fixture units per occupant.
Calculate The Total Fixture Count
Finally, multiply the necessary fixture units per occupant by the number of occupants to obtain the total plumbing fixture count. This count will help you determine the number of sinks, toilets, showers, and other fixtures needed for the plumbing system.
Examples Of Calculating Plumbing Fixture Count In Different Building Types
Calculating plumbing fixture counts is essential when designing a building’s plumbing system, and the approach varies across different building types.
In residential buildings, the plumbing fixture count depends on the number of bedrooms and the intended use of the space. For instance, a single-family home with two bedrooms will generally require a minimum of two full bathrooms, each with a toilet, sink, and shower.
In commercial buildings, the plumbing fixture count depends on the type of facility. Restaurants may require a higher fixture count due to the presence of restrooms and kitchen sinks. While offices may necessitate a lower count.
Public buildings, such as schools or hospitals, have specific codes and regulations to follow. Fixture counts in these buildings depend on occupancy factors and the intended use of each space.
Several online resources, such as plumbing fixture calculators. They are ready to assist in determining appropriate fixture counts for different building types. By accurately calculating plumbing fixture counts, designers can ensure efficient and functional plumbing systems in their projects.
Validation and Review of Fixture Count Calculations
Accurate calculation of plumbing fixture counts is vital for sound plumbing design and code compliance. Validating and reviewing fixture count calculations is imperative to prevent errors that could lead to future issues.
Double-checking fixture unit assignments is one method. Ensure each plumbing fixture is doing the correct unit value per plumbing code specifications, consulting charts, or tables for guidance. Seeking professional input for accuracy is advisable.
Utilizing a plumbing fixture calculator or software can simplify the process, eliminating potential mistakes. By adhering to these measures, one can confidently determine the plumbing fixture count. To ensure a seamless and efficient plumbing system that meets all requirements.
Conclusion
“How to Calculate Plumbing Fixture Count” is a critical aspect of construction projects, ensuring resource efficiency and hydraulic system effectiveness. Accurate computations, considering occupant use, fixture types, and flow rates, not only comply with codes but also enhance water optimization, reducing maintenance costs. Following these steps empowers project planners to confidently determine the plumbing fixture count, promoting operational smoothness and customer satisfaction.
by avi | Mar 2, 2024 | plumbing Services
In the world of plumbing. You might have heard about the role of elbows in a plumbing vent system. It’s a common query: how many elbows can a plumbing vent have? Let’s unravel this mystery and understand the delicate balance.
A plumbing vent can have a maximum of two elbows for proper functioning. The number of elbows in a plumbing vent has limits to two for optimal performance.
Proper venting is crucial for the effectiveness of a plumbing system. The vent allows air to enter the system, preventing airlocks and enabling waste to flow smoothly. Plumbing vents have designs with specific guidelines to ensure that they function efficiently.
Factors Affecting Plumbing Vent Elbow Limit
Understanding the factors that affect the elbow limit of plumbing vent systems is essential. Plumbing vents play a crucial role in removing sewer gases and allowing air to flow freely. Which prevents water traps and pressure imbalances. However, there are limitations to the number of elbows that you can use. Let’s explore the key factors that influence this limit.
Building Codes
Navigating the world of plumbing? Building codes are your GPS. They set the rules for installing and maintaining plumbing systems. Including the maximum allowable elbows in a vent system. These rules vary by location. Making it vital to check your local building codes or enlist a pro plumber for compliance assurance. Non-compliance isn’t just a headache. It could mean plumbing woes and penalties. Stay on the right path with building codes for a smoothly functioning plumbing system.
Vent Pipe Diameter
The diameter of the vent pipe is another critical factor affecting the elbow limit. The larger the diameter of the pipe, the more smoothly air and waste gases can flow. A larger diameter allows for more airflow and reduces the likelihood of clogs and blockages. Consequently, plumbing systems with larger vent pipe diameters can accommodate more elbows. In comparison to systems with smaller diameters.
When it comes to plumbing vent pipe diameter. It’s important to adhere to the manufacturer’s recommendations and local building codes. Consult with a professional plumber to determine the appropriate diameter for your specific plumbing needs.
Now, let’s address some common questions related to plumbing vent elbows:
Can you put a 90-degree angle in a vent pipe?
Yes, it is possible to use a 90-degree angle. However, it is crucial to consider the building codes and the overall design of the plumbing system. Excessive use of 90-degree elbows can hinder the smooth flow of air and gases. Potentially leading to clogs or plumbing issues.
Does a plumbing vent have to be straight?
No, a plumbing vent does not have to be completely straight. While a straight vent pipe facilitates optimal airflow. There are situations where bends and angles are necessary. However, it’s essential to consider the number of bends, angles, and the overall design. To ensure proper functionality and compliance with building codes.
Can plumbing vent pipes have 90-degree angles?
Yes, plumbing vent pipes can have 90-degree angles. However, it’s crucial to maintain an appropriate balance between the number and efficiency. Excessive use of 90-degree angles or elbows can restrict airflow. Which can lead to potential ventilation issues.
How Many Elbows Can A Plumbing Vent Have
A plumbing vent can have multiple elbows to efficiently eliminate sewer gases. However, it is necessary to minimize the use of elbows to avoid restrictions in the flow of air. Proper installation and adherence to local building codes are crucial for optimal performance.
How many elbows can a plumbing vent have? When it comes to plumbing vents. It’s essential to understand the limitations and exceptions regarding the number of elbows. The number of elbows in a plumbing vent pipe can affect the efficiency of the ventilation system. While it may lead to potential issues if the management is not proper. In this blog post, we will explore the standard limitations and exceptions. When it comes to the number of elbows in a plumbing vent.
Standard Limitations
Plumbing system designs ensure a smooth flow of wastewater and sewage gases out of the building. As per the standards, a plumbing vent should have a specific number of elbows to maintain optimal airflow. Generally, it is necessary to have no more than two 90-degree turns in a plumbing vent pipe. The smooth flow of air is crucial to prevent clogs and maintain the pressure balance within the system. Excessive bends and turns can restrict the flow and potentially lead to backflow or venting issues.
Exceptions And Special Cases
Sometimes, extra elbows are needed in plumbing vents due to space or structural constraints. This might exceed standard recommendations. It’s crucial to design these systems carefully to maintain optimal function and minimize restrictions. Certain areas have specific rules. For instance, some building codes limit plumbing vents to just one 90-degree turn. Check your local codes to make sure your vent system complies.
Questions to consider:
- Can you use a 90-degree elbow in a vent pipe?
- Can plumbing vent pipes have 90-degree turns?
While it’s generally best to limit elbows for proper airflow. Unique circumstances may require more. Striking a balance between standards and specific needs is key. Understanding these limits is crucial for an efficient plumbing system. Despite the standard advice of limiting to two 90-degree turns, exceptions may exist. By carefully considering circumstances and checking local codes. Plumbers ensure proper design and installation of plumbing vent systems.
Effect Of Elbows On Venting Performance
When it comes to the plumbing vent system, the number of elbows can have a significant impact on its performance. The arrangement of elbows in the venting system can affect the airflow and the overall efficiency of the plumbing system.
Potential Issues
Excessive elbows in a plumbing vent can impede proper airflow. Leading to inefficient venting and potential obstructions. The presence of multiple elbows can cause restrictions in the vent pipe. Resulting reduction in venting performance. Inadequate venting may lead to suction issues. Causing slow drainage and unpleasant odors in the plumbing system.
Strategies For Optimizing Venting
To optimize venting performance. It is crucial to minimize the number of elbows in the plumbing vent system. Utilizing long-radius elbows instead of short-radius ones can help reduce resistance to airflow. Thereby improving the ventilation level. Proper placement of elbows and ensuring smooth transitions can also enhance the efficiency of the venting system. Regular inspection and maintenance of the vent pipe can help. It helps to identify and address any ventilation issues arising from the presence of elbows.
Professional Recommendations
Ensuring the proper functionality of a plumbing vent system is crucial. For maintaining an efficient and effective plumbing setup. Professional recommendations for the number of elbows a plumbing vent can have industrial practices. This can help prevent common mistakes.
Industry Best Practices
According to industry best practices. It is better to limit the number of elbows in a plumbing vent system. Excessive bends and turns can impede the flow of air and lead to potential blockages. Ideally, a plumbing vent pipe should have no more than two 90-degree turns. To maintain proper air circulation and prevent issues. Such as airflow restriction and odor problems. In cases where multiple turns are unavoidable, using long sweep elbows instead of short-radius elbows is advisable. As they provide a smoother interior surface, reducing the chances of debris accumulation.
Common Mistakes To Avoid
- Exceeding the necessary number of elbows can lead to a reduction in venting efficiency. This may result in gurgling sounds or slow drainage in the plumbing system.
- Attempting to force a 90-degree bend in a space limitation can lead to restriction in airflow. As well as potential blockages. Ultimately affecting the performance of the plumbing system.
- Neglecting to ensure a straight path for the plumbing vent can result in trapped air and negative pressure. Causing issues such as siphoning of water from traps and sewer gas odors. Infiltrating the living space.
Frequently Asked Questions
Q: Can a plumbing vent have multiple elbows?
A: Yes, plumbing vents can have multiple elbows. Limit for venting efficiency and preventing clogs.
Q: Is there a maximum number of elbows allowed in a plumbing vent system?
A: While no strict maximum, minimize elbows for smooth airflow, avoiding venting and drainage issues.
Q: Are there specific guidelines for the placement of elbows in a plumbing vent system?
A: Elbows in a plumbing vent should be strategically placed, following local codes for proper venting.
Q: Can too many elbows in a plumbing vent cause problems with air circulation?
A: Yes, excessive elbows hinder air circulation, leading to drainage issues and potential blockages.
Q: Are there alternative solutions if I need to navigate around obstacles without using too many elbows?
A: Yes, alternatives like long-radius elbows or reconfiguring layouts exist. Consult a plumber for efficient solutions.
Conclusion
So, knowing how many elbows can a plumbing vent have is crucial. This ensures proper plumbing service and prevents any potential issues in your plumbing system. By following local building codes and guidelines. You can determine the maximum number of elbows enough for your specific situation.
Remember to consult with a professional if you have any doubts or concerns. Ensuring proper venting will ultimately contribute to efficient and effective functioning. It will ensure the productivity of your plumbing system.
by avi | Feb 26, 2024 | plumbing Services
Commercial plays a great role in terms of advertising. Which Becaon PLumbing took proper advantage of. By casting famous actors they push their publicity. But one question is occurring more often who is woman in beacon plumbing commercial
The woman in Beacon Plumbing commercial is Tamika Lecheé Morales, a professional actress writer, and drama play. In the Beacon Plumbing commercial, Tamika Lecheé Morales plays the role of a knowledgeable and confident Actor. Who effectively communicates the exceptional plumbing services offered by Beacon Plumbing.
With her engaging demeanor and clear communication. She effectively captures the attention of the audience and conveys reliability. Through her performance, she brings an inviting and trustworthy presence to the commercial. Making it memorable and impactful for viewers.
Who Is Woman In Beacon Plumbing Commercial
The woman in the Beacon Plumbing commercial has certain attention for her role. Many viewers are curious about the identity of the actress. The Beacon Plumbing commercial actress remains a mystery. Because there was no official info on the actress in the Beacon Plumbing commercial. However, there have been speculations about her identity.
But the name of the actress was Tamika Lecheé Morales. But most think she might have some connections with Marshawn Lynch, the former NFL player. The commercial itself has a long history, and it has become a recognizable fixture. The woman in the Beacon Plumbing commercial has become a topic of mystery for many viewers. So, for those You can check her out yourself at Tamikamorales.
Tamika Lecheé Morales plays a crucial role in promoting Beacon Plumbing’s services. She effectively conveys the company’s professionalism and dedication. Her acting showed quality plumbing services which Beacon Plumbing was ready to offer. Her vibrant personality and engaging delivery create a memorable impression. Leaving viewers with a positive image of Beacon Plumbing.
Impact
The Beacon Plumbing commercial has gained significant attention and made a lasting imonct in the community. The mysterious actress who stars in the commercial has become a topic of discussion among viewers. Many wonder, “Who is woman in Beacon Plumbing commercial?” Her captivating presence has intrigued the audience, leading to widespread speculation and curiosity.
The community has embraced the Beacon Plumbing commercial. While people eagerly share their thoughts and opinions. The reception has been overwhelmingly positive. Because the commercial’s humor and creativity resonate with a wide audience. People appreciate the actress’s engaging performance and the commercial’s memorable catchphrases.
The media has also taken notice of the Beacon Plumbing commercial. Various news outlets and publications have highlighted the commercial’s impact. Contributing to its popularity and recognition. This sudden attention generated even more buzz and speculation about the actress’s identity.
The Beacon Plumbing commercial was undoubtedly a lasting impression. The actress’s intriguing portrayal has sparked conversations. Making her the subject of curiosity and speculation. With the commercial’s growing popularity. The mystery surrounding the woman in the Beacon Plumbing commercial continues to captivate viewers.
Conclusion
So, who is woman in beacon plumbing commercial is no longer a mystery. Despite a lack of information, her presence and charisma are off the chart. Her presence gets the better attention from viewers with little effort. This unknown woman was successful in capturing our curiosity Which left us confused for a long term period.

by avi | Feb 20, 2024 | plumbing Services
For homeowners, nobody wants to sacrifice their house integrity. Also when the matter consists of water the matter becomes even worse. Among all the preventive methods double check valve is a rising contender. Because of its functionality and top-of-line performance. This is a nice way to prevent water damage to your home. But like everything they also succumb to repair or damage. This is when the necessity of how to test a double check valve becomes too imminent.
To test a double check valve. Starting with inspection externally, and internally, and performing in-line function testing if necessary. These methods ensure the valve is functioning correctly and preventing backflow.
Failing to test and repair or replace a double check valve can lead to future failures. Testing procedures typically involve measuring the differential pressure across the valve. While also checking for any faults or malfunctions. Following these steps ensures the valve operates as you want it to work and maintains proper flow control.
Double Check Valve
A double check valve is an important component. That ensures the safety and functionality of a plumbing system. Its root workflow is to prevent the backflow which causes water contamination. Which is why testing a double check valve is crucial. If you want to ensure its proper functioning and to avoid any potential hazards checking up is essential.
What Is A Double Check Valve
A double check valve is a specific type of backflow prevention device. It consists of two independent check valves. These check valves lie in series. Each check valve provides a redundant layer of protection against backflow. The purpose of the prevention is to keep the water supply.
How To Test A Double Check Valve
Testing a double check valve is a straightforward process that can be done using a few simple steps:
- Close the main water supply to the double check valve.
- Check for any visible signs of damage, such as leaks or cracks, in the valve assembly.
- Inspect the valve for any buildup of debris or sediment. Because they may hinder its proper functioning.
- Use a differential pressure gauge to measure the pressure difference.
- Record the reading on the gauge and compare it to the manufacturer’s specifications.
- If the pressure difference is within the acceptable range. It means the double check valve is functioning properly.
- If the pressure difference is outside the acceptable range. Your system needs further testing or repairs.
- Open the main water supply to the double check valve and observe its operation. Also, look for any signs of leakage or abnormal functionality.
- If any issues are found during the testing process. It is essential to consult a professional plumber for further inspection and repairs.
Regular testing of a double check valve is essential to ensure its reliability. This will comply with local plumbing codes and regulations. By following these steps, you can easily test a double check valve. Which will ensure the safety of your plumbing system.
Common Issues To Look Out For
While regular maintenance can help prevent most problems with double check valves. Some common issues may still arise. Here are a few problems to be aware of:
Leaking
If you notice any signs of leakage, such as water dripping from the valve. It may indicate a faulty seal or worn-out gaskets. These components should have proper inspection and replacements if necessary.
Restricted Flow
A decrease in water flow through the valve may be a cause of debris or sediment accumulation. Cleaning the valve and removing any obstructions can usually resolve this issue.
Internal Damage
Internal damage, such as broken springs or faulty check valves, can occur over time. If the valve fails the testing procedure or exhibits unusual behavior. It may be necessary to disassemble it for a closer inspection and potential repairs.
By following these maintenance and troubleshooting tips. You can keep your double check valve in optimal condition and ensure the safety of your water supply. Regular inspection, cleaning, and replacement of faulty parts will help to minimize potential issues. Also, this will ensure more reliable operation of the valve.
preparation for How to test a double check valve
To ensure accurate testing, it’s crucial to prepare the double check valve properly. This involves turning off the water supply, inspecting the valve, and gathering the necessary tools and equipment. Below, we’ll outline the steps for each of these preparation tasks.
Turn Off the Water Supply
Before testing the double check valve, turn off the water supply to prevent any water leakage. This can be done by locating the main shut-off valve and closing it to stop the water flow.
Inspect The Valve
Inspection of the valve is crucial to identify any visible signs of damage or wear. Inspect the valve for leaks, corrosion, or any obstructions. Because they tend to affect its functionality. It’s important to address any identified issues before proceeding with the testing process.
Gather Necessary Tools And Equipment
Gather the necessary tools and equipment necessary for the testing process. This may include a differential pressure gauge, test kits, and any additional instruments. These are the tools you will to perform the specific testing procedures for the double check valve. Ensuring that everything you need is close to you.
Testing Procedure
To start the testing procedure for a double check valve, begin with a visual inspection. Examine the valve for any signs of damage or wear and tear. Look for cracks, leaks, or corrosion on the valve body. Check the valve fittings and connections for any loose or faulty parts. Ensure that the valve is properly in place and under proper alignment. Take note of any visible issues that may affect the valve’s performance.
Checking for leaks
Next, check for leaks in the double check valve system. This can be done by performing a leak test. Begin by closing all downstream shutoff valves and removing any pressure from the system. Then, pressurize the upstream side of the valve using a test pump or other suitable method. Allow the pressure to stabilize, and then inspect the valve and its connections. If any leaks are present under your notice. Take appropriate action to repair or replace certain components.
Turning on the device
Once the visual inspection and leak test are complete. It’s time to test the functionality of the double check valve. This can be done by verifying the opening, closing, and sealing of the valve. Open the upstream shutoff valve and measure the differential pressure across the valve. If you want try using a suitable pressure gauge. Make sure that the pressure does not drop significantly over time. If this happens it means there is still a leakage or malfunction inside the valve. Additionally, check the valve’s ability to prevent backflow by introducing a reverse flow. Also, ensure that the valve closes properly.
Testing the flow of water
Finally, measure the water flow through the double check valve to ensure its proper operation. Use a flow meter or other appropriate measuring device to determine the flow rate. Compare the flow rate to the expectational flow rate depending on the system. Any significant deviation may indicate a restriction or obstruction in the valve. Which may require further investigation or maintenance.
Regular Cleaning And Lubrication
Proper maintenance of your double check valve is essential. As they ensure smoother operation and prevent any potential issues. Regular cleaning and lubrication help to keep the valve functioning optimally. Here are the steps to follow:
- Begin by shutting off the water supply and relieving any built-up pressure in the system.
- Inspect the valve for any visible debris or dirt. Use a soft brush or cloth to gently remove any contaminants.
- Apply a small amount of lubricant to the moving parts of the valve. Such as the hinges and springs. Be sure to use a lubricant that your manufacturer provides.
- Once the valve is clean and functional. Carefully reassemble it and restore the water supply.
- Finally, test the valve to ensure it is functioning properly. This can be done by performing a flow test or using a testing device.
Replacing Faulty Parts
If you encounter any issues with your double check valve during the testing process. It may be necessary to replace certain faulty parts. Here are the steps to follow:
- Identify the specific component that needs to have a replacement. Such as a faulty seal or a malfunctioning spring.
- Refer to the valve’s user manual or consult a professional. To have the correct replacement part.
- Shut off the water supply and relieve any pressure in the system.
- Remove the faulty part using the appropriate tools and install the new component in its place.
- Once the replacement part is securely in place. Reassemble the valve and restore the water supply.
- Perform a thorough test to ensure that the valve is now functioning correctly.
Frequently Asked Questions
What Are 3 Basic Methods Of Testing A Check Valve?
The three basic methods of testing a check valve are external inspection, internal inspection, and in-line function testing. These tests help ensure the proper functioning of critical check valves.
Can A Double Check Valve Fail?
Yes, a double check valve can fail over time if repair or replacement is not done.
What Is The Minimum Pressure For A Double Check Valve?
The minimum pressure for a double check valve is 1. 0 PSID. It’s essential for proper functioning.
Conclusion
In essence, testing a double check valve is crucial to ensure its functionality and safety. By following the appropriate testing procedures, you can identify any potential issues and prevent backflow incidents. Regular testing and maintenance of your double-check valve can safeguard your water supply and uphold the integrity of your plumbing system.
 Call Now