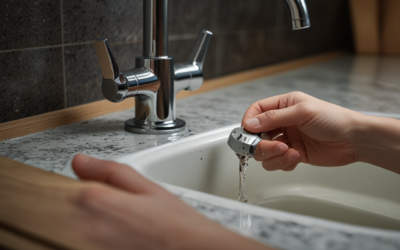
If you are experiencing issues with your Delta shower faucet, you may think that a complete replacement is the only solution. However, a rebuild can be a cost-effective and efficient way to solve your faucet problems. This guide explains what a Delta shower faucet rebuild involves and provides step-by-step instructions for completing the process.
What is a Delta Shower Faucet Rebuild?
A Delta shower faucet rebuild involves disassembling the faucet to replace broken or worn out parts. This involves removing the trim and handle to access the cartridge, which controls the flow of water. The cartridge can be replaced, along with other parts such as the seals and springs, to restore the faucet’s functionality.
Why Choose a Delta Shower Faucet Rebuild?
A Delta shower faucet rebuild has several advantages over a full replacement. First, it is less expensive, as you only need to replace the damaged parts rather than buying a whole new faucet. Additionally, it is a more sustainable option, as you are not contributing to more waste by disposing of a still-functional faucet. Finally, a rebuild is often quicker than a full replacement, as you do not need to remove and install a new faucet.

Tools You Will Need
Before beginning your Delta shower faucet rebuild, make sure you have the following tools:
– Screwdriver (Phillips head)
– Adjustable wrench
– Needle-nose pliers
– Cartridge removal tool (can be purchased at most hardware stores)
– Replacement parts (cartridge, seals, springs)
Step-by-Step Guide for Delta Shower Faucet Rebuild
Follow these steps to complete a Delta shower faucet rebuild:
Step 1: Turn off the Water
Before beginning any work, turn off the water supply to the faucet. You can do this by closing the valve under the sink or at the main water supply.
Step 2: Remove Trim and Handle
Using a screwdriver, remove the screws that hold the trim plate in place. Once the screws are removed, simply pull the trim plate away from the wall to expose the handle. Next, use the screwdriver to remove the handle screw and pull the handle away from the wall. If the handle is stuck, use a handle puller to remove it.
Step 3: Remove Cartridge
To remove the cartridge, use a cartridge removal tool. Insert the tool into the opening where the handle was located and rotate it counterclockwise until you feel it grip the cartridge. Continue rotating the tool until the cartridge is free and can be removed by hand.
Step 4: Replace Cartridge and Seals
Inspect the cartridge for any damage or wear. If it is damaged, replace it with a new one. Also, replace the seals and springs, which are located behind the cartridge.
Step 5: Reassemble the Faucet
After installing the new cartridge, seals, and springs, reassemble the faucet in the reverse order of disassembly. Start by inserting the cartridge into the opening and securing it with the cartridge removal tool. Then, attach the handle and trim plate with their respective screws.
Step 6: Turn on the Water and Test
Finally, turn on the water supply and test the faucet to ensure it is working correctly. There should be no leaks or drips, and the water should flow smoothly.
Conclusion
A Delta shower faucet rebuild can save you time and money while also being an environmentally friendly solution. By following the step-by-step instructions provided in this guide, you can easily complete a rebuild yourself. If you encounter any issues, don’t hesitate to contact a certified plumber near you for professional assistance. For all your plumbing needs, visit aceplumbingrepair.com or give us a call at (844) 711-1590.

